
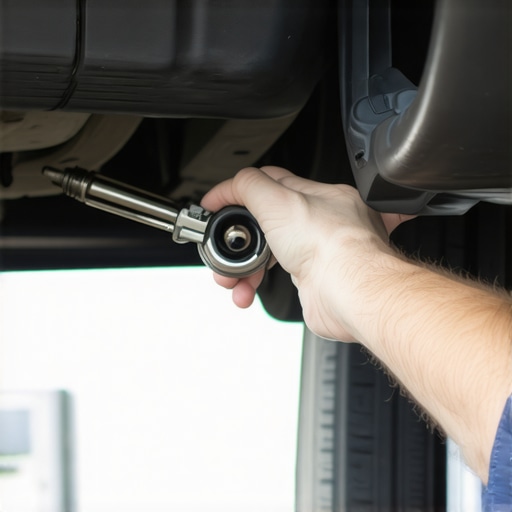
It was a blazing summer day when I finally lost patience with that persistent rattling coming from under my car. Every bump and turn sent a loud, annoying clang that invaded my peace. At first, I thought it was a sign of serious trouble—something I had to shell out big bucks to fix. But after some digging and a bit of trial and error, I discovered a surprisingly simple fix that’s helped countless fellow drivers avoid unnecessary expenses. Today, I want to share that little trick with you—how a humble hose clamp can quiet your heat shield and bring back your driving peace of mind.
How I Stopped the Rattle and Saved a Few Bucks
The breakthrough came during an amateur repair session in my driveway. I noticed the heat shield—an essential component designed to protect the car’s undercarriage from the heat of the exhaust system—was loose and banging against the floor pan whenever I hit a bump. Honestly, I was ready to shell out for a full replacement or professional repair, but I remembered reading about quick fixes online. Turns out, many hot-rodders and DIY enthusiasts swear by a simple hose clamp to hold the heat shield in place.
In my case, I simply loosened the clamp around an existing bracket and secured the heat shield to a stable part of the frame. Within minutes, the rattling was gone. It was a minor adjustment but a major relief—and a huge money saver. This experience taught me that sometimes, the most straightforward solutions are jumping-off points, especially when you’re aware of what’s really worth fixing.
This article isn’t just about my story. It’s a personal invitation to explore a practical fix that may be just what your vehicle needs right now. If you’ve been battling a stubborn heat shield rattle, or you’re curious whether this quick fix could work for your car, stick around. I promise, we’ll cover everything you need to know to tackle it yourself, safely and effectively.
Is a Hose Clamp Fix Really That Simple? Some Skeptics Won’t Believe It
I admit, I was skeptical at first—thinking, “Surely, a hose clamp isn’t enough for such a vital and hot component.” But an early mistake I made was assuming I needed a complete heat shield replacement when all it needed was a firm, secure attachment. Learning from that, I can tell you that a properly sized hose clamp, placed correctly, can withstand the heat and vibrations—saving you money and time.
According to automotive experts, quick fixes like these are often overlooked, yet they can extend the life of parts and prevent more costly repairs down the line. For detailed insights into vehicle maintenance, you might want to check out [this guide on auto repair hacks](https://repairmycarpro.com/auto-repair-hacks-save-money-without-sacrificing-quality).
Now that we’re on the same page about the why and the possibilities, let’s dive into the practical steps to fix that rattling heat shield with a hose clamp. Grab your tools, and let’s get started!
Gather Your Tools and Prepare for the Fix
Start by collecting a few basic tools: a set of hose clamps, a screwdriver or socket wrench suitable for tightening the clamp, and possibly gloves to protect your hands from heat. I remember the first time I attempted this fix—my driveway turned into a makeshift garage. I laid out all tools on a tarp, ready to get under the car. Level the vehicle if possible, ensuring it’s on a flat surface and the parking brake is engaged for safety.
Identify the Loose Heat Shield
Inspect the undercarriage to locate the rattling heat shield. Look for any loose or dangling parts—sometimes, a simple wiggle test confirms the excessive movement. In my case, I noticed the shield was unlatched from its bracket and banging against the floor pan during bumps. This visual confirmation helps ensure you’re fixing the right part.
Remove the Old or Existing Fasteners
If there’s an existing clamp or bolt, loosen or remove it using the appropriate tool. Sometimes, corrosion or rust makes this step tricky—think of it as trying to loosen a stubborn jar lid. Applying penetrating oil may ease the process. Remember, the goal is to secure the shield firmly without causing damage, so be gentle yet firm.
Position the Hose Clamp Correctly
Slide the hose clamp around the area where the shield is loose. The ideal spot is where the shield contacts a solid part of the frame or body. For my fix, I chose an existing bracket and wrapped the clamp tightly around the shield’s edge, ensuring it’s snug but not over-compressed. Think of it as tightening a belt—firm enough to hold, but not so tight as to stretch or break the material.
Use the Right Size Clamp
Pick a hose clamp with a diameter that matches the shield’s width when compressed. This prevents slips or over-tightening. I opted for a clamp labeled 1 inch to 1.5 inches—my car’s heat shield required a medium-sized clamp for a secure fit. Consult your vehicle’s manual or measure the diameter if unsure.
Tighten the Clamp Securely
Using a screwdriver or socket wrench, tighten the clamp until the heat shield stays in place with no movement. Be vigilant—over-tightening can damage the shield or create unnecessary stress, while under-tightening won’t stop the rattling. Remember the time I overtightened and caused a small crack; a gentle hand is key here.
Test the Fix Under Conditions
After securing the clamp, gently shake or tap the heat shield to confirm it’s firmly attached. Drive the vehicle over some bumps to simulate real conditions. During my test drive, I noticed immediate quiet, and the rattling no longer persisted. The fix was swift, effective, and cost-saving.
Review for Safety and Effectiveness
Finally, double-check all fasteners and the stability of the shield before concluding. Remember, a well-fastened heat shield not only quiets your ride but also prevents heat damage to other components. This straightforward repair can be completed in less than 30 minutes and save you from costly dealership visits—and yes, even more rattles in the future. For more repair hacks that keep your vehicle running smoothly, explore [this guide on auto repair hacks](https://repairmycarpro.com/auto-repair-hacks-save-money-without-sacrificing-quality).Many car owners operate under misconceptions when it comes to auto repair, often leading to unnecessary expenses or overlooked issues. One prevalent myth is that all brake pads need replacing at the same time; however, quality brake service involves assessing individual components, as detailed in [this brake maintenance guide](https://repairmycarpro.com/the-ultimate-guide-to-brake-service-for-safety-and-performance).
Another misconception is that oil changes are solely about changing the fluid; in reality, modern oil change technologies incorporate custom oil formulations and filter innovations that can significantly extend engine life, as explained in [this article](https://repairmycarpro.com/oil-change-innovations-technologies-that-save-your-engine).
Often, people believe vehicle diagnostics are only necessary when the check engine light is on. However, advanced diagnostics can reveal hidden issues before symptoms appear, preventing costly repairs later. For a deeper understanding of these proactive checks, review [decoding vehicle diagnostics](https://repairmycarpro.com/decoding-vehicle-diagnostics-what-your-car-is-trying-to-tell-you).
A crucial nuance many miss is the importance of understanding your vehicle’s specific needs versus routine procedures. For instance, the frequency of brake fluid replacement varies based on driving habits and vehicle age, rather than a fixed schedule. Recognizing these subtleties helps maintain optimal performance and safety.
Be cautious of the trap that one-size-fits-all solutions apply to auto repairs. Each vehicle has unique requirements, and applying generic advice can sometimes cause more harm than good. Staying informed through expert insights enables you to make smarter decisions. Looking for guidance tailored to your car? Reach out through our [contact page](https://repairmycarpro.com/contact-us) for personalized advice.
Lastly, misunderstanding diagnostic results can lead to unnecessary repairs. It’s vital to interpret these signals accurately, which is why learning to decode vehicle diagnostics is invaluable—saving your time and money. For some tips on this, check out [this resource](https://repairmycarpro.com/decoding-vehicle-diagnostics-what-your-car-is-trying-to-tell-you).
Have you ever fallen into this trap? Let me know in the comments. The key takeaway is to challenge assumptions, stay educated, and consult trusted experts to keep your vehicle in top shape.
How do I maintain my vehicle over time without breaking the bank?
Keeping your vehicle in top shape requires not just good instincts but the right tools and regular maintenance strategies. Over the years, I’ve refined my toolbox to include specific equipment that makes auto repairs safer, more efficient, and cost-effective.
First, I invest in a quality diagnostic scan tool. Personally, I use the BlueDriver Bluetooth Pro because it connects effortlessly via Bluetooth, providing comprehensive readouts of error codes and live data. This device allows me to diagnose issues early, often before a warning light appears, saving me from costly breakdowns. According to this detailed guide on vehicle diagnostics, understanding your car’s signals is crucial for proactive maintenance.
Next, I keep a set of high-quality socket wrenches and ratchets organized in a portable toolkit. Investing in metric and SAE sizes ensures I can handle most fasteners without strain or slipping. For delicate tasks, I rely on precision screwdrivers with insulated handles, especially when working with electrical components. This prevents accidental shorts and provides better control.
An underrated tool I swear by is a magnetic pickup tool. It’s invaluable for retrieving dropped bolts or nuts in tight engine compartments—saving time and avoiding damage. Plus, I always have a digital multimeter for electrical troubleshooting, which helps me confirm whether sensors, switches, or fuses are functioning correctly.
Consistency in maintenance isn’t just about tools. I follow a structured schedule for oil changes, brake inspections, and fluid top-ups, aligned with my vehicle’s manual recommendations. Automated reminders via apps help me stick to this routine, ensuring components like brakes and fluids don’t wear out prematurely.
Looking ahead, I anticipate that vehicle diagnostics will become even more sophisticated with AI and machine learning. Already, systems are tracking real-time data to predict failures before they happen—a trend I see as the future of auto maintenance. To stay ahead, investing in software updates and learning to interpret advanced diagnostics will be invaluable.
How can I keep my car running smoothly long term?
One practical step is mastering basic checks like inspecting your fluids and filters. Regularly scanning for errors with your diagnostic tool can alert you to emerging issues, such as pending sensor failures or weak spark plugs, which if addressed early, extend the life of your vehicle.
If you’re serious about long-term performance, I recommend integrating preventive maintenance into your routine. For example, replacing your fuel filter every 30,000 miles can improve engine efficiency and prevent costly repairs. Using quality tools, staying informed on maintenance needs, and proactively addressing small issues before they escalate are keys to keeping your vehicle dependable and safe for years to come. Don’t underestimate the value of a good multimeter or a reliable diagnostic app—these are your best allies in this journey.
Lessons from the Garage: Surprising Truths About Auto Repairs
One of the toughest lessons I learned was that not every rattling or heat shield issue demands a costly fix. Sometimes, a simple hose clamp, properly installed, can save you hundreds and prolong the life of vital components. It taught me to trust practical, DIY solutions and to question assumptions about what truly requires professional intervention.
I also realized that understanding your vehicle’s specific needs—like regular diagnostics and tailored maintenance—can prevent many headaches. Not all advice fits every car, and personal experience combined with expert insights makes for smarter, more cost-effective choices.
Lastly, I discovered that proactive maintenance isn’t just about fixing what’s broken but about recognizing early warning signs. A well-informed driver can often spot small issues before they escalate, turning potential crises into minor adjustments.
Tools and Resources That Keep Me Moving
My essential toolkit includes a quality diagnostic scan tool like decoding vehicle diagnostics—it’s invaluable for catching issues early. I trust a reliable set of socket wrenches and a multimeter, which empower me to troubleshoot electrical problems confidently. For learning and reference, books like The Car Hacker’s Handbook and reputable online guides have broadened my understanding of auto repair nuances.
These tools and resources consistently remind me that thorough knowledge and quality equipment are investments that pay off over time, helping me keep my car running smoothly without overspending.
Be the Driver Who Takes Control
Your journey to mastering auto maintenance begins now. Armed with the right tools, knowledge, and confidence, you can tackle common issues like a rattling heat shield or prevent bigger problems from forming. Remember, each small fix is a step toward independence and savings. Don’t wait for a breakdown—be proactive and curious. Your vehicle—and your wallet—will thank you for it.