I remember the exact moment I realized something was seriously wrong with my car. I was cruising down the highway when a strange, high-pitched whine started to creep into the drivetrain. At first, I thought it was just road noise or perhaps some loose trim, but as I kept driving, the sound intensified. It was like a ghostly tune playing just for me—annoying, persistent, and unmistakably abnormal. I pulled over, turned off the engine, and then started it again, only to be greeted by the same eerie howling. That was my lightbulb moment—something was seriously amiss with one of my wheel bearings, but which one? Accurate diagnosis could save me hundreds in repairs and prevent a roadside breakdown. If you’ve faced a similar situation—driving along and suddenly hearing that squeal or rumble—you know exactly how nerve-wracking it can be. Today, I’m going to walk you through how to identify which wheel bearing is causing the howling, drawing from my own experience and solid auto repair science. Because understanding the culprit not only zips up your safety but also keeps your money in your wallet long-term.
How to Detect the Noisy Wheel Bearing During Your Drive
The first step in solving this mystery is understanding that wheel bearings don’t just randomly make noise. Their howling pattern can actually tell you a lot. Pay attention to how the sound changes with your driving conditions. Does it get worse when turning? Does it persist regardless of the road surface? These clues are key. I’ve found that wheel bearings tend to hum or whine louder when their lubrication begins to fail or when their internal components start to wear out. A simple way I checked mine was by safely lifting the car after a drive and listening for the sound to see if it’s more pronounced near a specific wheel. Some mechanics also suggest gently applying the brakes while driving at low speed—if the noise diminishes, it might be a sign that the bearing on that side is the culprit. But I won’t leave you hanging—more practical diagnostics are coming up. Before diving into hands-on testing, though, it’s crucial to know why this matters beyond just squeals and drags.
Unaddressed wheel bearing issues can lead to uneven tire wear, decreased handling, or even catastrophic wheel failure. According to automotive safety experts, a failing wheel bearing can cause a wheel to lock up unexpectedly, posing serious safety risks. That’s why early detection and proper diagnosis are so important. By the way, I made a classic mistake early on—replacing what I thought was the noisy wheel bearing without confirming which one it was. It was a waste of time and money because I didn’t perform the right diagnosis first. For reliable results, it’s worth learning a few tricks and techniques that I’ll share below, so you don’t fall into the same trap. For now, let’s explore how you can be sure which wheel bearing is the one singing that telltale song during your drive.
Lift and Isolate the Wheel
Start by safely raising your vehicle using a jack and secure it with jack stands. Remove the wheel of the suspected side. During my own estimate, I recalled that after a long highway drive with a high-pitched hum, I gently jacked up the front left wheel, which was the most audible side, and spun it by hand. It was a messy bit of work, but it confirmed my suspicion that this wheel was where the noise originated. Think of it like testing a musical instrument—if you tap and listen, the discord reveals itself.
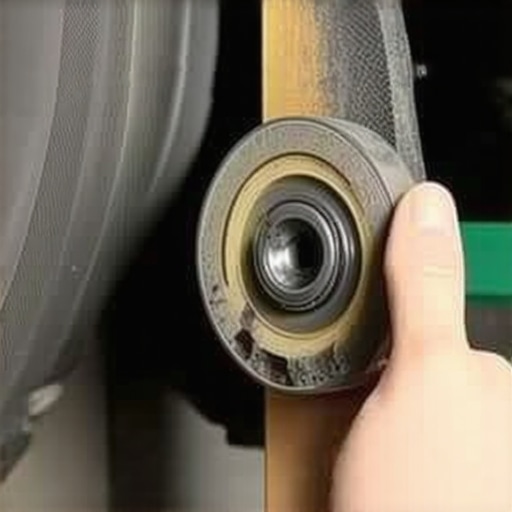
Perform a Spin Test and Listen Closely
Spin the wheel by hand while listening for roughness or play. A healthy bearing spins smoothly with minimal resistance. When I did this, I noticed a slight grinding sound and a wobble—clear signs of bearing wear. Imagine rotating a bicycle wheel; any rough feeling indicates issues. This process is crucial because it narrows down the culprit without unnecessary parts replacement. For more insights into diagnosis, check out [vehicle diagnostics explained](https://repairmycarpro.com/decoding-vehicle-diagnostics-what-your-car-is-trying-to-tell-you).
Check for Excessive Play
Grab the top and bottom of the wheel and attempt to wobble it. Excessive movement is a red flag. I once pressed on the wheel with my hands and felt a noticeable looseness, which confirmed the bearing’s deterioration. This step is akin to checking a door hinge—if there’s too much movement, the part is failed. If you detect play, it’s time to move to the next step to confirm whether the bearing is the root cause.
Apply Brakes While Rotating
Slowly rotate the wheel with the brakes applied lightly. If the noise diminishes or the wheel feels like it’s locking up, that points toward the bearing or brake components. I discovered this when I held the wheel while turning; the noise reduced significantly when applying light pressure. This method helps distinguish between bearing and brake issues, similar to diagnosing a squeal coming from brake pads versus bearings.
Use a Dial Indicator for Precision
If available, mount a dial indicator to measure lateral and radial play precisely. This is like taking a car’s temperature—quantitative and reliable. I borrowed this tool from a friend and found that the radial movement exceeded manufacturer specs, sealing my diagnosis. Remember, accurate measurement avoids misdiagnosis, saving you money and time. For further details on advanced diagnostics, explore [advanced vehicle diagnostics prevent costly breakdowns](https://repairmycarpro.com/how-advanced-vehicle-diagnostics-prevent-costly-breakdowns).
Confirm with a Road Test
Finally, take the vehicle for a test drive. Listen carefully for the howl or rumble. Turn left and right to see if the noise intensifies or shifts, which can point to specific bearings. During my test drive, I noticed the sound worsened when turning right, indicating the right-side bearing. This step is like a final check—matching your diagnostic results with real-world behavior.
 Many car owners believe that basic fixes and routine maintenance are straightforward, but the reality is more nuanced. One pervasive myth is that auto diagnostics can be entirely automated or that a scan tool alone can pinpoint every problem accurately. While technology has advanced remarkably, relying solely on these tools without expert interpretation can lead to misdiagnosis. For instance, a simple error code might suggest replacing a sensor, but the underlying issue could be a wiring short or ground failure, which external sources like [vehicle diagnostics explained](https://repairmycarpro.com/decoding-vehicle-diagnostics-what-your-car-is-trying-to-tell-you) can help clarify.
An often-overlooked trap is the assumption that every warning light indicates an urgent need for immediate repairs. In many cases, warning lights are designed to alert you to developing issues, not necessarily critical faults. Ignoring or misinterpreting these signals can have disastrous consequences, such as overlooking a minor leak that, if neglected, compromises your entire cooling system—something discussed in detail during [auto repair strategies](https://repairmycarpro.com/essential-auto-repair-strategies-for-frequent-drivers).
In terms of brake services, many believe all brake pads wear out uniformly. But in reality, uneven pad wear caused by caliper sticking or warped rotors can silently diminish braking performance over time. This subtlety is a key reason why regular inspection and understanding brake service myths—like the false idea that brake noise always signals replacement—are vital. Learn more about what truly matters for brake safety in [brake service myths busted](https://repairmycarpro.com/brake-service-myths-busted-what-really-matters-for-safety).
Similarly, many think that oil changes are just about replacing dirty oil. However, neglecting to consider oil type, engine age, and driving conditions can lead to suboptimal engine performance and longevity. Synthetic oils, for example, are often promoted as universally superior, but their benefits depend strongly on your engine’s specifications and history, as explained in [oil change innovations](https://repairmycarpro.com/oil-change-innovations-technologies-that-save-your-engine).
What about common auto repair mistakes? A surprising one is replacing parts based on symptoms alone without confirming actual faults. For example, replacing a starter motor because of slow cranking might be unnecessary if a failing ground wire is the culprit. This highlights the importance of advanced troubleshooting techniques, which go beyond surface symptoms. For a step-by-step approach, see [diagnosing electrical issues](https://repairmycarpro.com/how-to-find-that-annoying-dash-rattle-without-taking-the-car-apart).
Now, here’s a question for the seasoned enthusiasts: How can you differentiate between a failing sensor and a wiring issue that causes false readings? The answer lies in comprehensive testing methods like voltage checks, connector inspections, and sometimes, external tools such as oscilloscopes. According to automotive diagnostics experts, understanding these nuances can save hundreds—if not thousands—in unnecessary replacements and repairs. For advanced tips, refer to [how advanced vehicle diagnostics prevent costly breakdowns](https://repairmycarpro.com/how-advanced-vehicle-diagnostics-prevent-costly-breakdowns).
Have you ever fallen into this trap? Let me know in the comments. Recognizing these hidden nuances not only enhances your ability to troubleshoot effectively but also empowers you to avoid costly mistakes. For more insights on auto repair accuracy, explore our comprehensive guides and stay ahead of the curve.
Invest in Precision Diagnostic Equipment
To keep your vehicle running smoothly over the long haul, having the right diagnostic tools is essential. I personally rely on a high-quality OBD-II scanner like the Innova 3160g. This device provides real-time data and allows me to read and clear trouble codes accurately, which is crucial before jumping into repairs. Unlike generic scan tools, my go-to device offers extensive live data streams and freeze-frame data, helping me identify issues like faulty sensors or wiring problems quickly. This empowers me to make informed decisions, saving both time and money, and ensures that my auto repairs are precise and effective.
Utilize Reliable Software for Auto Diagnostics
Pairing your scanner with robust software such as Torque Pro or FIXD enhances diagnostic capabilities. I prefer Torque Pro because it offers customizable dashboards that display parameters like fuel trims and sensor voltages at a glance. This level of insight helps me detect subtle issues that might not trigger a code immediately but could lead to major problems down the line. As vehicle electronics become more complex, relying on advanced diagnostic software helps me stay ahead, ensuring I catch problems before they escalate into costly repairs. Trending toward more integrated solutions, future tools will likely incorporate AI to analyze data patterns, further simplifying long-term vehicle maintenance.
Adopt Preventative Maintenance Protocols
Routine maintenance is the backbone of vehicle longevity. I adhere to strict schedules for oil changes, brake inspections, and fluid replacements, utilizing quality oils like synthetic formulations recommended in this resource. Regularly checking and replacing filters and spark plugs prevents minor issues from becoming major failures. Additionally, I use a pry bar to check ball joints and control arms periodically, catching wear early. These proactive measures extend the lifespan of critical components and help maintain optimal performance. Going forward, I predict that vehicle maintenance will become increasingly data-driven, with sensors predicting failures days or weeks in advance, shifting the paradigm from reactive to predictive repair.
Ask Yourself
Wondering how to sustain your vehicle’s performance over time? Focus on establishing a consistent maintenance routine supplemented by precise diagnostics. For example, integrating advanced tools like a dial indicator for wheel bearing checks or a multimeter for electrical troubleshooting ensures you’re addressing issues proactively. Don’t forget, the key to long-term success isn’t just fixing problems as they arise but preventing them through regular monitoring and smart diagnostics.
Start by performing a quick diagnostic of your vehicle’s fuel efficiency using simple checks—like analyzing throttle response and sensor readings—before your next long trip. This small investment in diagnostic diligence pays off by avoiding roadside breakdowns and costly repairs later on. For in-depth guidance on troubleshooting complex electrical issues, refer to this detailed explanation and elevate your auto maintenance game today.
Remember, mastering these tools and techniques transforms routine repairs into confidence-building exercises, ensuring your vehicle remains reliable for years to come. Try implementing a diagnostic software like FIXD or Torque Pro next time you suspect something’s off—it’s a game-changer for DIY maintenance.
The Unexpected Lessons That Changed My Approach to Auto Repair
One of the toughest lessons I learned was that quick fixes rarely solve deeper problems. Rushing into replacing a wheel bearing without thorough diagnostics led me to waste time and money, and highlighted the importance of patience and precise troubleshooting. Over time, I discovered that understanding the subtle cues—like specific noises during turns or the feel of wobbling wheels—can save a lot of headache. This experience taught me that investing in quality diagnostic tools and trusting a methodical process not only ensures safety but also builds confidence in DIY auto repair.
Tools and Resources That Elevate My Diagnostics Game
My essential toolkit now includes a reliable OBD-II scanner like the Innova 3160g, paired with software such as Torque Pro, which provides real-time data and helps me interpret complex signals accurately. I also rely on a dial indicator for precise measurements of bearing play, and a sturdy jack and stands for safe lifting. These tools, combined with the knowledge gained from detailed guides like decoding vehicle diagnostics, form a comprehensive system that makes diagnosing wheel bearing issues straightforward and reliable. They empower me to approach repairs with confidence and precision.
Let’s Keep Moving Forward Together
Taking the time to understand your vehicle’s signals and investing in reliable diagnostic resources sets you apart as a confident DIY enthusiast or informed vehicle owner. Each successful diagnosis reinforces your skills and helps you avoid unnecessary expenses or safety risks. Remember, the journey to mastery begins with small, informed steps—so embrace each diagnostic challenge as an opportunity to learn and grow. If you’ve ever felt unsure during a repair, share your experience below and let’s grow together in auto repair expertise!