
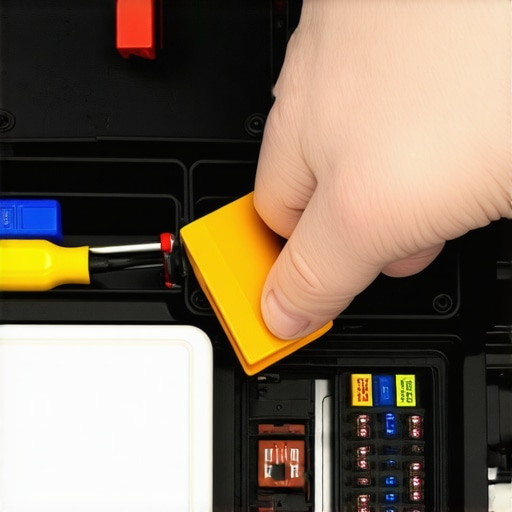
Imagine turning the key, and instead of that reliable engine start, all you hear is a haunting silence. Your heart sinks. That familiar flicker of hope fades quickly when you realize—your car won’t start again. As someone who’s been there, I know that sinking feeling all too well. One day, after replacing what I thought was a faulty alternator twice, I stumbled upon a simple fuse that was the real culprit. That lightbulb moment changed everything.
In many cases, the frustration of replacing your alternator can be avoided by a quick check of the elusive fuse linked to your charging system. I want to share my experience and help you avoid the pitfalls I faced. Today, we’ll uncover a surprisingly common oversight and demonstrate how a small fuse could save you a lot of money and hassle.
Why Overlooking a Fuse Could Lead to Unnecessary Alternator Replacements
It’s easy to get caught up in the excitement of swapping out major components like the alternator. After all, it seems like the logical fix when your battery warning light stays on or your vehicle stalls unexpectedly. But here’s the tricky part—many people forget to inspect the simplest part of the circuit: the fuse. A blown fuse doesn’t just stop power; it can mimic the symptoms of a dead alternator, leading to costly misdiagnoses.
My early mistake was trusting the obvious, jumping straight to the alternator thinking it was dead. Turns out, I had a blown fusible link, a tiny component that can easily be overlooked. According to automotive experts, a blown fuse or fusible link is a common reason for charging system failures, and neglecting it wastes time and money on unnecessary repairs. For comprehensive insights on auto repair strategies, I recommend exploring [essential auto repair strategies for frequent drivers](https://repairmycarpro.com/essential-auto-repair-strategies-for-frequent-drivers).
If you’ve ever experienced intermittently wired issues or found yourself replacing parts that seem to fail repeatedly, chances are you’ve overlooked this small but vital safeguard. Now that we’ve set the stage, let’s dive into how you can troubleshoot this fuse and avoid similar pitfalls.
Locate the Fuse Box and Identify the Correct Fuse
Start by finding your vehicle’s fuse box, usually under the dashboard or in the engine compartment. Refer to your owner’s manual to identify the fuse linked to the charging system or alternator. Remember, accuracy is key—using the correct fuse prevents unnecessary disassembly and confusion. I once spent an hour checking unrelated fuses because I misread the diagram, which delayed my troubleshooting process.
Remove the Fuse and Inspect Visually
Carefully extract the identified fuse using fuse pullers or pliers. Hold it up to a light and examine for a visible break in the wire or discoloration. A blown fuse often shows a melted or broken wire inside. I once replaced a fuse that looked fine visually, only to find it was blown later with a multimeter. So, visual inspection is a quick, initial step but not definitive.
Test the Fuse with a Multimeter
Set your multimeter to the continuity setting. Touch the multimeter probes to both ends of the fuse. A continuous beep indicates the fuse is good; no beep means it’s blown. I remember testing a fuse that looked intact—turns out, it was blown internally—multimeter testing saved me a lot of guesswork. Always test fuses before replacing, as this confirms their condition objectively.
Use a Test Light if a Multimeter Isn’t Available
If you lack a multimeter, a test light makes the job easier. Connect the clip to a ground point, then touch the test end to each fuse terminal. The light glowing indicates power; no light suggests a blown fuse. This method provides a quick check, especially for beginners.
Replace the Blown Fuse and Check for Underlying Causes
Once you’ve confirmed the fuse is blown, replace it with a fuse of the same amperage. Don’t use a higher-rated fuse; it can cause further damage. After replacement, start your vehicle and observe whether the electrical system functions correctly. Remember, a blown fuse often signals an underlying problem, like a short circuit or faulty component. In my case, replacing the fuse temporarily fixed the issue, but the fuse blew again because of a damaged alternator diode.
Further Diagnostics to Prevent Future Blown Fuses
If the fuse blows again shortly after replacement, further testing is necessary. Use vehicle diagnostics tools to scan for fault codes or perform an amperage draw test. Advanced diagnostics can reveal hidden issues causing overloads. Regular inspections and understanding your vehicle’s electrical demands help prevent surprises on the road.
Seeking Professional Help for Complex Issues
When in doubt, consult a professional mechanic. They can perform comprehensive diagnostics and identify faults that aren’t visible or easily tested. Proper diagnosis saves money and time—trust me, misdiagnosing can lead to replacing parts unnecessarily. If you’d like expert assistance, visit our contact page for support.
Many car owners believe that routine tasks like brake service and oil changes are straightforward, but beneath the surface lie nuanced details that can make all the difference in vehicle longevity and safety. Contrary to popular belief, not all brake pads wear evenly, and a visual inspection alone isn’t enough to determine their condition. Advanced diagnostics reveal hidden issues that standard checks often miss, underscoring the importance of professional evaluation. Moreover, the misconception that oil changes are solely about replacing dirty oil is outdated; innovations in lubrication technology now emphasize specific oil properties tailored to your engine’s needs, which can significantly extend its lifespan.
Are You Overlooking the Root Causes Buried Beneath the Surface?
Drivers frequently focus on immediate symptoms—like a squealing brake or a warning light—without understanding the underlying problem. For example, a worn brake rotor may seem like the primary issue, but a thorough diagnosis can reveal uneven pad wear caused by caliper sticking or suspension problems. Recognizing these factors allows for targeted repairs that prevent recurring issues. According to experts, employing modern diagnostic tools not only saves money but also enhances safety, as uncovered issues can be addressed before they escalate into costly repairs. Regularly updating your knowledge on vehicle maintenance strategies is vital. For comprehensive guidance, visit essential auto repair strategies for frequent drivers.
When it comes to brake systems, many assume replacing pads and rotors is all that’s needed. However, myth-busting brake service misconceptions shows that inspecting master cylinders, brake lines, and ABS sensors is equally crucial. Similarly, with oil changes, the focus should be on selecting the right oil formulation for your engine’s specific needs, especially with recent advancements like synthetic blends that offer superior protection and efficiency. Understanding these intricacies helps avoid damage caused by neglect or misdiagnosis. For a broader understanding of vehicle diagnostics and how they can prevent breakdowns, check out how advanced vehicle diagnostics prevent costly breakdowns.
Ultimately, maintaining your vehicle isn’t just about routine replacements but about understanding the complex systems at play. Professional diagnostics can uncover issues you might never notice or address until they cause significant damage. So, next time you think a simple fix will suffice, ask yourself: Am I truly solving the problem or just treating the symptoms? Have you ever fallen into this trap? Let me know in the comments.Maintaining your vehicle’s performance over time requires the right tools and consistent routines that go beyond basic oil changes or brake pad replacements. One of my favorite go-to tools is a high-quality digital multimeter, like the Fluke 117. I use it daily not just for checking fuses and diagnosing electrical issues, but also for verifying sensor signals and ensuring your vehicle’s electronic systems are functioning correctly. These multimeters provide accurate readings and durability for tough automotive environments. Additionally, I swear by an infrared thermometer gun to quickly identify overheating components, such as a failing wheel bearing or an exhaust manifold leak, saving time during diagnostics.
For software, I highly recommend investing in diagnostic scan tools like the Autel MaxiDAS DS808. This device allows me to read and clear fault codes, perform live data streaming, and access manufacturer-specific parameters. With advanced diagnostics, I can pinpoint issues like a bad oxygen sensor or a slipping transmission lock-up clutch before they cause severe damage. This proactive approach helps extend your vehicle’s lifespan and reduces the cost of repairs.
Regular maintenance tools should also include a good set of socket and wrench sets, preferably with metric and SAE sizes, for performing tasks like brake pad replacements and fluid changes yourself. I prefer models with ratcheting handles to speed up the process without sacrificing torque. For added safety and precision, I keep a torque wrench calibrated for specific tightening specifications, which is critical during wheel mounting or engine assembly.
Looking ahead, vehicle diagnostics and maintenance are moving toward greater integration with smartphone apps and cloud data. Such tools enable remote monitoring of critical parameters, alerting you of issues before symptoms manifest on the road. As vehicle technology becomes more complex, understanding and leveraging these tools will be essential.
**How do I maintain vehicle diagnostics and tools over time?** Regular calibration of your multimeter and scanner ensures measurement accuracy. Cataloging maintenance logs helps track tool performance and schedule upgrades or repairs proactively. Keeping physical tools organized in a toolbox with clear labels improves efficiency during repairs. Additionally, subscribing to software updates from your diagnostic tool manufacturers ensures compatibility with the latest vehicle models and systems.
If you’re ready to elevate your maintenance game, I challenge you to try updating your diagnostic scanner’s firmware this month. Keeping your tools up-to-date not only improves reliability but also unlocks new diagnostic features. For in-depth guides on diagnostics and repair hacks, check out auto repair hacks to save money. Remember, staying equipped with the right tools and routine checks is your best defense against unexpected breakdowns and costly repairs.
Lessons That Changed My Approach to Auto Repairs
One of the most valuable lessons I’ve learned is that sometimes, the simplest component can cause complex-looking problems. I once spent hours replacing an alternator only to find out a tiny fuse was blown, stopping the entire charging system. It taught me to always start with the basics, no matter how intimidating the repair seems.
Patience is key when diagnosing electrical issues. Jumping straight to major replacements can lead to unnecessary expenses. My experience with fuses reminded me that a thorough visual and multimeter inspection often reveals the real culprit behind what appears to be a major failure.
Charts and diagrams are your friends but shouldn’t replace actual testing. Relying solely on diagrams without physical checks risks overlooking critical signs. I now double-check every fuse and wiring connection before replacing parts—it’s saved me time and money.
Seeking out specialized tools, like a reliable multimeter, transforms how efficiently you can troubleshoot. Investing in quality diagnostic tools is one of the smartest moves I made, as it gives instant clarity and prevents guesswork during repairs.
Remember, understanding your vehicle’s electrical system deeply can turn diagnostics from guesswork into a guided process, saving frustration and resources. To deepen your knowledge, explore essential auto repair strategies for frequent drivers.
Your Essential Arsenal for Vehicle Troubleshooting
My go-to diagnosis tools include a Fluke 117 multimeter for precise readings; it’s durable and reliable even in tough environments. For quick checks, I use an infrared thermometer gun to swiftly identify overheating parts, saving me from dismantling unnecessary components.
An advanced scan tool like the Autel MaxiDAS DS808 has revolutionized how I diagnose complex issues. It provides real-time data and manufacturer-specific codes, helping me target repairs accurately. Regular updates on software from these tools ensure compatibility with the latest vehicle models, which is essential as automotive electronics evolve.
Additionally, a solid socket and wrench set with a torque wrench helps me perform repairs confidently, knowing bolts are correctly torqued. Keeping these tools organized and calibrated prolongs their lifespan and reliability, making repairs smoother and safer.
Embracing modern diagnostic technology and maintaining your toolkit is vital to staying ahead of vehicle issues. For more insights into vehicle diagnostics, visit how advanced vehicle diagnostics prevent costly breakdowns.
Trust Your Instincts and Take Action Today
Your car’s health depends on your willingness to look beyond the obvious and dig deeper with the right tools and knowledge. Don’t wait for small problems to turn into expensive repairs. Regularly inspect electrical components, keep your diagnostic tools updated, and stay curious about your vehicle’s systems.
Thinking about your next diagnostic step? Have you ever overlooked a simple fuse and paid the price? Share your story below and let’s learn from each other’s experiences!