
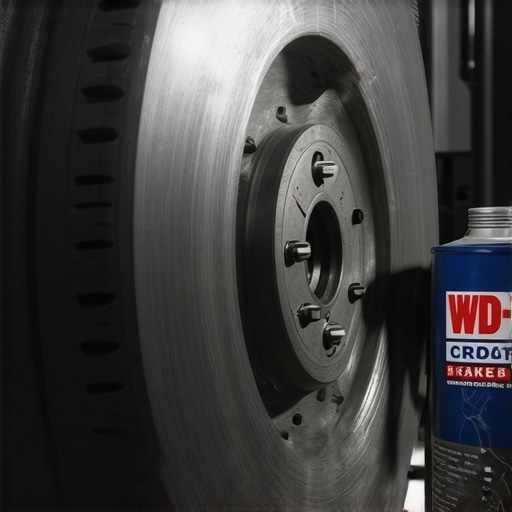
I remember the first time I reached for a can of WD-40 to silence my squeaky brake rotors. It was a hot summer afternoon, and that annoying squeal had become the soundtrack to my daily drive. I figured, “Hey, a quick spray, and I’ll be back on the road without that embarrassing noise.” But instead of restoring silence, I ended up with a glossy, slippery mess and a lingering doubt about whether I was making things worse.
Why Your Quick Fix Might Be Hurting You More Than Helping
That lightbulb moment made me realize something important: using WD-40 on brake rotors isn’t a magic fix. In fact, it can compromise your braking performance and safety. So, today, let’s dive into a better way—one that’s backed by experience and won’t put you or your vehicle at risk. We’ll explore why WD-40 isn’t the hero you think it is and what to do instead to keep your brakes quiet and reliable.
Is Spray-On a Shortcut or a Costly Mistake?
Early in my car repair journey, I made the mistake of trusting quick fixes like WD-40 because they seemed harmless and easy. However, I learned that these sprays can leave a residue that attracts dirt and debris, leading to more squeaking and uneven wear. Brake rotors work best when kept clean and dry with proper maintenance. For a detailed guide, check out this article on brake service myths.
Using inappropriate products not only delays fixing the real issue but can also escalate repair costs. Trusting a professional approach is the first step toward safe, effective brake maintenance. So, if you’ve ever found yourself spraying WD-40 on your rotors wondering if it’s worth the mess, you’re in good company—but there’s a better way.
Now, let’s look at what truly works and how you can save money while ensuring your brakes do their job when you need them most.
Step Into the Right Tools and Preparation
Before diving into any brake repair, ensure you have all necessary tools: a jack, jack stands, lug wrench, brake caliper piston tool, screwdrivers, and safety equipment like gloves and eye protection. I once started replacing brake pads without proper eye protection and got grease on my glasses—a quick reminder to always prep thoroughly. Check your vehicle’s service manual for specific parts and procedures, and verify the brake system’s condition by inspecting for leaks, worn pads, or uneven rotors.
Remove Old Brake Components Carefully
Loosen lug nuts slightly while the vehicle is on the ground, then raise it securely with a jack and support with stands. Remove the wheel for full access. Next, detach the caliper bolts using the appropriate socket, then slide the caliper off the rotor—be cautious not to strain the hydraulic hose. Suspend the caliper securely using a wire hook or bungee cord to prevent stress on the hose. During my last brake job, I learned that forcing the caliper off can damage the piston, leading to more repairs—so gentle and deliberate is key.
Prepare the Rotor and Piston for Reinstallation
If your rotor is warped or heavily scored, replacing it is best; however, some minor surface rust can be removed with a rotor stone or fine grit sandpaper. Use a brake caliper piston tool to compress the piston back into the caliper, which makes room for new pads. Think of the piston as a door hinge that needs to be pushed back—using the right tool ensures it moves smoothly without damaging the seal. In my experience, forcing the piston with a screwdriver can cause leaks, so patience is essential.
Install New Components with Precision
Align the new rotor onto the hub, ensuring it sits flush. Apply a small amount of high-temperature brake grease to the caliper slides and contact points—this prevents uneven pad wear. Place the new brake pads, ensuring they are positioned correctly. When reinstalling the caliper, tighten the bolts incrementally in a crisscross pattern for even pressure. Remember, using the correct torque specifications prevents over-tightening or loosening, which could compromise safety. For detailed torque specs, consult your vehicle’s manual or visit this essential brake guide.
Final Checks and Test Drive
Reinstall the wheel and lug nuts, lowering the vehicle gradually to torque the nuts to specification. Before going for a spin, pump the brake pedal a few times to seat the pads against the rotor—this ensures firm braking response. Test the brakes at low speed in a safe area, checking for any abnormal noise or vibrations. The key is to evaluate performance without pushing the vehicle to its limits immediately. Remember, proper brake maintenance not only improves safety but extends the lifespan of your rotors and pads, saving you money in the long run. For more tips on vehicle diagnostics, visit this comprehensive diagnostics guide.
Many car owners believe that basic maintenance tasks like oil changes and brake services are straightforward and universally interchangeable. However, beneath these surface-level understandings lie nuanced details that can significantly affect your vehicle’s longevity and safety. A common myth is that all oils or brake pads are created equal—nothing could be further from the truth. Using the wrong type can accelerate wear or cause engine issues, a fact supported by automotive experts like those at this resource on oil innovation.
Another often-overlooked mistake is neglecting vehicle diagnostics before jumping into repairs. Many assume that a check engine light always indicates a costly component failure, but sometimes it points to minor issues like sensor misreads or loose connections. Advanced diagnostic techniques, as detailed in this comprehensive guide, reveal how crucial proper diagnosis is for effective repairs and cost savings.
What’s the Nuance that Even Experienced Technicians Sometimes Miss?
It’s often assumed that replacing worn parts guarantees vehicle performance, but the true benefit lies in understanding system interactions. For example, a worn alternator might show normal voltage output but still cause subtle electrical issues affecting sensors and control modules. Recognizing these hidden nuances requires a deep understanding of vehicle electronics and testing procedures, as discussed by this expert article. Failing to see these subtleties can lead to repeated repairs and misdiagnoses, wasting time and money.
In the world of auto repair, superficial fixes often mask underlying problems. Believing that a quick oil change or a sliver of brake pad replacement is the end of maintenance can be a costly mistake. Instead, a holistic approach—regular diagnostics, understanding component interactions, and choosing the right parts—is essential. For a deeper dive into how to optimize your vehicle’s health without unnecessary expense, check out these auto repair hacks. Have you ever fallen into this trap? Let me know in the comments and share your experiences!”}**
How do I maintain my vehicle’s health over time?
Consistency is key when it comes to vehicle maintenance. I personally rely on a set of specialized tools to ensure each repair or service is performed accurately and efficiently. One of my favorite pieces of equipment is a quality digital torque wrench. Unlike traditional wrenches, a digital torque wrench provides precise torque readings, preventing over-tightening or under-tightening bolts, which can lead to component failure or safety issues. I use the ACDelco Digital Torque Wrench because of its accuracy and user-friendly interface, especially when working on critical parts like brake calipers or suspension components.
In addition, I highly recommend investing in a good OBD-II scanner, such as the BlueDriver Bluetooth Professional Diagnostic Scanner. This device connects seamlessly to your smartphone, allowing you to read, clear, and monitor diagnostic trouble codes (DTCs) in real-time. Having this tool has saved me countless trips to the mechanic by diagnosing issues early and understanding what my car needs before it becomes a costly repair.
For maintenance logs and scheduling, I utilize auto repair software that helps me keep track of oil changes, brake inspections, and tire rotations. Staying organized ensures I don’t forget routine tasks that are crucial for long-term vehicle health.
Looking ahead, I believe that technological integration will become even more prevalent. Future trends point toward AI-powered diagnostic tools that can predict failures before they happen, potentially saving drivers thousands in repairs and downtime. Companies are already developing sensors that monitor component wear and tear in real-time, integrating data into your vehicle’s dashboard.
What if I want to upgrade my tools for better maintenance?
Upgrading your toolkit is a smart move for serious DIYers. For example, replacing standard screwdrivers with a set of precision torque screwdrivers allows for more delicate work, especially on electronic components. Also, adding a ultrasound leak detector can help locate minor fluid leaks that aren’t visible to the naked eye, especially when diagnosing issues with cooling systems or brake fluid reservoirs. Comprehensive vehicle diagnostics tools empower you to troubleshoot and prevent problems early.
In my experience, familiarizing yourself with these advanced tools not only boosts your confidence but also extends your car’s lifespan. For example, regularly checking and calibrating your torque wrench ensures consistent results over its lifetime. Remember, proper tool maintenance is as important as maintaining your vehicle itself essential strategies for frequent drivers.
Why investing in these tools is a step toward independence
Taking control of your vehicle maintenance reduces reliance on repair shops and helps you understand your car’s needs. Plus, it saves money in the long run. If you’re ready to elevate your DIY game, start with a good quality torque wrench and an OBD-II scanner. Use them regularly to perform basic checks, and you’ll notice better performance and peace of mind.
Remember, maintaining your vehicle isn’t just about fixing problems—it’s about proactive care. For more insights into saving money without sacrificing quality, visit auto repair hacks. Don’t forget to schedule periodic diagnostics and calibration to keep everything running smoothly. Ready to give these tools a try? Your car will thank you!
Lessons That Changed My Approach to Car Care
- One of the hardest lessons I learned was the danger of relying on quick fixes like WD-40 on brake rotors. It may seem convenient, but I realized that proper cleaning and maintenance are key to safety and longevity. Cutting corners with shortcuts can mask underlying issues, leading to costly repairs down the line.
- Understanding the nuances of vehicle diagnostics opened my eyes to the complexity of modern cars. Diagnosing minor issues early, with tools like an OBD-II scanner, helped me avoid the trap of misdiagnosis and unnecessary part replacements, saving me time and money.
- Patience with proper torque and meticulous installation made a huge difference. Rushing through brake pad or rotor replacement often results in uneven wear or safety risks. Taking the time to learn and follow correct procedures pays off with reliable performance.
- Investing in quality tools and continuing education transformed my DIY repairs from guesswork to confidence. Tools like a digital torque wrench or ultrasound leak detector are game-changers, making maintenance safer and more precise.
- Finally, I learned that ongoing learning about my vehicle’s systems—not just repairs—helps me catch issues early and extend its lifespan. Deepening my understanding makes me a better caretaker and a more empowered car owner.
Tools and Resources I Trust for Auto Repair Success
One resource I heavily rely on is auto repair hacks. It offers practical insights into saving money while maintaining quality repairs, helping me make informed decisions. For diagnostic tools, I trust the comprehensive vehicle diagnostics guide. It helps me interpret error codes accurately and understand the root causes.
When it comes to essential hardware, I recommend the ACDelco Digital Torque Wrench for precise tightening, and the BlueDriver Bluetooth Scanner for effortless diagnostics. These tools have empowered me to take control without second-guessing, ensuring safety and reliability.
Don’t hesitate to explore detailed guides like this brake service guide to deepen your understanding. Learning from trusted sources accelerates your progress and prevents common pitfalls.
Build Momentum and Embrace Your Auto Maintenance Journey
Your car is more than just a machine; it’s a companion that rewards your care and attention. Seize the opportunity to learn, upgrade your tools, and develop confidence in your skills. Every repair or diagnostic is a step toward independence and smarter ownership. Remember, the more you educate yourself, the better equipped you’ll be to handle surprises and keep your vehicle running smoothly. Are you ready to take that first step today? Share your experiences or questions below—let’s grow together as auto repair enthusiasts!