
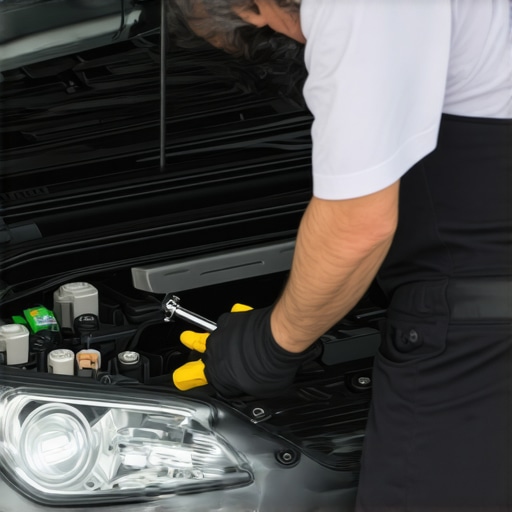
Ever been halfway through a drive when your car suddenly feels sluggish, as if someone pulled the plug on its power? I remember the first time I experienced that frustrating sponginess, and I thought I had a serious mechanical problem. Turns out, all it took was a quick fix involving one tiny sensor—my Mass Air Flow (MAF) sensor. That lightbulb moment saved me hundreds in repairs and kept my daily routine on track.
Why Throttle Response Drops and How a Dirty MAF Sensor Is Often the Culprit
Many drivers don’t realize that their engine’s breathing relies heavily on the MAF sensor. When this little component gets covered in grime and dirt, it can’t accurately gauge the amount of air entering the engine. As a result, the car’s ECU (Engine Control Unit) struggles to balance the air-fuel mixture, leading to poor throttle response and sluggish acceleration. It’s like trying to breathe through a clogged straw—everything slows down.
What surprised me early on was how a simple cleaning could restore lost performance. I once ignored the warning signs, hoping it was just a glitch. But the longer I drove, the more noticeable the hesitation became, especially when merging onto the highway or overtaking. It was a clear clue that something was amiss, and the culprit turned out to be a dirty MAF sensor.
Is Cleaning the MAF Sensor Really Effective?
Initially, I was skeptical—was this just a temporary fix? But I soon learned that with proper cleaning, most MAF sensors can perform like new. I made the mistake of using carburetor cleaner unsuitable for delicate sensors, which led to more problems. Now, I stick to a specific MAF sensor cleaner recommended by auto experts, and it’s been a game-changer. Curious about how this works? Check out auto repair hacks for more tips on DIY fixes that save money without sacrificing quality.
Are you noticing your car’s response isn’t what it used to be? If so, you’re not alone—and it’s often an easy fix. Next, I’ll walk you through how to safely clean your MAF sensor and get that responsiveness back. Ready? Let’s dive in and bring your car’s performance back to life.
Prepare Your Workspace and Gather Supplies
Start by parking your car on a level surface, turning off the engine, and disconnecting the negative terminal of the battery to prevent any electrical mishaps. Gather a clean microfiber cloth, a specific MAF sensor cleaner—do not use carburetor or brake cleaner—and a pair of gloves. Remember, patience and cleanliness are your best friends during this process.
Locate and Remove the MAF Sensor
Identify the MAF sensor, usually positioned between the air filter housing and the throttle body. Consult your vehicle’s manual or use online diagrams if needed. Carefully disconnect the electrical connector without pulling on the wires directly. Then, unscrew or unclip the sensor using appropriate tools, handling it gently to avoid damaging fragile components. I once rushed this step and accidentally dropped the sensor; a quick cleanup and careful reinstallation later, my engine ran smoothly again.
Clean the Sensor Protective Contaminant Layer
Hold the sensor by its edges and spray the cleaner onto the sensing elements and housing. Avoid touching the sensing wires or plates directly with your fingers or anything conductive—these are delicate. Use the microfiber cloth to wipe away loose dirt or oil. Let the sensor air-dry for a few minutes as the cleaner evaporates, ensuring no residue remains. This step is crucial, as residual dirt can continue to impair airflow measurement.
Note on Applying the Cleaner
Spray generously but avoid soaking the sensor excessively, which could cause damage. I learned this the hard way when I over-saturated a sensor, leading to a longer drying period. Check your cleaner’s instructions for optimal use. For reference, reputable guides suggest using a dedicated MAF cleaner, such as CRC or B-Plus, to ensure compatibility.
Reinstall the MAF Sensor with Care
Once dry, carefully reattach the sensor to its mounting point, securing it with the screws or clips. Reconnect the electrical connector, ensuring a firm fit. Before starting the engine, double-check that all tools are removed from the engine bay to prevent accidental damage. I once left a screwdriver perched on the engine, and starting it caused a startling racket; lesson learned—always double-check your work.
Test the Repair and Clear Codes
Reconnect the negative terminal of the battery. Start your engine and monitor its response. A noticeable improvement in throttle response, smoother idling, and absence of the check engine light indicate success. For further reassurance, use your vehicle’s diagnostic tool or visit a professional for a quick scan. Regular maintenance like this can prevent costly repairs and keep your vehicle running efficiently. If you encounter persistent issues, consider consulting auto diagnostic experts for advanced checks.
Many car owners believe they understand the basics of vehicle maintenance, but in reality, there’s a web of misconceptions that can lead to costly mistakes. For example, a widespread myth is that simply replacing parts like brake pads or oil is enough to ensure safety and longevity. However, without appreciating the subtle nuances—such as proper bedding of new brakes or the importance of precise oil viscosity—you risk premature wear and unexpected failures.
Is Your Maintenance Routine Missing Critical Details That Save Money?
This oversight is often rooted in outdated advice or marketing hype. For instance, some believe that regular oil changes every 3,000 miles are mandatory with synthetic oils, but recent studies show that many modern synthetics can safely last 7,500 to 10,000 miles if quality oils and filters are used. Relying solely on the ‘old-school’ mileage intervals can lead to unnecessary costs or overlooked issues.
Similarly, vehicle diagnostics are often misunderstood. Many think that a scanner code points directly to the faulty component, but advanced diagnostics reveal that codes frequently indicate deeper systemic problems, such as wiring issues or sensor misalignments.  auto repair hacks to discover practical DIY tips that complement professional diagnostics.
Don’t let myths and overlooked details compromise your vehicle’s performance. The key lies in understanding that auto repair involves more than just replacing parts—it’s about reading between the lines and catching the subtle signs early. If you’re unsure whether your maintenance routine covers all critical aspects, consult professionals or explore resources like the ultimate guide to brake service. Remember, informed owners make better decisions. Have you ever fallen into this trap? Let me know in the comments.Maintaining your vehicle’s performance requires not only knowledge but also the right equipment and methods. I personally rely on a high-quality automotive multimeter, such as the Fluke 115, which provides precise voltage and resistance measurements essential for diagnosing electrical issues accurately. This tool has become indispensable in my workshop because it helps me identify faulty sensors, bad connections, or wiring problems faster than guesswork. Additionally, I use a professional-grade OBD-II scanner like the BlueDriver, which connects via Bluetooth and offers detailed, real-time data, making it easier to interpret diagnostic trouble codes and prevent costly breakdowns. I particularly appreciate its user-friendly app interface, allowing me to clear codes and monitor vehicle responses after repairs seamlessly. As vehicle technology continues to evolve, integration of advanced diagnostic software—like OEM-specific apps—is also becoming vital, offering deeper insights that generic tools can’t match. Looking ahead, trends point toward wireless diagnostics and AI-powered analysis, which will streamline maintenance and empower owners to perform more tasks themselves. How do I maintain vehicle diagnostics over time? Consistently calibrate your scan tools, stay updated with software updates from manufacturers, and periodically verify tool accuracy with known-good reference devices. Regularly consulting resources such as auto repair hacks can help you optimize your toolkit for long-term reliability. Remember, investing in precise tools isn’t just about fixing issues; it’s about building confidence in your maintenance routine and catching problems early. Start by testing your battery voltage with a reliable multimeter this week—it’s a small step that can save you from unexpected breakdowns and expensive repairs.
The Hard-Earned Wisdom of an Auto Enthusiast
One of the most valuable lessons I learned is that consistent, attentive maintenance can turn a questionable vehicle into a reliable companion. I once ignored subtle signs of wear, thinking they were minor issues, only to face expensive repairs later. Now, I understand that catching small problems early—like a slightly squeaky brake or sluggish acceleration—saves money and extends my car’s lifespan. Trust me, staying vigilant about your vehicle’s cues, especially with essential tasks like brake service and vehicle diagnostics, is a game-changer. Observing how your car responds over time gives you clues that even professional tools can’t always detect right away.
Another revelation was the importance of understanding the nuances behind common maintenance myths. For example, many think that regular oil changes every 3,000 miles are necessary for synthetic oils, but recent studies show that modern synthetics can last much longer when used correctly. Relying on outdated advice can lead to unnecessary costs. It’s crucial to stay updated with credible resources and expert insights—this knowledge empowers you to make smarter maintenance choices and avoid pitfalls that could compromise your vehicle’s performance.
Lastly, never underestimate the value of investing in quality diagnostic tools and learning how to interpret their data. Equipment like a reliable OBD-II scanner and multimeter do more than just reset warning lights—they provide real-time insights into your engine’s health, allowing preventive action before problems escalate. Regularly checking system responses, especially during routine oil changes or brake inspections, helps you become proactive rather than reactive. For comprehensive guidance, consulting detailed resources such as auto repair hacks can significantly elevate your DIY skills and confidence.
My Essential Toolbox for Auto Repair Success
Over the years, I’ve found that certain tools are indispensable for effective vehicle maintenance. A high-quality multimeter, like a Fluke 115, has helped me diagnose electrical issues accurately, saving time and money. Additionally, a dependable OBD-II scanner such as BlueDriver provides detailed diagnostics and ease of use. These tools have become my trusted allies, enabling me to perform tests, clear codes, and monitor the vehicle’s response after repairs—skills that can save you hundreds at the shop and give peace of mind. Remember, the right tools, combined with proper knowledge, turn vehicle maintenance from a daunting chore into a manageable task. To deepen your understanding, explore resources like the ultimate guide to brake service for expert insights on maintaining your braking system effectively.
Your Drive Toward Confident Maintenance Starts Now
Taking charge of your vehicle’s health isn’t just about fixing problems—it’s about building confidence and creating a safer driving experience. Each small step, like cleaning a dirty MAF sensor or checking your battery voltage, accumulates into a powerful routine that keeps your car performing at its best. Don’t let myths or overlooked details hold you back; educate yourself continuously and trust your instincts. With the right knowledge and tools, you can prevent costly breakdowns and enjoy longer, worry-free miles. So, what’s the first maintenance task you’ll tackle today? Share your plans below and join the community of proactive vehicle owners!