
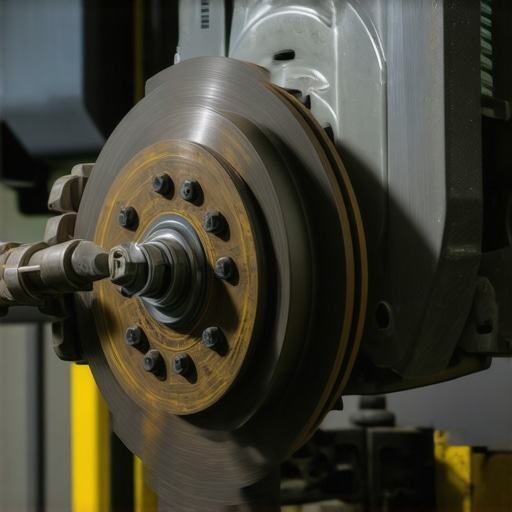
I vividly remember the moment it happened. I had just finished my DIY brake replacement on a chilly Saturday morning, feeling pretty proud of myself. But as I hit the road, a unsettling squeal echoed from my wheels, followed by a noticeable pulsation in my brake pedal. Turns out, I had just cooked my rotors—an expensive lesson learned the hard way. That lightbulb moment made me realize how one seemingly minor mistake can turn a simple brake job into a costly repair nightmare.
Why Skipping Proper Preparation Can Cost You Big Time
Many DIY enthusiasts, myself included in the beginning, underestimate how crucial proper rotor handling is during brake repairs. Rushing through the process or neglecting a key step can lead to warped or even cracked rotors. And here’s the kicker—rotors are among the most critical components for safety, translating your pedal input into stopping power. Damaged rotors compromise your safety and can double your repair costs. So, today, I promise to share the most common mistake that ruins rotors and how to avoid it like a seasoned pro.
Is It Really Worth All the Fuss To Do Your Own Brakes?
Absolutely! But only if you understand how to avoid the pitfalls that owners often stumble into. I’ll admit, early on, I made the mistake of reusing old rotor surface rust, assuming it wouldn’t matter. That mishap led to uneven wear and, ultimately, the need for new rotors just months later. According to industry experts, neglecting rotor surface quality during installation can significantly shorten their lifespan (learn more about vehicle longevity tips).
Secure Your Vehicle Before Removing Rotors
Start by parking your car on level ground, engaging the parking brake, and placing wheel chocks behind the wheels that will remain on the ground. Loosen the lug nuts slightly while the wheel is still on the ground to prevent the tire from spinning. Then, lift the vehicle with a jack and secure it with jack stands for safety. Once elevated, finish removing the lug nuts and take off the wheel. During my own recent brake job, this prep prevented any accidental slips and ensured a stable workspace.
Accurate Disc Disassembly
Remove Brake Calipers Carefully
Use a socket wrench to undo the caliper bolts. Suspend the caliper using a bungee cord or a wire to avoid stress on the brake hose. Do not hang it by the hose, as this can cause damage. In my experience, supporting the caliper prevents stress on the hose and keeps the brake system intact. Avoid letting the caliper hang freely, which could lead to internal damage.
Extract the Old Rotor Properly
Once the caliper is removed, the rotor may be stuck due to corrosion or rust. Tap it gently with a rubber mallet or use a rotor puller if necessary. Applying a penetrating lubricant around the hub can loosen rust. I once encountered a rotor stuck tight; after applying penetrating oil and waiting 10 minutes, a few light taps freed it without forcing or damage.
Handle Rotors with Precision to Ensure Longevity
Clean the Hub Surface
Before installing the new rotor, clean the hub surface thoroughly with a wire brush or brake cleaner to remove rust and debris. A clean surface ensures the rotor sits flush and reduces the risk of warping. During my last rotor swap, neglecting this step led to uneven brake wear; thorough cleaning fixed future issues.
Install the New Rotor Correctly
Align the rotor with the hub’s bolt holes, then hand-tighten the lug nuts in a star pattern to ensure even seating. Tighten them gradually with a torque wrench to manufacturer specifications. This prevents uneven stress distribution that can warp the rotor. I learned this the hard way—overtightening one lug led to a warped rotor after a few hundred miles.
Reassemble and Test Safely
Reattach the caliper, tightening bolts to spec. Put the wheel back on, tighten lug nuts by hand, lower the vehicle, then torque all lug nuts to manufacturer’s recommended tightness. After completing the installation, pump the brake pedal a few times to restore caliper piston position and check for leaks. In my case, a quick test drive and brake test confirmed a firm pedal and smooth operation, saving me a costly return trip for adjustments.
Keep Preventing Rotor Damage
Regular inspections and proper braking habits extend rotor lifespan. Avoid riding the brakes or applying uneven pressure; these actions cause excessive heat and uneven wear. If your vehicle manifests symptoms like pulsating brake pedal or squeals, don’t ignore them—address them promptly by inspecting your rotors. For insights on diagnosing brake issues early, visit this comprehensive brake service guide. Proper rotor handling during replacement can save you hundreds and keep your brakes performing flawlessly.
While many car owners believe that routine tasks like oil changes and brake repairs are straightforward, there’s often a deeper layer of complexity that gets missed, leading to costly mistakes. Let’s dig deeper into some common misconceptions and advanced pitfalls that even seasoned DIYers can fall into, so you can elevate your auto maintenance game.
Why Relying Solely on Mileage or Time Can Backfire
Most people follow the traditional rule of changing oil every 3,000 miles or every three months, but modern synthetic oils have significantly extended these intervals (learn more about synthetic oil intervals). Blindly sticking to these outdated schedules can either lead to unnecessary oil changes or overlooked degradation. Advanced vehicle diagnostics can reveal oil breakdowns well before the recommended mileage, saving money and protecting engine health.
Beware of the Myth That All Brake Pads Are Created Equal
Many assume that any brake pad replacement is sufficient, but not all pads offer the same performance or lifespan. Some drivers make the mistake of choosing low-cost options without considering material composition or driving style, which can cause uneven wear or quicker rotors degradation (dive into brake service myths). The nuance lies in selecting brake components tailored to your driving habits, climate, and vehicle specifications.
Advanced Checks That Uncover Hidden Vehicle Diagnostics Issues
Many drivers overlook the importance of thorough diagnostics during regular service, risking not catching issues like misfires, sensor failures, or emission leaks early. Vehicle diagnostics have evolved beyond simple engine lights; sophisticated systems can detect subtle anomalies that, if ignored, might result in breakdowns or damage (discover how diagnostics save money). For example, a failed oxygen sensor can subtly reduce fuel efficiency for months before triggering a light, but a deep diagnostic check can identify it sooner.
What Do Experts Say About Neglecting Proper Torque Settings?
Over-tightening or under-tightening bolts during repairs can warp components or cause parts to loosen prematurely. Many mechanics emphasize using a torque wrench to get things right, but a common mistake is ignoring manufacturer specifications. This subtle detail impacts safety and longevity, especially in critical areas like wheel lug nuts and brake assembly bolts. Consulting manufacturer data or those insightful auto repair hacks can guide precise assembly.
Have you ever fallen into this trap? Let me know in the comments. The key to avoiding these pitfalls is staying informed and proactive—your car’s reliability depends on it!
Essential Tools for DIY Auto Maintenance
Maintaining your vehicle over time requires more than just basic knowledge; having the right tools makes all the difference. I rely heavily on a high-quality digital torque wrench, such as the GearWrench Electronic Torque Wrench, because it provides precision when tightening critical components like lug nuts and caliper bolts. Its ability to store preset torque values reduces the risk of over- or under-tightening, which can cause warping or loosening later on. Additionally, a digital multimeter, like the Fluke 115 Multimeter, helps me troubleshoot electrical issues with confidence, ensuring that everything from battery health to sensors operates optimally.
Leveraging Software for Better Diagnostics
Modern vehicles are equipped with extensive onboard diagnostics systems. For thorough vehicle health checks, I use a professional-grade OBD2 scanner, like the BlueDriver Pro OBD2 Scanner. This device connects seamlessly with my smartphone via Bluetooth and provides real-time data, fault codes, and measurable sensor outputs. Regular calibration and updates to the scanner’s firmware ensure the latest diagnostics are available, helping me catch issues before they become costly problems. As vehicle systems continue to evolve, integrating diagnostic tools like these will be indispensable for proactive maintenance and long-term reliability.
Strategies for Effective Long-Term Vehicle Care
Beyond tools, adopting strategic maintenance routines is vital. I schedule quarterly inspections of critical components—checking brake pads, fluid levels, and belt conditions—to prevent minor issues from escalating. Using high-quality lubricants and filters, like the synthetic oils when appropriate, enhances engine longevity and fuel efficiency. Additionally, aligning my maintenance intervals with manufacturer recommendations, backed by vehicle diagnostics, ensures optimal performance. For those who regularly drive in challenging conditions, investing in an IR thermometer can monitor brake and engine component heat during operation, helping identify overheating issues early.
How do I maintain vehicle diagnostics over time?
Consistent diagnostics require staying current with software updates for your scanner device and periodically cleaning sensor connections to ensure accurate readings. I also monitor the vehicle’s behavior between diagnostics, paying attention to subtle changes like increased idle roughness or unusual vibrations. Proper documentation of inspections helps track wear patterns, allowing for timely interventions. As vehicle technology advances, embracing smarter diagnostic methods will become increasingly essential for vehicle longevity.
Being proactive by integrating precise tools and strategic routines not only extends your vehicle’s lifespan but also saves you money and stress down the line. I encourage you to try regularly scanning your vehicle with a reliable diagnostic tool—it’s astonishing how much you can prevent with a little tech-savviness. For a detailed guide on how diagnostic checks early can save hundreds, visit this comprehensive resource. Remember, the key to long-term vehicle health is consistent, informed care—your car will thank you for it!
Lessons Only Experience Can Teach About Auto Maintenance
- One of the most valuable insights I’ve gained is that rushing through brake repairs often leads to overlooked details, like insufficient cleaning of the hub surface, which can cause uneven rotor wear. Taking my time and double-checking each step has saved me from costly rework.
- Seeing firsthand how improper torque settings can warp rotors taught me the importance of using a reliable torque wrench — a small investment for peace of mind and prolonged component life.
- Understanding that not all brake pads and rotors are created equal—choosing parts tailored to my driving habits and climate—has dramatically improved safety and performance.
Tools and Knowledge That Changed My Approach
- A high-quality digital torque wrench, like the GearWrench Electronic Torque Wrench, ensures precise tightening, preventing warping and loose components.
- Investing in an advanced OBD2 scanner, such as the BlueDriver Pro, has helped me catch hidden issues early, saving money and avoiding breakdowns.
- Reading authoritative guides on brake service, like the comprehensive brake repair article, has deepened my understanding of proper procedures and safety precautions.
Ignite Your Drive to Keep Your Car at Its Best
Learning from my own auto repair journey has shown me that patience, the right tools, and continuous education are key to vehicle longevity. Don’t hesitate to take control of your car’s maintenance — it’s rewarding and often more economical than relying solely on professionals. Take that first step today, and remember: your car’s health is an investment in your safety and peace of mind. Are you ready to embrace more DIY auto projects and save both money and trouble? Share your stories or questions below, and let’s grow together!