Ever been stuck in your driveway, wrestling with that stubborn oil filter that just won’t loosen? I remember several times fumbling helplessly, worrying I was about to strip the damn thing or damage the engine. There’s this moment of frustration where you think, “How the heck am I supposed to get this last bit off?” My lightbulb moment came not from fancy tools but from good old-fashioned tenacity and a bit of know-how I’ve since honed.
The Hidden Secret to Freeing a Stuck Oil Filter
Have you ever faced a stubborn oil filter that refuses to budge, no matter how much you wiggle or tighten your grip? You’re not alone. Many car enthusiasts and everyday drivers alike encounter this problem. The typical answer is to use a special oil filter wrench, but what if you don’t have one nearby? Or worse, what if the filter is stuck so tight it’s risking damage to your engine?
Don’t worry—I’ve been there, and I can tell you from experience that there’s a surprisingly effective way to tackle this without a wrench. It’s a method rooted in patience, some clever techniques, and understanding the causes of tight filters. Today, I promise to share with you the *real* trick that’s saved me from expensive repairs and messy oil spills. So, if you’ve ever felt that twinge of panic when the filter just won’t turn, keep reading.
Is the Wrench the Only Solution, or Is There a Smarter Way?
Early in my oil changing adventures, I made the mistake of blindly relying on tools designed for the job. I bought a fancy filter wrench that seemed perfect—until I faced a filter lodged like a rock in concrete. That’s when I realized I was missing the nuances of how filters grip and why they get stuck in the first place. Proper technique, patience, and a bit of ingenuity turned out to be the keys.
By understanding the common reasons filters seize—like cross-threading, corrosion, or overtightening—you can usually avoid the worst scenarios. Plus, knowing a few insider tips can make the process smoother and safer. Want to learn more about how modern oil change techniques can even *improve* your engine’s longevity? Check out [this comprehensive guide](https://repairmycarpro.com/oil-change-innovations-technologies-that-save-your-engine) for some cutting-edge tips.
Now that you’re primed with the right mindset and a bit of background, let’s get into the practical steps to free that stubborn filter without risking damage or spills. Are you ready to tackle this like a pro? Let’s go.
Apply Gentle Torque in the Right Direction
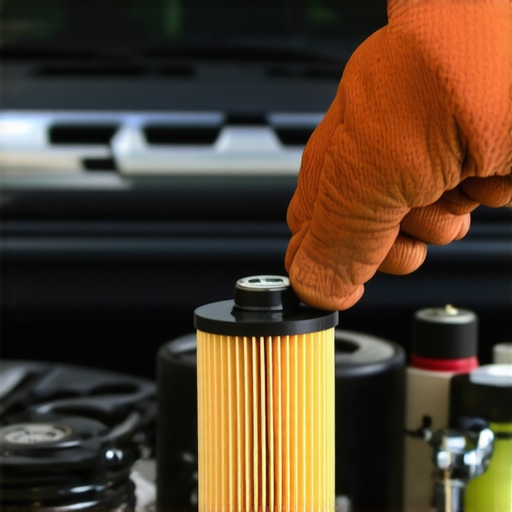
Start by gripping the oil filter with your hand or a rag, turning it counterclockwise—just like unscrewing a stubborn jar lid. I remember once using a thick cloth wrapped around the filter during a weekend oil change; the extra grip made all the difference. Turn slowly with steady pressure to avoid slipping or damaging the filter threads. Especially if the filter feels tight, avoid using excessive force at this stage.
Spray Penetrating Oil and Let It Work
Next, apply a generous amount of penetrating oil like WD-40 around the base of the filter, ensuring it seeps into the threads. It’s akin to softening rusted bolts in automotive repairs—patience is key. Wait about 10-15 minutes, giving the oil time to break down corrosion and lubrication barriers. This step can prevent stripping and make subsequent turns easier, much like loosening a rusty bolt on suspension components.
Use a Thick Cloth or Rubber Strap for Better Grip
When the filter resists your hand, take a sturdy cloth or a rubber strap to get a firmer grip. Wrapping the cloth around the filter provides additional friction. During one garage session, I used an old bicycle inner tube, which created enough grip to turn the filter without slipping. Think of this as adding ‘traction’ to a slippery tire—sometimes, simple materials outperform specialized tools.
Leverage Proper Tools When Needed
If manual effort isn’t enough, consider a strap-style filter remover, which wraps around the filter and lets you apply torque with a ratchet or socket wrench—much like using a breaking bar for stubborn parts. Remember, apply even pressure and avoid using impact tools that could crack the filter housing. This method is especially effective if the filter has been overtightened, which is common in DIY oil changes.
Beware of Over-Tightening and Cross-Threading
Recognize that overtightening causes filters to seize. If you notice resistance early, avoid forcing it. Cross-threading can also cause a filter to become permanently stuck. When installing filters, hand-tighten firmly but smoothly, and finish with a wrench just snug—this helps prevent future headaches. For more insights on preventing issues like this, check out [top auto repair tips](https://repairmycarpro.com/top-auto-repair-tips-to-extend-your-vehicles-lifespan).
Use Heat as a Last Resort
If the filter still refuses to turn, carefully applying heat can expand metal parts slightly, making them easier to loosen. Use a heat gun or a hairdryer at a safe distance to warm the area for a few minutes. Think of this as expanding a metal ring to slip it off—a delicate but effective tactic. Always exercise caution to avoid damaging nearby components or igniting oil vapors.
Maintain Patience and Safety
Throughout this process, remember that patience beats brute force. Rushing can lead to cracked housing or stripped threads, resulting in more costly repairs. If you find yourself repeatedly struggling, it might be wise to consult professional help or visit a trusted mechanic. Sometimes, a quick, expert-assisted removal saves time and stress.
By following these targeted steps, you can loosen even the most stubborn oil filters safely and effectively. For more tips on vehicle maintenance, exploring [auto repair hacks](https://repairmycarpro.com/auto-repair-hacks-save-money-without-sacrificing-quality) can be incredibly helpful. Don’t forget, understanding your vehicle’s components is the first step toward becoming your own mechanic.
While many drivers think they know the basics of auto maintenance, there’s often a deeper layer of understanding that can make a significant difference in vehicle longevity and safety. One common misconception is the belief that all oil changes are created equal; in reality, the type of oil and the technology used in modern engines demand more precise choices. For instance, newer engines benefit from synthetic oils that resist breakdown at higher temperatures, which can be crucial for performance and durability. To learn about groundbreaking oil change techniques that could extend your engine’s lifespan, check out [this detailed guide](https://repairmycarpro.com/oil-change-innovations-technologies-that-save-your-engine).
Are You Falling for the Myths About Brake Service
Many believe that brake pads should be replaced every 20,000 miles without considering driving habits or material quality. In truth, premium brake pads with proper installation can last much longer, especially if regular inspections are performed. Overlooking these nuances risks unnecessary replacements and expense. For insights on what matters most for safety and budget, see [this comprehensive overview](https://repairmycarpro.com/brake-service-myths-busted-what-really-matters-for-safety).
Breaking Down Vehicle Diagnostics: Beyond the Surface
Most drivers consider diagnostics a one-time fix; however, advanced diagnostic tools can uncover underlying issues that standard scans miss. For example, tiny vacuum leaks or sensor malfunctions can cause noticeable problems, yet often go unnoticed for months. Knowing how to interpret diagnostic codes properly and understanding what your vehicle’s signals really mean can prevent costly breakdowns. Dive into [decoding your car’s signals](https://repairmycarpro.com/decoding-vehicle-diagnostics-what-your-car-is-trying-to-tell-you) to sharpen your knowledge.
One trap many fall into is believing that regular maintenance doesn’t require attention to the nuances of sensor calibration or the importance of proper torque specifications. For instance, over-tightening a wheel lug nut can warp the rotor or damage the studs, leading to uneven wear or safety risks. Always adhere to recommended torque settings and recognize that precision matters more than brute force. To avoid such pitfalls, review [auto repair tips that save money](https://repairmycarpro.com/auto-repair-hacks-save-money-without-sacrificing-quality). Have you ever fallen into this trap? Let me know in the comments and share your experiences.Maintaining your vehicle’s health over the long haul requires more than just basic knowledge; it demands the right tools, a disciplined approach, and understanding of how to scale your efforts efficiently. From routine oil changes to complex diagnostics, having high-quality, reliable equipment is essential to build confidence and ensure safety.
Investing in Quality Auto Repair Tools
One of my top recommendations for anyone serious about vehicle maintenance is a versatile set of hand tools combined with digital diagnostic equipment. For starters, a professional-grade torque wrench—like the **Snap-On Digital Torque Wrench**—not only ensures precision when tightening components such as brake calipers or wheel nuts but also prevents over-tightening that can lead to costly damage. I personally rely on my **Tekton** tools for their durability and affordability, especially their ratchet sets and specialty wrenches.
Embracing Advanced Diagnostic Software
In recent years, vehicle diagnostics have evolved beyond basic code readers. I recommend investing in a **Snap-On Verus Edge** or **Autel MaxiSys** scanner. These tools interface with your car’s ECM (Engine Control Module) and provide real-time data, live graphs, and even ECU programming capabilities. I use mine not just for fault codes but to monitor sensor outputs and understand how adjustments affect engine performance, which greatly reduces trial-and-error repairs.
Streamlining Maintenance for Longevity
Long-term results hinge on disciplined maintenance routines. For example, setting reminders within your diagnostic software for scheduled fluid changes, filter replacements, and system calibrations can extend component life and prevent unexpected breakdowns. Additionally, keeping an organized log of repairs and diagnostics helps track patterns and identify recurring issues early.
Scaling Your Operations
As your expertise grows, so should your toolkit. Upgrading from basic hand tools to hydraulic lifts like **Atlas** or **Rotary** lifts allows you to work safely and efficiently on higher vehicles or components requiring significant force. Also, integrating software with cloud backup enables remote diagnostics and collaboration if you decide to partner with a professional mechanic or create a small auto shop.
How do I keep my auto repair process sustainable over time?
Consistent maintenance, periodic tool upgrades, and staying informed about latest industry technologies are vital. Regularly reviewing your techniques against reliable resources like [auto repair resources](https://repairmycarpro.com/auto-repair-hacks-save-money-without-sacrificing-quality) helps ensure your methods remain current.
Predictably, automotive tech trends are moving toward more integrated, software-driven systems. Future-proof your repair toolkit by learning to use advanced diagnostic platforms, which can even preemptively alert you to issues before they become serious. For example, mastering the art of decoding vehicle diagnostic codes with expert guidance—like [decoding your vehicle diagnostics](https://repairmycarpro.com/decoding-vehicle-diagnostics-what-your-car-is-trying-to-tell-you)—can save you hours of troubleshooting.
I encourage you to test out one of these advanced diagnostic techniques today—perhaps by interpreting a live sensor reading during your next oil change or brake service. Just a small, strategic step now can pave the way for more efficient, reliable repairs in the future.
As you gain more confidence in vehicle maintenance, one of the key lessons is that patience and understanding often outweigh brute force. I’ve learned that forcing a stuck oil filter can cause costly damage, but arming yourself with the right techniques and mindset can make all the difference. The most valuable insight? Never underestimate the power of gentle leverage combined with proper preparation. Next time you face that challenge, remember that a calm approach, combined with these insider strategies, can save your engine and your wallet.
Building your auto repair skills isn’t just about tools—it’s about the wisdom to know when to push, when to pause, and how to approach each problem with a problem-solving mindset. Keep learning, stay patient, and each stubborn obstacle will become an opportunity to improve your craft and confidence behind the wheel.