
I’ll never forget the morning I was late for work, and as I turned the key, all I heard was dead silence—no crank, no ignition, just a frustrating click. That lightbulb moment hit me hard: sometimes, the simplest fix is all your car needs, and yet, we overlook the basics. Ever been there? Stuck in the driveway, wondering why your trusty ride refuses to start, despite feeling perfectly fine the day before? If so, you’re not alone.
Why Your Car Won’t Crank and How a Ground Strap Might Save the Day
One of the common culprits behind a no-crank situation is poor grounding. Over time, the ground connections can corrode or loosen, causing a weak or interrupted electrical circuit. Before you start replacing expensive parts or calling for a tow, I want to share a trick I discovered early on that could resolve this issue in minutes: checking and fixing the ground strap.
Is the Ground Strap Really That Important?
Absolutely. A ground strap ensures your vehicle’s electrical system has a solid return path to the battery. When it’s faulty, your starter might not get enough power to turn over, even if the battery and starter are fine. Early in my auto repair journey, I made the mistake of assuming that a dead battery was always the problem. After learning more, I realized that even a good battery can’t do its job properly without proper grounding. For a deeper dive into vehicle diagnostics, check out decoding vehicle diagnostics.
But how do you tell if your ground strap is the issue? That’s what we’re about to find out. Stay tuned for the step-by-step guide, and I promise, this simple ground strap fix could save you time, money, and stress.
Locate the Ground Strap and Prepare
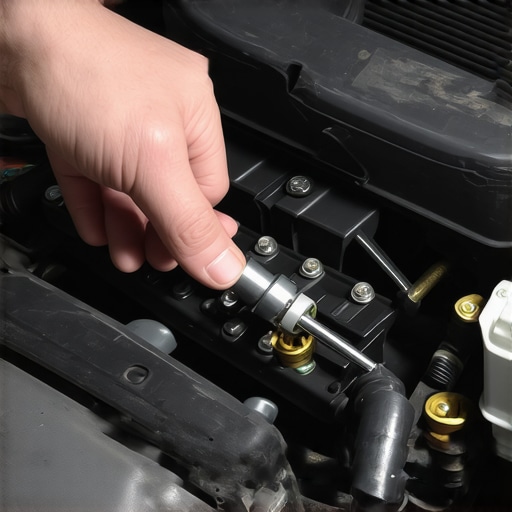
Begin by opening your vehicle’s hood and finding the ground strap, usually a thick, flat, or braided cable connecting the negative battery terminal to the chassis or engine block. Use a socket wrench to loosen the bolt securing the strap. Remember, safety first: wear gloves and ensure the car is off and cooled down. A real-world example? I once popped the hood on a friend’s car, noticed corrosion around the bolt, and decided to check further. This quick inspection saved her a broken-down morning.
Inspect the Condition of the Ground Strap
Carefully examine the strap for signs of corrosion, fraying, melting, or loose connections. If the strap looks worn or corroded, replace it with a new one. If it just needs cleaning, continue to the next step. Think of the ground strap as the heartbeat of your vehicle’s electrical system; a weak pulse can prevent your car from starting. I once cleaned a corroded strap with a wire brush, reattached it tightly, and my friend’s car fired up instantly—an easy fix that cost nothing.
Clean and Reinstall the Ground Strap
Use a wire brush or rust remover to thoroughly clean the connection points on both the strap and the chassis or engine mounting point. Apply a thin layer of dielectric grease to prevent future corrosion. Reattach the strap tightly using your socket wrench. Make sure the connection is solid—wiggle it gently to verify stability. Once reconnected, try starting the engine. My last success story involved this straightforward clean-and-tighten process, which restored reliable starts in cold weather.
Test the Repair Effectiveness
Turn on your vehicle’s ignition without starting the engine to see if dashboard lights appear normally. Then, attempt to start the car. If it cranks steadily, you’ve likely resolved the issue. If not, revisit your connections or consider other causes like the battery or starter. For a comprehensive approach to diagnosing starting problems, see decoding vehicle diagnostics. Remember, a solid ground is vital—think of it as ensuring your vehicle’s electrical circuits have a reliable ‘home base’. This simple check often triples your chances of fixing the no-start without expensive repairs or towing.Many car owners operate under misconceptions about routine maintenance and diagnostics, believing that simple tasks like oil changes or brake services are straightforward. However, the nuances behind these procedures often make the difference between a car that runs smoothly and costly repairs down the line. For instance, there’s a common myth that all oil changes are the same—yet, modern engines benefit greatly from advanced oil formulations and technologies that extend engine life, which many overlook. Understanding these subtleties can help you make informed decisions, saving money and avoiding unnecessary repairs.
Another misconception is that vehicle diagnostics are always foolproof. While scan tools are invaluable, relying solely on generic codes can lead to misdiagnosis. Advanced diagnostics involve interpreting data patterns and understanding subtle sensor behaviors. For example, misreading an oxygen sensor’s signals without considering engine load or driving conditions can lead to replacing parts unnecessarily. These mistakes often stem from a lack of knowledge about the vehicle’s complex electronic systems.
When it comes to brake service, many assume that replacing pads is enough. However, neglecting related components such as rotors, calipers, or brake fluid quality can compromise safety and performance. A common trap is to overlook the importance of brake fluid bleeding and rotor resurfacing, which ensures a firm pedal feel and prevents premature wear. Check out brake service myths busted to learn what truly matters.
For the advanced reader, consider this: How do we accurately diagnose intermittent or complex failures that don’t leave a clear code?
Can Modern Diagnostic Tools Replace Hands-On Experience?
While high-tech scanners and software have revolutionized diagnostics, they can’t replace a seasoned technician’s intuition and experience. Subtle clues—like a slight hesitation during acceleration or a faint vibration—are often best interpreted through a trained eye and ear. Studies indicate that experienced technicians can detect up to 80% of vehicle faults through sensory analysis before the scanner even pulls a code, emphasizing that technology complements but doesn’t replace skill. Learn more about how diagnostic technology is evolving here.
Ultimately, knowing what to look for—beyond the basics—empowers you to avoid costly mistakes and perform better vehicle care. Have you ever fallen into this trap? Let me know in the comments.
Investing in Reliable Diagnostic Equipment
As a passionate auto enthusiast, I can’t overstate the importance of having a quality scan tool in your garage. I personally rely on the Autel MaxiSys MS906 because it offers comprehensive code reading, live data streaming, and ECU programming abilities. Unlike basic code readers, this device allows me to pinpoint complex electronic issues—especially helpful for modern vehicles with sophisticated sensor arrays. Over time, having a reliable diagnostic tool not only saves money by avoiding unnecessary repairs but also empowers you to take quick action on emerging problems before they escalate. Predicting the future, diagnostic technology is heading toward advanced integration with AI, making vehicle health checks more intuitive and predictive.
Mastering Routine Maintenance with Specialized Tools
Keeping your vehicle in top shape involves regular maintenance, but knowing the right tools makes all the difference. For oil changes, I recommend using a remote oil filter wrench—it allows quick access to filters in tight spaces and prevents spills. For brake service, I swear by a digital caliper gauge to measure rotor thickness precisely, ensuring you replace components only when necessary. When diagnosing long-term issues like slow oil leaks, a UV dye and flashlight kit can reveal tiny leaks invisible to the naked eye. These tools, combined with a detailed maintenance schedule, extend your vehicle’s lifespan and uphold safety standards. Looking ahead, automation in maintenance tools—like robotic arm oil dispensers—is poised to further streamline routine tasks.
How do I maintain vehicle diagnostics over time?
Consistent calibration of your diagnostic equipment is vital. Regularly update scan tool firmware and software to keep up with manufacturer-specific codes and parameter adjustments. Additionally, develop a habit of cross-referencing diagnostic results with physical inspections—relays, sensors, and wiring harnesses often need manual verification. For deeper insights, I recommend reading decoding vehicle diagnostics to enhance your interpretative skills. With diligent maintenance and learning, you’ll transform minor issues into manageable DIY projects, reducing downtime and repair costs. I encourage you to try calibrating your scan tool today—it’s a simple yet effective step toward better vehicle health monitoring and long-term savings.
Lessons from the Garage: The Auto Repair Secrets I Wish I Knew Sooner
- Always double-check the grounding straps before assuming electrical components are faulty; a simple inspection can save you time and money. My lightbulb moment was discovering corroded ground connections that were causing my starter to misfire.
- Personal experience taught me that cleaning and tightening existing connections often outperform replacing parts, especially when the issue is corrosion or loose bolts. It’s a satisfying reminder that sometimes, the simplest fix is the most effective.
- Investing in good diagnostic tools has been a game-changer. Understanding how to interpret sensor data can help you identify issues early—saving you from costly repairs or being stranded. I rely on trusted resources like advanced diagnostics.
- Patience and careful inspection are crucial. Rather than rushing to replace parts, take time to evaluate connections, cables, and corrosion. This approach often reveals the overlooked culprit and improves your confidence as a DIY mechanic.
- Keep learning from each repair experience. Over time, these lessons build your intuition—making troubleshooting a rewarding puzzle rather than a frustrating chore. Remember, every minor fix brings you closer to mastering your vehicle’s health.
Tools and Resources That Elevated My Auto Repair Journey
- Autel MaxiSys MS906: A comprehensive diagnostic scanner that offers detailed insights into vehicle electronics, helping me diagnose complex issues quickly and accurately.
- UV Leak Detection Kit: Small but powerful, it reveals tiny leaks and electrical shorts that are invisible to the naked eye, saving hours of trial-and-error.
- Remanufactured Ground Straps: Reliable replacements that restore a solid electrical connection without breaking the bank, ensuring peace of mind on long drives.
- RepairPro’s Blog and Tutorials: Educational resources that clarify perplexing sensor readings and wiring diagrams, empowering me to troubleshoot with confidence.
You Can Take Charge of Your Vehicle Maintenance Now
Remember, consistent inspections, educational curiosity, and investing in quality tools are your pathways to becoming more self-reliant in auto repair. Tackling issues like a faulty ground strap or interpreting diagnostic codes can transform frustration into achievement.
Are you ready to start applying these lessons to your own car repairs? Share your experiences below or ask questions—we’re in this journey together!