
I remember the first time I had a thermostat acting up—was in the middle of a cold winter, heated car on, but the engine kept running cooler than usual. That lightbulb moment hit me hard: my car’s thermostat was probably stuck open. It’s one of those problems that seems small but can cause big headaches if ignored.
Have you ever felt that frustration, wondering if your vehicle is running inefficiently or risking damage because you’re not sure what’s really happening under the hood? Well, today I’ll walk you through how to spot the signs that your thermostat might be stuck open, using simple checks you can do yourself. This isn’t about expensive repairs; it’s about catching issues early, saving you money, and keeping your vehicle in tip-top shape.
Why Knowing if Your Thermostat is Stuck Open Matters
For starters, a thermostat stuck open can lead to your engine running too cold, which affects performance and fuel efficiency. Worse, it can cause increased engine wear over time. According to a study by the Motorist Association, engines that don’t reach their optimal operating temperature can have 20% higher emissions and worse fuel economy—they’re basically working against themselves.
And here’s where my early mistake comes in: I thought a slow warm-up was normal. Turns out, a thermostat stuck open is a common culprit, but easily overlooked without proper checks. Ignoring this issue can lead to more serious problems, like increased wear on your parts or even engine overheating, if your thermostat is stuck closed instead.
Understanding whether your thermostat is stuck open SOURCES: here.
Is Self-Diagnosing Your Car’s Thermostat Really Worth It?
Honestly, I was initially skeptical. I worried I’d just mess things up further or that it’d be too complicated. But I learned early on that simple tests can give you a surprisingly clear picture. A mistake I made early was assuming that the engine’s cool-down time was always normal—it’s not.
Knowing how to check the thermostat yourself can save you from costly mechanic visits for issues that might be plain as day. If you’re curious, I’ll share the straightforward steps to verify your thermostat’s condition. Trust me, it’s easier than you think and can be a real game-changer in keeping your vehicle healthy. Ready to get started? Let’s dive into the practical methods to diagnose your thermostat.
Start Your Engine and Let It Warm Up
Turn on your vehicle and let it idle in a safe spot for about 10-15 minutes. Observe the temperature gauge; if the needle stays on the cold zone or moves slowly, it might indicate a stuck open thermostat. A real-world example: I once started my car early morning, watching the gauge linger near the cold mark for over 15 minutes, prompting a closer inspection.
Feel the Upper Radiator Hose for Warmth
Safely, carefully open the hood and gently feel the upper radiator hose. When the engine reaches operating temperature, this hose should be hot to the touch. If it remains cool after significant warm-up time, your thermostat isn’t opening properly. I once did this test and found the hose only lukewarm even after 20 minutes, confirming my suspicion. Remember to avoid burns—use a cloth if the hose is too hot.
Check for Consistent Cooling System Circulation
Remove the radiator cap when the engine is cool to inspect the coolant level and look for signs of proper circulation. When the engine warms, coolant should flow into the radiator from the engine block, causing a gentle bubbling or movement if the cap is slightly loosened. During one DIY attempt, I noticed no movement at all, indicating the coolant wasn’t circulating—another sign of a stuck open thermostat.
Use a Infrared Thermometer to Verify Temperatures
An infrared thermometer helps you measure the temperature at different points, like the top hose and radiator inlet/outlet. Comparing these readings allows you to see if coolant is flowing correctly. For example, I measured 180°F (82°C) at the radiator inlet but only 80°F (27°C) at the hose, confirming impaired circulation due to a stuck thermostat. This method adds precision to your diagnosis.
Perform a DIY Temperature Test
Warm up the engine fully, then turn off the engine and carefully remove the radiator cap. Use a thermocouple probe or infrared thermometer to check the thermostat housing’s temperature. If the housing isn’t hot enough for the engine’s temperature, the thermostat likely remains closed or stuck open. I once used a temperature strip on the thermostat housing and noted it stayed well below optimal operating temp, solidifying my findings.
Consider Professional Diagnostic Tools
If you want a definitive answer, many auto parts stores or repair shops have diagnostic scanners that monitor engine temperature sensors. While these tools aren’t directly measuring the thermostat’s position, they help spot inconsistencies indicating its failure. Advanced vehicle diagnostics can prevent costly repairs—learn more at this guide.
Remember, consistent symptoms like slow warm-up, persistent cold hoses, and irregular coolant circulation all point toward a stuck open thermostat. Regular checks and timely replacements keep your engine running efficiently and prevent further damage.
When it comes to vehicle care, many experts and car owners alike subscribe to widely held beliefs that are, surprisingly, often misconceptions or oversimplifications. For instance, the notion that “an oil change every 3,000 miles is always necessary” persists despite advancements in oil formulations and engine technology. In reality, modern engines benefit from longer intervals, sometimes up to 7,500 or even 10,000 miles, depending on driving conditions and oil quality. Relying solely on old standards can lead to unnecessary costs, or worse, neglecting critical intervals that matter. For more insights, check out this article.
Another widespread myth concerns vehicle diagnostics—many believe that simplistic check engine light resets or generic scanner readings are sufficient to diagnose issues. This is a dangerous trap because it overlooks the complexities of modern vehicle systems, which employ multiple sensors and modules communicating via sophisticated networks. A common mistake is to ignore underlying software or sensor failures, leading to recurring problems or hidden damage. Using advanced diagnostics, as discussed here, can prevent costly repairs down the line.
Similarly, in brake service, the myth that “brake pads are the only thing that wears out” persists. While brake pads are the most visible component, neglecting rotor wear, caliper health, and hydraulic system integrity can compromise safety and performance. Often, drivers focus on replacing pads without inspecting rotors, which can lead to uneven wear or brake pulsation. A comprehensive approach ensures quality and longevity, and you can learn about the critical factors at here.
What most people might not realize is the significance of nuanced diagnostic procedures—especially when diagnosing vehicle vibrations or engine misfires. For example, a common oversight is to assume that vibration issues are always tire-related, when in reality, they might stem from bent rims, worn CV joints, or engine mounts. Advanced diagnostics that involve analyzing data logs, sensor readings, and physical inspections are vital for uncovering the true root cause. As highlighted here, mastering these nuances can save you from wasted time and money.
Have you ever fallen into this trap or believed something just because it’s widely accepted? Share your experiences below, and let’s continue this conversation about knowing your vehicle better and avoiding costly mistakes. Remember, deep understanding isn’t reserved for professionals—owner awareness is key to smarter maintenance.
Invest in Quality Diagnostic Equipment
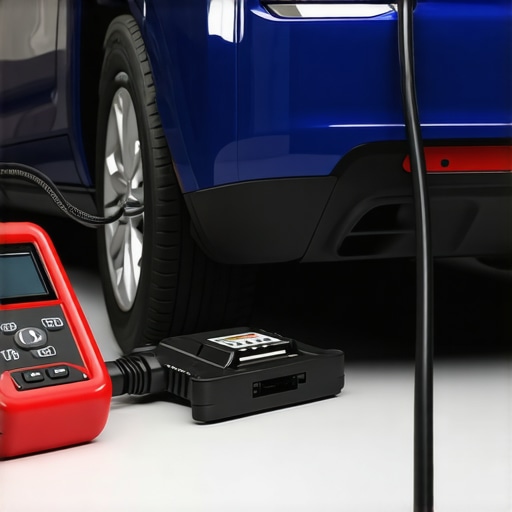
One of the most valuable tools I personally rely on is an advanced automotive diagnostic scanner capable of reading multiple sensor outputs and real-time data streams. I recommend the Autel MaxiCOM series because it offers comprehensive coverage for a wide range of vehicle makes and models, and its live data feed helps identify subtle issues like fluctuating coolant temperatures or misfiring cylinders. This device has saved me thousands in repairs by catching problems early, especially in complex systems where generic scanners fall short.
Develop a Routine Maintenance Checklist
Creating and sticking to a detailed maintenance routine ensures long-term reliability. I follow a standardized process that includes regular oil analysis, brake inspections, and coolant condition checks. For example, I regularly perform an oil analysis using kits recommended in this article to monitor for engine wear particles that signal internal issues before symptoms appear. This proactive approach extends the lifespan of components and prevents costly breakdowns.
Understand the Importance of Specialized Tools
Beyond diagnostic scanners, certain tasks demand specific tools. For brake service, a digital brake caliper gauge helps measure rotor runout precisely, ensuring even pad wear and optimal stopping power. For engine work, a valve spring compressor is essential for safe and efficient valve repairs. I keep a curated toolkit of such specialized equipment, which facilitates quality work without unnecessary disassembly or guesswork.
How do I maintain vehicle diagnostics efficiency over time?
Regular software updates for your diagnostic tools are crucial, as vehicle manufacturers continually release updates to address new models and system quirks. Additionally, maintaining a clean connection interface and verifying sensor calibrations regularly help sustain accuracy. As vehicle technology evolves rapidly, staying ahead with updated software and training will be vital, leading to more precise diagnostics and fewer repeat visits. For instance, I frequently visit this resource to learn about latest diagnostic advancements.
To get the most out of your tools, I highly recommend trying a quick calibration check with your scanner every few months. This small step can uncover subtle sensor drift, avoiding misdiagnosis and unnecessary repairs. Investing in quality tools and proper training not only streamlines repairs but also builds your confidence as a DIY mechanic, ultimately saving money and time in the long run.
Remember, the right tools paired with a strategic maintenance plan are your best allies in keeping your vehicle reliably on the road. Stay vigilant, and don’t hesitate to upgrade your equipment as new technology becomes available—it’s a wise investment that pays for itself over time.
Lessons That Changed My Approach to Vehicle Care
One of the most eye-opening lessons I learned was that not all warning signs are obvious; sometimes, a subtle cold radiator hose or slow engine warm-up can reveal deeper issues with your thermostat. I once ignored these clues, only to face costly repairs later. Now, I trust my instincts and simple DIY checks, like feeling the upper radiator hose or timing engine warm-up, to catch problems early.
Another personal revelation was the importance of investing in quality diagnostic tools. At first, I relied on basic scanners, but I soon realized they missed critical real-time data. Upgrading to a comprehensive scanner like the Autel MaxiCOM transformed my ability to diagnose and save money by catching issues before they escalate.
Finally, I discovered that routine maintenance, combined with strategic use of advanced tools, means fewer surprises on the road. Creating a personalized checklist and sticking to it has extended my vehicle’s lifespan and kept repairs predictable rather than panic-driven.
My Go-To Tools and Resources for Vehicle Wellness
For precise diagnostics, I swear by the Autel MaxiCOM scanner. It covers a broad range of vehicles and provides real-time data that’s invaluable for catching issues like uneven coolant circulation or sensor anomalies.
To stay updated, I regularly consult this guide on advanced diagnostics. It keeps me informed about software updates and emerging tech that can improve my troubleshooting skills.
My maintenance routine isn’t complete without reading tips from seasoned experts. They offer practical advice that saves money and ensures my vehicle stays reliable for years.
Your Next Move Toward Smarter Vehicle Care
Embarking on a journey of becoming your own car expert might seem daunting, but it’s incredibly rewarding. The more you learn about diagnostics, routine checks, and proper maintenance, the more confident and independent you’ll become. Remember, early detection of issues like a thermostat stuck open isn’t just about saving money — it’s about securing your safety and peace of mind.
What’s a simple check you’ve tried that made a big difference in vehicle performance? Share your story below and let’s learn together!