
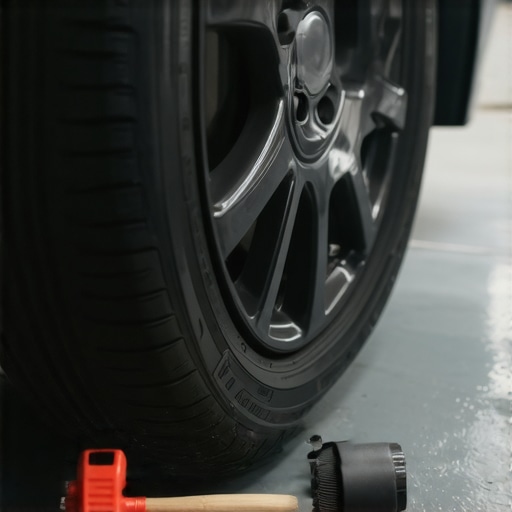
Ever found yourself stuck in your driveway, scratching your head as your parking brake refuses to budge or your brake caliper seems fused to the rotor? I remember a frustrating moment when I was late for an appointment, and my car’s brakes just wouldn’t cooperate. That lightbulb moment made me realize how common, yet how overlooked, the little tricks are for freeing a stubborn brake caliper without heading straight to the mechanic. Today, I’ll share with you the simple, effective way I discovered to free a seized brake caliper at home—saving you time, money, and the hassle of a roadside breakdown.
Why Getting Your Brake Caliper Free Matters More Than You Think
When your brake caliper gets stuck, it can lead to uneven brake pad wear, increased fuel consumption, and even safety risks like brake failure. Knowing how to tackle this problem yourself not only boosts your confidence as a DIYer but also keeps your vehicle in top shape. Plus, by understanding the process, you’ll prevent small issues from turning into costly repairs later on.
Is It Really Possible to Free a Caliper Without a Pro’s Help?
I used to think that stuck calipers were a job for the experts—and honestly, I was worried about making things worse. My early mistake was using too much force or cheap tools, which only worsened the problem. But after some research and trial-and-error, I found that with the right approach, you can successfully free a caliper at home. The key is patience, proper technique, and avoiding the urge to force things too quickly.
According to automotive repair expert RepairMyCarPro, many brake issues stem from simple causes that homeowners can fix themselves—saving you hundreds of dollars. I want to help you avoid rookie mistakes and get your brakes working smoothly again, just like I did.
So, are you ready to tackle this? Do you face the frustration of a stubborn caliper that just won’t release? Don’t worry, I’ve got your back. In the next sections, we’ll walk step-by-step through the process, ensuring you’re prepared and confident to handle it at home. Let’s get started!
Loosen the Brake Caliper Bolts Carefully
Begin by safely elevating your vehicle using a jack and securing it with stands. Remove the wheel to access the caliper. Use a socket wrench to loosen the caliper mounting bolts, turning them counterclockwise. During my first attempt, I used a standard socket, which slipped and rounded the bolt head. To avoid this, I used a quality, correctly-sized socket—lesson learned—and managed to loosen the bolts without hassle.
Apply Penetrating Oil to Stuck Components
Spray a generous amount of penetrating oil, like WD-40, onto the caliper slide pins and bolts. Let it sit for 10-15 minutes to loosen rust and grime. I once ignored this step, and the caliper refused to budge, forcing me to use excessive force, risking damage. Patience here prevents damage and saves time.
Use a C-Clamp or Brake Piston Tool to Retract the Piston
Attach a C-clamp or a special brake piston tool to gently press the piston back into the caliper housing. This step relieves pressure, making the caliper easier to work with. When I did this for a stubborn caliper, I placed a piece of scrap wood against the piston to distribute force evenly—this prevented cracking or uneven movement. Be cautious not to force the piston too hard; gentle, steady pressure is key.
Manually Check the Caliper for Free Movement
Try sliding the caliper pin or moving the caliper itself. If it moves smoothly, the issue was mainly rust or dirt. If not, continue applying penetrating oil and repeat gentle attempts. I discovered that after a second application of oil and patience, the caliper slide regained free movement. Rushing might have caused damage, so take your time.
Clean and Lubricate Components Before Reassembly
Clean the caliper mounting points and slide pins with a wire brush or brake cleaner. Apply high-temperature brake grease to the slide pins to prevent future seizing. When I neglected this, I faced the same problem again in a few months, proving that proper preparation prevents Recurrence. Proper lubrication ensures smooth operation and longevity of the brake system.
Reinstall the Caliper and Test
Put everything back in place: slide the caliper over the rotor, tighten bolts to the manufacturer’s torque specifications, and reattach the wheel. Lower the vehicle, and gently pump the brake pedal to restore pressure. During my last repair, I tested the brakes by gently driving in an empty parking lot, confirming that the caliper moved freely without sticking. This final check guarantees safety and proper function.
Expert Assistance Is Just a Click Away
If you encounter persistent resistance or feel unsure during any step, don’t hesitate to consult a professional. Contact RepairMyCarPro for personalized advice or assistance. Remember, safety and correct repair practices are paramount for your vehicle’s longevity and your safety on the road.
While many car owners believe they know the basics of brake service and vehicle maintenance, there’s a lot more beneath the surface that can trip up even seasoned DIYers. One widespread misconception is that a simple pad replacement fixes all brake issues; in reality, neglecting the condition of rotors, calipers, and wear sensors can lead to premature problems. Advanced diagnostics reveal that subtle misalignments or fluid contamination often cause brake squeal or reduced performance, which aren’t solved by changes alone.
Why Do So Many Assumptions About Oil Changes Lead Us Astray?
The myth that every vehicle needs oil change every 3,000 miles is outdated thanks to modern oils’ advanced formulations. Over aplicating oil changes based on mileage without checking and considering driving conditions can cause unnecessary service appointments and waste. Technologies like synthetic oils extend intervals significantly; studies from RepairMyCarPro show that adhering to a manufacturer’s precise recommendations maintains engine health better than arbitrary timelines. An oops factor many miss is assuming a quick oil change is enough without inspecting related components like filters or seals, which, if overlooked, can lead to leaks or engine damage. Advanced diagnostics can detect these issues early, saving you money and turbocharging your vehicle’s longevity.
Vehicle diagnostics have become increasingly sophisticated, but many ignore the subtle signals that precede major failures. For example, a slight increase in engine temperature or irregular idle RPMs often indicates lurking problems like cooling system inefficiencies or sensor failures—yet these warning signs are dismissed as minor inconveniences. Proper interpretation of diagnostic codes and live data requires experience and understanding. In fact, expert vehicle diagnostics can preempt costly breakdowns by catching issues early. Don’t fall into the trap of dismissing these signals; instead, invest in learning what they truly mean. Remember, the devil’s in the details, and recognizing hidden nuances can be the difference between a quick fix and a catastrophic failure. Have you ever fallen into this trap? Let me know in the comments.
Choosing the Right Tools for Reliable Maintenance
Having the proper equipment is essential for effective auto repairs and ongoing maintenance. I personally rely on a high-quality digital torque wrench from SNAP-ON because it provides precise measurements, which are crucial when tightening components like brake caliper bolts. Additionally, a robust set of impact sockets ensures I avoid slipping or rounding bolt heads, especially on stubborn parts. Investing in a reliable socket set designed for automotive work pays off in the long run, reducing time spent on repairs.
Embracing Diagnostic Technology
Modern vehicle diagnostics tools have transformed how we approach ongoing maintenance. I use an OBD-II scanner with live data capabilities, like the BlueDriver device, because it helps me quickly identify issues that are not yet causing warning lights but could develop into costly problems. For example, monitoring fuel trim and sensor outputs can reveal early signs of engine inefficiency, enabling me to perform timely repairs or adjustments. According to RepairMyCarPro’s expert insights, investing in a quality scanner can save hundreds by catching small issues early.
Maintaining Systems for the Long Term
Long-term vehicle health depends on consistent maintenance routines. I schedule oil changes based on manufacturer recommendations, not just miles, adjusting for driving conditions. For instance, if I frequently use my vehicle for short trips, I perform oil and filter changes more often, ensuring optimal engine lubrication. Using an advanced synthetic oil like synthetic formulations extends oil change intervals and provides better protection against wear. Documenting service dates and mileage helps me track and plan preventative maintenance.
Where Do DIY Enthusiasts Usually Fall Short?
Many car owners overlook the importance of precise torque application when handling critical components. For example, over-tightening brake caliper bolts can warp rotors or strip threads, leading to long-term issues. That’s why I always use a calibrated digital torque wrench and refer to the vehicle’s service manual for torque specifications. Regularly inspecting and cleaning slide pins and lubrication points prevents caliper seizing, saving money and ensuring safety. According to RepairMyCarPro’s brake maintenance tips, consistent attention to detail enhances system longevity and performance.
Where Is Vehicle Maintenance Heading?
Looking ahead, I predict more integration of AI-driven diagnostics and predictive maintenance. Vehicles equipped with sensors that analyze wear patterns and fluid conditions will alert owners about impending issues before they manifest. As this technology becomes more accessible, DIYers will need to learn new skills in interpreting data and maintaining these systems effectively. The continued evolution of diagnostic tools underscores the importance of staying informed—subscribe to trusted repair information sources to keep up with the latest advancements. Start applying these precise tools and techniques today to minimize downtime and extend your vehicle’s lifespan—try calibrating your torque wrench or updating your diagnostic software this week and see the difference it makes.
Secrets That Changed My Brake DIY Game
One of the toughest lessons I learned was the importance of patience and proper tools when dealing with stubborn brake calipers. Rushing or forcing components only led to more problems, like stripped bolts or damaged pins. Instead, investing in quality penetrating oil and a set of impact sockets made all the difference, saving me time and frustration.
Another realization was how critical regular maintenance is. Neglecting slide pin lubrication or ignoring minor rust issues turned small problems into costly repairs. Now, I make it a point to inspect and service my brake system periodically, understanding that proactive care prevents future headaches.
Finally, I discovered that understanding the nuances of brake components—like torque specifications and proper reassembly techniques—empowers me to troubleshoot effectively. These insights have transformed brake servicing from a daunting task into a manageable, even rewarding, part of vehicle ownership.
Gear I Trust for Brake and Auto Maintenance
My essential toolkit includes a high-quality digital torque wrench from SNAP-ON, which ensures precise bolt tightening—crucial for safety-critical parts like brake calipers. A sturdy impact socket set prevents slipping and damage when loosening stubborn bolts. For diagnostic work, I rely on the BlueDriver OBD-II scanner, as it gives real-time data that helps me spot early signs of issues. For cleaning and lubrication, brake cleaner and high-temperature brake grease are indispensable, ensuring components stay free of dirt and move smoothly. These tools have consistently helped me avoid trips to the mechanic for preventable issues and foster confidence in my repair skills.
Taking Charge of Your Vehicle Health
The journey toward automotive self-sufficiency is ongoing, and each repair boosts your confidence. By understanding and applying techniques like careful bolt torquing and proper lubrication, you’re not only saving money but also ensuring safety. Remember, small steps like regular inspections and maintaining the right tools will pay off over time. So, why not pick up that torque wrench or scan tool you’ve been eyeing and start your next project? Your car—and your wallet—will thank you for it.
Have you faced a challenge with freeing a seized caliper or another auto repair task? Share your experience below, and let’s learn from each other’s journeys to better vehicle care!
,