
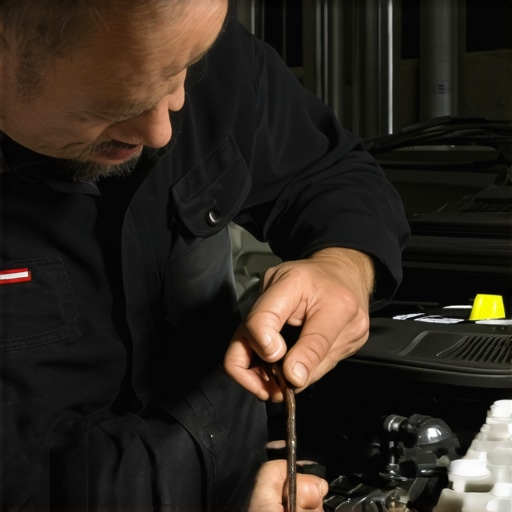
One afternoon, I was stuck in a frustrating cycle—my car sputtered, idled rough, and the check engine light seemed to glow brighter every time I turned the key. I had already tried the usual fixes—oil change, clicking through diagnostics, even a fresh set of spark plugs—but nothing seemed to solve the real problem beneath the hood. Then, in a burst of inspiration (or desperation), I remembered something I’d read about automotive troubleshooting: using a simple stick of incense to detect vacuum leaks. At first, I thought, “This can’t work,” but I was willing to try anything to avoid a costly trip to the shop.
Discovering Hidden Leaks Without Breaking the Bank
Using incense to locate vacuum leaks isn’t just a clever trick—it’s a game-changer for DIY enthusiasts. When a vacuum leak occurs, it allows unmetered air to enter the engine, disrupting the combustion mixture and causing performance issues. Finding that sneaky leak can be tricky, especially if it’s small or tucked away. But with a stick of incense, you can detect the leak smoke-free and with surprising accuracy. I’ll walk you through the practical steps I used, backed by some automotive expertise, to pinpoint those elusive leaks and bring your engine back to life without costly diagnostics. According to automotive technician experts, smoke tests are a common method for leak detection, and incense can serve as an effective, low-cost alternative for the home mechanic. Want to save yourself time and money? Keep reading.
Is the Incense Trick Too Good to Be True?
Early on, I made the mistake of thinking that I could just wave the incense around randomly and find the leak. That’s not how it works. It requires patience, steady hands, and knowing what to look for. I also underestimated how sensitive the smoke is—tiny leaks can cause big problems. Trust me, I learned this the hard way when I initially missed a small crack in a hose connector. But once I understood the process, the incense method became straightforward and surprisingly reliable. I promise, with a little practice, you’ll be able to detect vacuum leaks just like a pro. Curious if you’ve faced similar problems with your vehicle? If so, you’re about to learn a simple, effective trick that might change the way you diagnose engine troubles. For more essential auto care tips, check out [vehicle diagnostics explained](https://repairmycarpro.com/vehicle-diagnostics-explained-easy-checks-before-your-road-trip). Let’s get started!
Prepare Your Workspace and Gather Materials
Start by parking your car on a level surface and ensuring the engine is cool. You’ll need a few supplies: a box of plain incense sticks, a lighter or matches, safety gloves, and a flashlight. Wear gloves to protect your hands from heat or fumes. I remember one time, I almost burned my fingers fumbling in the engine bay—so gloves are a good idea. Position your car in a well-ventilated area to avoid inhaling smoke or fumes. With everything ready, open the hood and locate the vacuum hoses—these are usually rubber tubes connected to various engine components.
Identify Suspected Areas to Test
Next, examine the vacuum lines for signs of wear, cracks, or disconnections. Focus on common leak points like the intake manifold connections, small hoses near the throttle body, and the brake booster line. Think of these hoses as the lungs of your engine—if a lung is punctured, it won’t function properly. During my own repair, I found a small crack in a hose connector that I hadn’t noticed before. Mark these potential leak sites so you can focus your incense testing accordingly. Proper identification saves time and increases the chances of detecting elusive leaks.
Conduct Smoke Testing Using Incense
To generate smoke, light the incense stick and let it burn for a few seconds, then gently blow out the flame. You want a steady stream of smoke. Hold the incense close to the vacuum hose connections and joints while moving slowly around the suspected areas. Imagine it like a lighthouse beam scanning the shores for cracks—be patient and meticulous. When I did this, I noticed the smoke was drawn into a tiny crack near the throttle body, clearly indicating a leak. This simple visual cue helps you locate small leaks that can cause rough idling or stalling. Be cautious not to touch hot engine parts or your incense while testing. <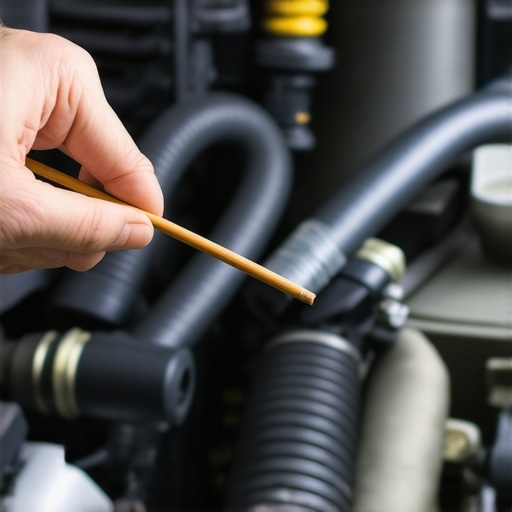 >
>
Observe for Smoke Ingress Signs
Watch closely for any smoke being pulled into a hose or escaping from a crack. Even a tiny trail of smoke can signify a significant leak. Remember, your goal is to find where the smoke is entering the engine’s intake under normal operating conditions. If no smoke enters the hoses, move to another suspected area. Using this technique, I identified a leak in the flex hose connected to the brake booster—quite a small crack, but enough to cause noticeable engine performance issues. Once located, replace or repair the affected hose to restore proper vacuum pressure.
Confirm and Repair the Leak
After identifying the leak, turn off the engine and allow the area to cool if it’s hot. Then, fix the leak by replacing cracked hoses or tightening loose connections. For small cracks, a high-quality hose clamp or sealant may suffice, but replacing damaged hoses is more reliable. I learned that trying to patch a crack temporarily leads to more frustration—sometimes a full replacement is the best solution. Once repaired, start the engine and repeat the incense test to confirm the leak has been eliminated. This method ensures your engine breathes cleanly and runs smoothly, saving you diagnostic time and repair costs.
When it comes to vehicle diagnostics and maintenance, many drivers operate on misconceptions that can lead to costly mistakes. A common myth is that all brake pads are created equal, but in reality, choosing the wrong pad type for your driving style or climate can significantly affect safety and longevity. Additionally, many assume a simple oil change suffices for engine health, overlooking the importance of synthetic versus conventional oils and the advancements in filtration technology that can extend intervals and improve performance. Recognizing these nuances is crucial for effective vehicle care.
Another misconception involves auto diagnostic tools. Beginners often rely solely on generic code readers, assuming they provide comprehensive insights. However, advanced diagnostics require specialized equipment and expert interpretation to identify issues like partial sensor failures or complex electrical anomalies that simple tools might miss. Misinterpreting diagnostic trouble codes (DTCs) without understanding their context can lead to unnecessary repairs or overlooked problems.
Beware of common pitfalls such as ignoring subtle signs of brake fade or abnormal vibrations, which could indicate underlying issues like warped rotors or worn suspension components. Rushing into repairs based solely on surface symptoms can mask the true cause, resulting in repeated visits and wasted money. The key is to approach diagnostics systematically and with an understanding of the vehicle’s intricacies.
For a deeper dive into effective auto repair strategies, check out [auto repair hacks that save money without sacrificing quality](https://repairmycarpro.com/auto-repair-hacks-save-money-without-sacrificing-quality). Additionally, understanding the importance of proper brake service can prevent accidents, as discussed in [the ultimate guide to brake service for safety and performance](https://repairmycarpro.com/the-ultimate-guide-to-brake-service-for-safety-and-performance). These resources emphasize the significance of nuanced knowledge in maintaining vehicle safety and performance.
Falling into these common traps can be costly, but awareness is the first step toward mastery. Have you ever fallen into this trap? Let me know in the comments. Remember, deep knowledge in auto repair isn’t just for professionals—it’s for anyone who wants to keep their vehicle running smoothly and safely.
Maintaining your vehicle’s health over time requires more than just basic knowledge—it demands reliable tools that provide accurate diagnostics and effective repairs. As I delved deeper into auto maintenance, I realized that investing in the right equipment is essential for anyone serious about keeping their car running smoothly and avoiding costly breakdowns. From advanced diagnostic scanners to specialized repair kits, each tool I use has proven invaluable in my DIY arsenal. For example, I routinely rely on a high-quality code reader that not only deciphers standard DTCs but also offers live data streams, allowing me to pinpoint issues quicker. This aligns with recommendations from automotive diagnostic experts, who suggest that comprehensive tools like the Decoding Vehicle Diagnostics guide can empower drivers to understand what their cars are telling them—saving time and money. Looking ahead, the trend points toward smarter, more connected diagnostic systems that can troubleshoot and even recommend repairs remotely, making vehicle maintenance more accessible to the average owner.
How do I maintain my diagnostic tools over time?
Keeping your diagnostic equipment in top shape means regular calibration and updates. I make it a point to connect my scanner to the manufacturer’s software periodically, ensuring compatibility with the latest vehicle models. Additionally, storing tools in a clean, dry environment prevents corrosion and damage. For software, subscribing to official updates ensures you have access to new protocols and bug fixes, which is crucial as vehicle electronics evolve rapidly. Investing in a durable carrying case also protects your tools during transport and prevents accidental drops that could compromise their functionality. With proper maintenance, your tools will serve you reliably for many years, enabling ongoing vehicle health monitoring and early problem detection. For more advanced auto repair tips, check out auto repair hacks that save money without sacrificing quality. Remember, consistent upkeep of your tools is as important as servicing your vehicle—so set a schedule and stick to it.
Predictively, the future of automotive tools will integrate AI diagnostics and cloud-based data sharing, allowing even novice users to perform complex repairs confidently. As these technologies become mainstream, maintaining your current equipment and staying updated with the latest software will keep you ahead of breakdowns and costly repairs.
Less Is More: Lessons That Changed My Approach to Auto Repair
One of the most revealing lessons I learned was that overcomplicating diagnostics often leads to more confusion than clarity. I used to rely heavily on fancy scanners and guesswork, but the simple incense trick taught me to trust visual cues and patience. Also, I realized that understanding my vehicle’s specific quirks—like how vacuum leaks manifest—made troubleshooting more efficient. Finally, I discovered that sometimes, the best tools are the ones you already have; you just need to know how to use them effectively.
What’s Next for DIY Enthusiasts
For anyone eager to take auto repair into their own hands, I recommend investing in reliable diagnostic tools like the Decoding Vehicle Diagnostics guide, which deepens your understanding of engine signals. Exploring trusted resources such as top auto repair tips can prevent costly mistakes. Don’t forget—attention to detail and patience are your best allies in DIY repairs.
Seize the Moment and Get Your Hands Dirty
Embarking on auto diagnostics might seem intimidating at first, but with a curious mind and a calm approach, you can make significant strides. Imagine the confidence you’ll feel when you locate a vacuum leak using just incense or identify a faulty hose before it causes more damage. Now is the time to start experimenting, learning, and saving money—your vehicle and your wallet will thank you. What’s one auto repair skill you’ve been hesitant to try? Share below—let’s grow together in this journey!