
Picture this: you’re cruising down the highway, enjoying your favorite playlist, when suddenly your engine stutters, loses power for a second, and then smooths out. But deep down, you know something’s not right. That unsettling moment makes you wonder—could it be my ignition coil? I’ve been there, frustrated trying to pinpoint which part is actually causing that rough idle or hesitation, only to end up replacing parts blindly and wasting money.
Over the years, I’ve learned that diagnosing an ignition coil failure isn’t about guessing—it’s about knowing where to look, what symptoms to trust, and how to avoid common mistakes. Today, I want to share a practical, no-nonsense approach to identify which ignition coil is actually failing, and how you can do it yourself before a simple misfire turns into a costly breakdown.
Let’s Find Out Which Ignition Coil Is Failing—Without Guesswork
Is It Worth the Hassle to Pinpoint the Exact Coil?
Trust me, early on I made the mistake of swapping coils at random or replacing whole sets just because of a hesitation or check engine light. Not only did I empty my wallet, but I often replaced coils that weren’t even faulty. According to industry experts, incorrectly diagnosing coil problems can lead to unnecessary repairs and lingering issues. A more targeted approach not only saves money but extends your vehicle’s life and keeps you confident on the road.
If you’re asking yourself whether it’s worth the effort to identify the specific failing coil, my answer is a resounding yes. It’s about pinpointing the root cause, preventing future breakdowns, and understanding your vehicle better. Think of it as becoming your own auto diagnostic hero—saving time, hassle, and cash.
My Early Mistake and How You Can Avoid It
One mistake I made was relying solely on the engine code without further testing. That often pointed me in the right direction, but not always. Today, I recommend verifying symptoms with simple tests and sometimes consulting with a professional if needed. For more insight on how advanced diagnostics can help prevent costly failures, check out this guide.
Next, we’ll get into the nuts and bolts of how to actually identify a failing ignition coil—without expensive tools or guesswork. Ready? Let’s dive in and turn you from a worry-wart into a confident DIYer who knows exactly what’s going on under the hood.
,
Use a No-Guess Method to Find the Bad Coil
Prepare Your Vehicle and Tools
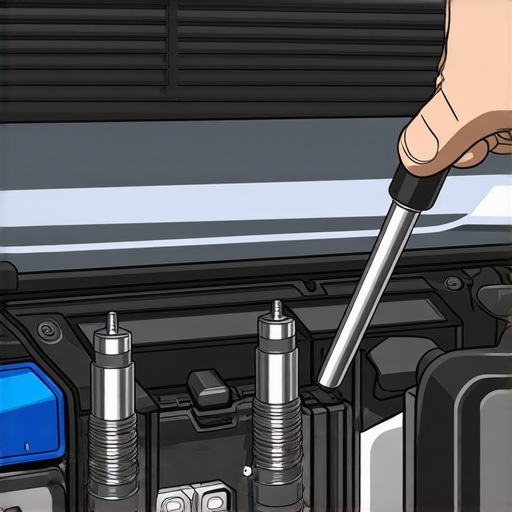
Park your car on a level surface, engage the parking brake, and turn off the ignition. Open the hood and locate your ignition coils—these are usually coil packs or individual coils on top of each cylinder. Gather a digital multimeter or a spark tester, and wear safety gloves and eye protection. I once tested coils with a basic multimeter that only measured resistance; it saved me from unnecessary replacements. Ensure your battery is in good condition to avoid false readings and connect the multimeter to the primary resistance terminals of each coil following the vehicle’s service manual.
Perform Resistance Checks on Coils
Set your multimeter to Ohms (Ω) and check each coil’s primary resistance—typically between 0.4 to 2 ohms, but consult your manual. Comparing each coil’s reading helps identify irregularities. For example, I once found a coil with a resistance of over 10 ohms—signaling internal damage. If your readings fall outside normal specs, that coil is likely faulty. Remember, a coil that reads infinitely or has no continuity is definitely bad. For detailed resistance ranges for common vehicles, visit this diagnostic guide.
Check for Spark with a Spark Tester
Remove a spark plug wire or coil-on-plug connector and connect the spark tester. Crank the engine and observe if the tester emits a strong, blue spark. If there’s no spark or it’s faint, the coil isn’t delivering current properly. I once used this method on a friend’s sedan; the spark tester revealed weak sparks on two cylinders, which led me to replace the coils only on those cylinders—saving us hundreds compared to replacing all coils. Be cautious: safety first—never test near moving parts or in wet conditions. For more on diagnosing ignition issues, see auto repair best practices.
Swap or Replace Faulty Coils
If you identify a weak or dead coil, try swapping it with a coil known to be good—like swapping a faulty flashlight bulb in a test. Start the engine and see if the misfire follows the coil. If the misfire appears on a different cylinder after swapping, that coil is the culprit. Otherwise, the problem may lie elsewhere. Remember, some coils are part of an ignition pack; replacing the entire pack might be necessary if individual testing doesn’t yield conclusive results. Checking the vehicle’s service manual for specific testing procedures is recommended. For further insight on how to avoid costly auto repairs, check this article.
Final Tips for Accurate Diagnosis
Always perform multiple tests to confirm a coil’s failure and avoid replacing parts unnecessarily. Marketplace tutorials often oversimplify diagnosis; real-world testing involves a combination of resistance checks and spark tests. As I experienced during a roadside breakdown, relying solely on engine codes without testing led me to replace coils that were actually fine. Consider consulting professional diagnostics if you’re unsure, but mastering these basic tests boosts your confidence and keeps repair costs down. To understand how diagnostics can prevent breakdowns, visit this comprehensive guide.
When it comes to brake service, auto repair, or even routine oil changes, many car owners rely on common clichés or superficial advice, overlooking the subtle but critical nuances that can make a significant difference in maintenance quality and vehicle longevity. A typical misconception is assuming that all brake pads or oils are created equal, which isn’t true. For instance, some believe that spending more always guarantees better performance, but in reality, understanding your vehicle’s specific needs and the proper application of quality parts and procedures is what truly matters.
An often-ignored aspect is the importance of precise diagnostics before undertaking repairs. Many drivers attempt to address symptoms like squeaking brakes or sluggish acceleration without deeper testing, which can lead to unnecessary replacements or missed issues. It’s akin to diagnosing a health problem solely based on symptoms without proper medical tests. External factors like road salt, humidity, or driving habits subtly influence component wear but are frequently dismissed, leading to premature failures. For deeper insights, see how diagnostics save you money.
A common trap is trusting low-cost or generic parts when genuine or OEM parts are needed. While budget parts seem attractive, their inferior materials can cause problems later. Conversely, some think that professional service always guarantees optimal results, but even skilled mechanics can overlook vehicle-specific nuances if they rely solely on generic manuals or outdated procedures.
Advanced vehicle diagnostics reveal that subtle electrical issues, temperature fluctuations, or sensor misalignments can masquerade as simple mechanical problems. This is particularly true for complex systems like ABS, stability control, or engine management. For example, ignoring minor but consistent sensor errors may lead to larger system failures down the line. A deep understanding of your vehicle’s diagnostics can help prevent this.
One critical warning is the misconception that all vehicle issues stem from worn-out parts—many are caused by faulty sensors, corroded connections, or software glitches. Recognizing this nuance can prevent unnecessary part replacements and focus efforts on the actual cause. Moreover, neglecting routine checks on things like your cabin air filter or coolant levels can lead to hidden problems that affect overall system performance.
In your experience, have you ever fallen into this trap? Let me know in the comments. Remember, mastering these subtle distinctions can extend your vehicle’s lifespan, improve safety, and save you considerable money in the long run. To build your auto repair skills further, explore auto repair hacks for saving money and tips to extend your vehicle’s life. Stay curious and attentive—your car will thank you.
Investing in the Right Equipment for Long-Term Reliability
Consistency in vehicle maintenance hinges on having the proper tools and establishing a routine that prioritizes precision over guesswork. Personally, I swear by a high-quality digital multimeter, like the Fluke 115, because its accuracy and durability make testing components like ignition coils and sensors straightforward and reliable. Unlike cheaper models that may give inconsistent readings, a Fluke helps me diagnose electrical issues efficiently, saving time and money.
Alongside a multimeter, I rely on a reputable code scanner such as the BlueDriver Bluetooth Scan Tool. It links seamlessly with my smartphone, providing real-time data and access to manufacturer’s-specific codes. This combination allows me to verify engine trouble codes against actual sensor readings and diagnose underlying problems without unnecessary part replacements. As vehicle electronics grow more complex, investing in advanced diagnostic tools is no longer optional—it’s essential for maintenance consistency.
Implementing Routine Diagnostics for Longevity
Routine diagnostics prevent tiny issues from snowballing into costly repairs. I recommend scheduling comprehensive checks at least twice a year, utilizing both professional services and DIY techniques learned from trusted resources. For example, I use simple resistance and spark tests before long trips to ensure ignition and electrical systems are in top shape. This proactive approach maximizes vehicle lifespan and performance.
Scaling Your Maintenance Game for the Future
With automotive technology rapidly advancing—think electric vehicles and advanced driver-assist systems—your maintenance toolkit must evolve too. Expect to see more integrated diagnostic platforms that communicate directly with your vehicle’s ECUs, enabling real-time health monitoring. Investing in learning how to interpret these data streams now can prepare you for a future where self-maintenance and diagnostics become standard. Regularly updating your skills and tools ensures you’re ahead of potential failures, reducing downtime and repair costs over time.
How can I maintain vehicle diagnostics effectively over time?
Developing a schedule for regular system checks is crucial. Keep your diagnostic software updated, and familiarize yourself with your vehicle’s specific parameters through manuals and online forums. Additionally, maintaining a log of diagnostic readings helps identify patterns that precede failures, allowing you to schedule repairs proactively. I also recommend integrating OBD-II monitoring apps that provide alerts for abnormal sensor data, so you’re informed even between maintenance sessions. Remember, staying current with diagnostic techniques isn’t just for mechanics—it’s an empowering step towards autonomy in vehicle care. For deep insights into diagnostics, check out how diagnostics prevent breakdowns. Try using an advanced code scanner during your next routine check; it can reveal hidden issues before they manifest into costly repairs.
Secrets Car Repair Experts Keep to Themselves
One of the most eye-opening lessons I learned about diagnosing ignition coils is that relying solely on engine codes can be misleading. Sometimes, code readers point you in the right direction, but they don’t tell the full story. An actual diagnosis involves understanding your vehicle’s unique electrical whispers—like how the resistance readings from a multimeter can reveal internal coil damage that a scanner might miss.
Another insight I gained is that swapping coils between cylinders is a surprisingly effective way to identify a faulty one. Before I invested in expensive tools, I would do this simple test, and often, the misfire would follow the coil—a clear sign of failure. This approach saved me money and time, especially when I was working on cars that don’t have the most advanced diagnostic systems.
Lastly, I realized that patience is key. Rushing to replace parts without thorough testing leads to unnecessary costs. Learning to comprehend subtle electrical signals—like weak sparks or unusual resistance—can turn you from a DIY amateur into a confident auto detective. For an in-depth look into how diagnostic tools can prevent costly mistakes, visit this guide.
My Gear That Makes Ignition Coil Diagnosis Feel Like Second Nature
Having the right tools is essential. I trust my Fluke 115 multimeter because of its accuracy and durability, which makes resistance testing straightforward. Pairing this with a Bluetooth-enabled code scanner like BlueDriver allows me to see real-time sensor data and interpret fault codes effectively. These investments in quality diagnostic gear empower me to troubleshoot with confidence and avoid unnecessary replacements.
Over time, I’ve also learned that maintaining a detailed log of diagnostic readings and repair notes helps me notice patterns—like gradually increasing resistance values or recurring misfires—that indicate more subtle problems. These insights are invaluable, especially when dealing with complex electronics or hybrid systems.
Your Turn to Achieve Precision in Ignition Diagnosis
Mastering these diagnostic techniques isn’t just about fixing your car; it’s about gaining peace of mind and saving money. Equipped with a good multimeter, a reliable code scanner, and a thoughtful approach, you can tackle ignition coil issues head-on. Remember, the key lies in understanding what your vehicle’s electrical system is telling you—so don’t shy away from learning it. Your car—and your wallet—will thank you. Have you ever struggled to pinpoint a misfire? Share your experience below!
,