
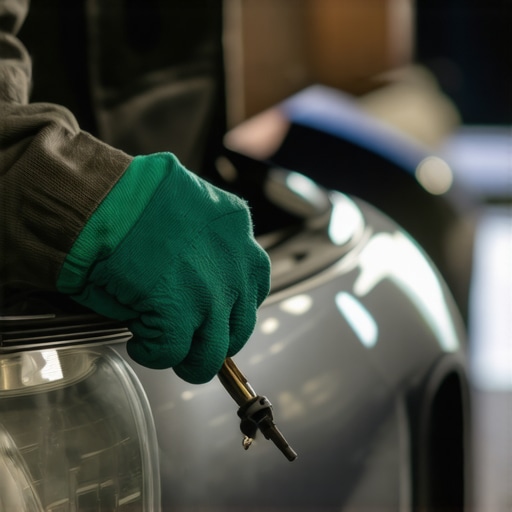
Ever had that sinking feeling when you’re standing in front of your car, ready to hit the road, and suddenly the hood won’t budge? I remember the first time I faced this frustration—standing there in my driveway, heart pounding, as the latch refused to cooperate despite my best efforts. It was a lightbulb moment for me, realizing that this seemingly simple task can quickly turn into a real headache if you don’t know the right tricks.
Today, I want to share with you the tried-and-true methods that have saved me countless trips to the mechanic and plenty of sweaty palms. Whether your hood is stuck due to rust, a misaligned latch, or just age, there’s a good chance you can get it open yourself—safely and effectively.
Why a Stuck Hood Can Halt Your Day in Its Tracks
A jammed hood isn’t just an inconvenience; it can prevent you from performing routine checks or repairs that might be vital for your safety and your vehicle’s longevity. Ignoring the problem or trying to force it open can lead to more damage, like bending the latch, cracking the paint, or worse. That’s why knowing how to open a stubborn hood latch is a valuable skill for every car owner.
If you’ve ever found yourself in this predicament, you’re not alone. I’ve been there. Initially, I made the mistake of tugging blindly at the release lever, thinking more force was the answer. Turns out, that can do more harm than good. Instead, a gentle, informed approach is what really makes the difference.
For professional advice on preventive maintenance and auto repair strategies, check out [essential auto repair strategies for frequent drivers](https://repairmycarpro.com/essential-auto-repair-strategies-for-frequent-drivers). It’s packed with tips that go beyond simple tricks to keep your vehicle in top shape.
Now, let’s walk through some practical steps to get that stubborn hood open without causing damage or sweating bullets in the process. And trust me, with a little patience and the right techniques, you’ll be back on the road in no time—no mechanic required. Ready to become a DIY hero? Let’s dive into the methods that will turn your frustration into success.
Locate and Inspect the Release Mechanism
Start by finding the interior release lever or cable, usually near the driver’s seat. Gently pull or push it to see if it frees the hood. Often, the latch is rusted or misaligned, preventing it from releasing. Once you identify the latch, visually inspect for obstructions, rust, or damage that could be causing the blockage. During my own experience, I noticed the latch was covered in dirt, which I cleaned with a wire brush—a simple fix that made a noticeable difference.
Apply Gentle Force with Tools if Needed
If the interior release doesn’t budge, carefully access the front grille area. Use a flathead screwdriver or a plastic pry tool to gently nudge or lift the latch. Be cautious to avoid damaging paint or losing clips. For example, I once used a plastic pry tool to lift a stuck latch, applying gentle pressure at different angles until it clicked open. Think of this step as coaxing a stubborn door open; patience is key.
Use Lubricant to Loosen Rust
If rust is the culprit, spray the latch with penetrating oil, like WD-40. Wait a few minutes for the lubricant to soak in. Then, attempt to operate the latch again. When I encountered a stubborn latch last winter, applying lubricant and working it back and forth freed it without forceful yanks, preventing potential damage.
Try Manual Release from Under the Car
In some cases, the cable may have slipped or broken inside. Carefully slide under the vehicle with a flashlight and locate the latch assembly. Pull the cable or manually move the latch if accessible. I once managed to open a jammed hood by pulling on the cable from underneath, which saved a trip to the mechanic. Think of it as pulling a drawer open from the inside—sometimes the external handle fails, but the inside still works.
Prevent Future Issues by Maintenance
Regularly lubricate the latch and cable connections to avoid rust buildup. Wiping the latch area and applying a silicone spray every few months keeps everything smooth. Remember, a well-maintained latch is like a well-oiled hinge—smooth operation prevents future headaches. For more comprehensive auto maintenance tips, visit this guide.
Many car owners operate under misconceptions about vital maintenance tasks like brake service, vehicle diagnostics, and oil changes. **Contrary to popular belief, not all brake noises indicate worn rotors; sometimes, debris or misalignment is to blame**, and jumping straight to rotor replacement can be costly. Similarly, many assume that vehicle diagnostics tools always provide definitive answers, but experts warn that software readings can miss underlying mechanical issues if not interpreted carefully. **An often-overlooked nuance in oil changes is the significance of modern synthetic oils, which can last significantly longer than traditional oils, challenging the old 3,000-mile rule and potentially saving you money**; see this resource for more insights.
A common mistake is neglecting thorough inspections before repairs, thinking that routine checks are unnecessary or too time-consuming. Yet, detailed diagnostics using advanced tools can reveal hidden problems before they escalate. For instance, advanced vehicle diagnostics can identify issues like early-stage misfires or sensor failures, saving you expensive repairs later.
In the realm of auto repairs, susceptibility to myths can lead to unnecessary expenses. Do you believe in the myth that all brakes must be replaced at the same time? The truth is, uneven wear is common, and replacing only what’s needed is both safe and cost-effective, provided the entire system is thoroughly inspected. Be cautious of the trap of overspending on parts or services that aren’t truly necessary.
For comprehensive auto repair strategies that cut through these myths and maximize your vehicle’s reliability, consider visiting this guide. As you deepen your understanding, you’ll avoid costly mistakes and make informed decisions that benefit both your safety and your wallet.
Ever fallen into this trap of misconceptions? Let me know in the comments. Remember, understanding the nuances can make all the difference in auto maintenance success.
Reliable Tools for Auto Maintenance
Investing in the right equipment can make all the difference in maintaining your vehicle efficiently. I personally swear by a high-quality digital multimeter, like the Fluke 115, which provides precise readings of battery health and alternator output, helping me diagnose electrical issues before they escalate. For inspecting brake components, a trusted set of mechanic’s stethoscopes allows me to pinpoint squeaks or grinding noises accurately, avoiding unnecessary parts replacement. An automotive code reader, such as the Innova 3160, is invaluable for quick vehicle diagnostics, providing real-time data and error codes. These tools empower DIY enthusiasts to assess their vehicle’s condition confidently and avoid costly trips to the mechanic.
Essential Software and Diagnostic Techniques
Modern vehicles are equipped with complex electronic systems that require specialized software to properly interpret diagnostic data. I use OBD2 scan tools connected via Bluetooth to my smartphone, especially the BlueDriver, which offers advanced diagnostics and real-world troubleshooting tips. Paired with apps like FIXD or Torque Pro, these tools help me understand engine trouble codes and track vehicle performance trends over time. Regularly updating the software ensures compatibility with newer car models and enhances diagnostic accuracy. According to this resource, staying current with diagnostic technology is a proactive approach to preventing breakdowns and extending your vehicle’s lifespan.
Routine Maintenance That Pays Off
While tools are essential, consistent manual checks and maintenance routines are equally important. I recommend setting a schedule for lubricating latch mechanisms, inspecting belts and hoses, and changing oil based on your vehicle manufacturer’s guidelines—often longer intervals with synthetic oils like Mobil 1 or Royal Purple. I personally follow the advice from this article on synthetic oil benefits, which has helped me extend oil change intervals beyond the traditional 3,000 miles without risking engine damage. Additionally, keeping a detailed maintenance log helps track wear patterns and predict upcoming service needs, saving money in the long run.
How do I maintain auto diagnostics over time?
Consistently update your diagnostic tools and software, perform regular visual inspections, and familiarize yourself with your vehicle’s normal operation. This proactive approach allows you to catch potential issues early and address them before they become costly repairs. For more detailed strategies, visit this guide.
In an era where vehicle technology advances rapidly, staying equipped with the right tools and knowledge is crucial. I highly recommend trying out a professional-grade multimeter combined with a reliable diagnostic app to get real-time insights into your car’s health. This investment not only saves money but peace of mind, knowing you can handle small issues before they turn into roadside emergencies.
What I Wish I Knew About Fixing a Stubborn Hood
One of the most eye-opening lessons I learned was that patience and proper tools trump brute force when dealing with a jammed hood. I discovered that rust and misalignment are common culprits, and addressing them early can save you money and stress. If I had known that regular lubrication and inspections could prevent this headache, I would’ve started those habits sooner.
Another insight was that sometimes, the problem isn’t what seems obvious. Pulling on the release lever without inspecting the latch can worsen the issue. Now, I always check the latch visually and use penetrating oil before trying to force anything. It’s these small adjustments that make DIY fixes both successful and satisfying.
Lastly, I realized that respecting the structure of your vehicle can prevent unintentional damage. Applying gentle pressure and knowing when to step back and reassess keeps your car safe and your mindset calm. These lessons have transformed my approach to auto repairs from reactive to proactive.
My Essential Arsenal for Auto Care Triumphs
Investing in quality tools was a game-changer. A reliable digital multimeter like the Fluke 115 allows me to diagnose electrical issues accurately, saving trips to the mechanic. A good code reader, such as the Innova 3160, has helped me interpret error codes without guesswork. Additionally, a mechanic’s stethoscope helps me pinpoint noises that could indicate wear before they turn into costly repairs.
Books have also expanded my understanding. The titles that challenged my misconceptions—like auto repair hacks—showed me smarter ways to maintain my vehicle. Armed with these resources, I approach auto care with confidence, knowing I have the right information and equipment.
Let’s Turn Knowledge into Action
Embarking on your auto repair journey might feel daunting at first, but remember, every expert was once a beginner. Start small—lubricate your latch, check fluid levels, or scan for error codes. Each step builds your confidence and skills, making you less reliant on professionals for simple issues. The more you learn and practice, the more your vehicle becomes a reliable partner rather than a source of worry.
So, what’s the next small step you’ll take today to better understand and care for your vehicle? Share your plans below—your experience might inspire someone else to start their auto maintenance adventure!