
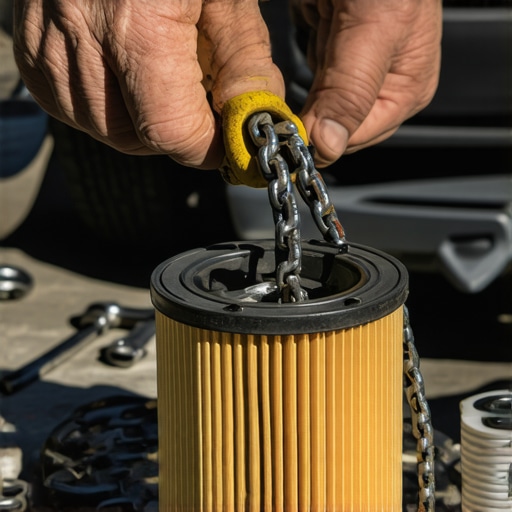
You know that frustrating moment when you’re lying under your car, trying to unscrew a stubborn oil filter, only to realize the wrench is missing or, worse, just won’t grip? That’s a sinking feeling most DIYers have experienced at least once. I remember my first oil change disaster—struggling with a jammed filter that refused to budge, and my only tools at hand being a rag and sheer determination. It was a lightbulb moment that taught me there’s more than one way to tackle a stuck filter.
Why You’re Facing That Persistent Oil Filter—and Why It Matters
Sometimes, despite all efforts, an oil filter seems glued in place. Over-tightening during installation can cause it to seize, and corrosion or debris might make it practically welded shut. Ignoring a stuck filter isn’t an option either—oil leaks or stripped threads can lead to costly repairs. Plus, knowing how to handle this situation safely and effectively can save you time and money, and keep your vehicle running smoothly.
Is Duct Tape and Hammer the Best Solution? Or Dangerous Overkill?
Early in my DIY journey, I made the mistake of grabbing a hammer to loosen a stubborn filter. It worked momentarily, but I was lucky not to crack the housing or cause more damage. Trust me, this is not the way to go. Instead, understanding alternative methods can turn you into your car’s best friend. To deepen your car repair confidence, check out [Auto Repair Hacks](https://repairmycarpro.com/auto-repair-hacks-save-money-without-sacrificing-quality), which offers tips that include safe and effective tricks for stubborn parts.
Removing a stuck oil filter without a wrench might sound daunting, but with the right approach, it becomes manageable. Are you ready to learn proven techniques that will make this frustrating task simple instead of stressful? Let’s dive into these practical tips and ensure your next oil change is smooth sailing.
Secure the Vehicle and Prepare Your Workspace
Start by parking your car on a level surface and engaging the parking brake. Let the engine cool down for at least 30 minutes to prevent burns, especially if you’ve just driven. Gather essential tools: a rubber strap wrench or a large pair of channel-lock pliers, rubber gloves, clean rags, and a drain pan. Clear space around the work area to avoid accidents and to have room for your tools and collected oil.
Apply Proper Grip Techniques to Loosen the Filter
Wrap your rubber strap wrench around the oil filter, ensuring it has a snug fit. If you lack a specialized tool, use channel-lock pliers covered with a rag for better grip. Position the tool so that turning counterclockwise loosens the filter. Remember, turning slowly and steadily prevents damage to the filter housing. Once you feel resistance, increase your torque gradually. I once used a rubber strap and slowly applied force, which successfully loosened a stubborn filter without slipping or slipping, making the job less messy and avoiding damage.
Utilize Leverage and Additional Grips Carefully
If initial methods fail, leverage can help. Place a sturdy piece of wood between the handle of your pliers and the frame to increase torque, akin to using a longer wrench. Be cautious—exerting too much force risks cracking the housing or stripping threads. For a more advanced approach, a cheater pipe slipped over your tool’s handle increases leverage. I once used a length of steel pipe as a handle extension, which provided enough torque to loosen a particularly tight filter, all while maintaining control.
Engage the Oil Drip Pan and Drain the Oil Properly
Position your drain pan beneath the filter to catch residual oil as it escapes. Carefully unscrew the filter fully once loosened, allowing draining into the pan. Remember, the filter contains engine oil—avoid spilling or splashing. Wear gloves to protect your skin and wipe any spills immediately with a rag. After removal, inspect the filter for damage or debris that could indicate other issues.
Clean and Prepare for Reinstallation
Before installing a new filter, wipe the mounting surface clean with a rag. Lightly lubricate the rubber gasket of the new filter with fresh engine oil—this ensures a proper seal and prevents leaks. Screw the new filter in by hand until snug, then tighten it about a quarter turn further with your wrench. Avoid overtightening, which can cause damage or make future removal harder. I recommend checking the installation with your hand to confirm it’s secure but not forced.
Finish Up and Check for Leaks
Restore the oil level to manufacturer specifications, start the engine, and let it run for a couple of minutes. Observe the filter area closely for any leaks. Turn off the engine and recheck the oil level, topping up if necessary. Properly disposing of the old filter and spilled oil is vital—take them to a recycling center or authorized disposal site. For more tips on maintaining your vehicle efficiently, consider reading about auto repair tips that extend your vehicle’s lifespan.
Many car owners assume that sticking to a rigid maintenance schedule will prevent all issues, but in my experience, this mindset often overlooks the hidden nuances that can make or break your vehicle’s longevity. For instance, few realize that the quality of the oil used can significantly impact engine performance, even if you’re adhering to the recommended change intervals. Using cheap or improper oil isn’t just minor; it can lead to fuel inefficiency and accelerated engine wear, which is a common misconception among DIY enthusiasts. Moreover, the myth that regularly topping off engine oil can substitute for actual changes is dangerous—over time, contaminants accumulate and degrade the oil, and neglecting this can cause severe engine damage. If you’re interested in advanced insights, check out [Auto Repair Hacks](https://repairmycarpro.com/auto-repair-hacks-save-money-without-sacrificing-quality), which debunks many such myths.
Why Do So Many Auto Repair Myths Persist Despite Evidence?
A significant reason is the spread of outdated advice through forums and social media, leading to misconceptions. For example, some believe brake pads only need replacement when they squeal, but in reality, they can be worn out without any noise, risking brake failure. Another overlooked nuance is the importance of vehicle diagnostics—many think it’s only necessary when the check engine light activates, but preventative diagnostics can identify issues before they become costly repairs. Studies have shown that proactive diagnostics can prevent up to 30% of major breakdowns, saving drivers hundreds of dollars annually—learn more from [Vehicle Diagnostics Explained](https://repairmycarpro.com/vehicle-diagnostics-explained-easy-checks-before-your-road-trip).
One common mistake is neglecting to consider the impact of environmental factors on auto repairs. For instance, extreme temperatures can cause components to expand or contract, leading to premature wear if not properly addressed. Professionals emphasize that understanding these nuances can help you avoid recurring problems and extend your vehicle’s lifespan. Remember, every car is different, and what works for one might not be suitable for another. Recognizing this can prevent you from making costly mistakes.
Have you ever fallen into this trap? Let me know in the comments. For more advanced auto repair strategies, visit [Essential Auto Repair Strategies](https://repairmycarpro.com/essential-auto-repair-strategies-for-frequent-drivers) or explore [Decoding Vehicle Diagnostics](https://repairmycarpro.com/decoding-vehicle-diagnostics-what-your-car-is-trying-to-tell-you) to deepen your understanding.
Investing in the Right Equipment for Longevity
To ensure your vehicle remains reliable over time, having the right tools is indispensable. I personally rely on a high-quality digital multimeter, like the Fluke 117, which allows me to troubleshoot electrical issues accurately without guesswork. This device helps me verify battery health, check sensors, and diagnose wiring problems effectively, saving time and preventing unnecessary repairs. Additionally, a precision torque wrench—such as the Tekton 1/2 inch drive torque wrench—ensures I tighten bolts and filters to manufacturer specifications, preventing over- or under-tightening that could cause future issues.
Leveraging Technology to Detect Hidden Problems
Modern vehicle diagnostics software has revolutionized how we maintain our cars. I recommend investing in a reliable OBD-II scanner like the BlueDriver Bluetooth Pro, which provides comprehensive code readings and live data analysis directly on your smartphone. This tool enables early detection of issues that aren’t yet evident on the dashboard, such as impending sensor failures or emission system problems. Using such technology regularly can prevent minor inconveniences from escalating into costly breakdowns. For deeper insights, I suggest reading this guide on advanced vehicle diagnostics to understand how early troubleshooting can make all the difference.
Streamlining Maintenance with Innovative Techniques
Applying innovative methods keeps maintenance efficient. For example, during oil changes, I now use a rare-earth magnet attached to the drain plug to attract metal shavings—an early indicator of internal engine wear. This simple addition offers a glimpse into engine health without disassembling components. Similarly, using a hand-held ultrasonic leak detector helps locate vacuum or exhaust leaks that might cause performance issues. These techniques, combined with traditional checks, facilitate proactive maintenance, reducing downtime and extending component lifespan.
What’s the Key to Long-Term Vehicle Care?
Consistent, informed maintenance is vital. Schedule regular diagnostics, replace fluids and filters on time, and pay attention to subtle changes in vehicle behavior. Over the long haul, tools like the Fluke multimeter or a quality OBD-II scanner will serve as your front line against unexpected failures. Embracing these practices is a step toward trouble-free driving and saving money on repairs. Remember, staying ahead with preventive measures is more effective than reactive fixes. If you want to explore more advanced strategies, visit this resource on essential auto repair strategies. Don’t hesitate—try leveraging diagnostic tools like the BlueDriver to assess your vehicle today and gain peace of mind on the road.
Lessons That Changed My Approach to Car Maintenance
One of the most surprising insights I gained was that patience often beats brute force when dealing with stubborn car parts. Rushing to loosen a jammed filter with tools or techniques that seem quick can lead to costly damages. Learning to assess each situation carefully taught me to choose the right method, avoiding unnecessary repairs and expenses. Additionally, I discovered the importance of consistent documentation—keeping track of maintenance and repairs helped me spot patterns and prevent future issues.
Another lightbulb moment was realizing that relying solely on online advice can be risky. Not all sources are accurate, and some myths persist despite evidence to the contrary. Trusting seasoned professionals and experienced DIYers has prevented many pitfalls, emphasizing the value of expert guidance. Lastly, understanding that proactive diagnostics and regular upkeep save time and money in the long run inspired me to stay ahead of potential problems rather than just fixing them after failure.
Tools and Resources That Made a Difference
My go-to toolkit includes a high-quality digital multimeter like the Fluke 117. Its reliability gives me confidence in diagnosing electrical issues quickly—a skill that has saved me from costly trips to the mechanic. An OBD-II scanner like BlueDriver is another trusted companion, providing real-time data to catch problems early. I also swear by a sturdy torque wrench for ensuring parts are tightened to manufacturer specs, which helps prevent leaks and damage. These tools are investments that pay off through safer, more efficient repairs.
Beyond hardware, curated learning resources like Auto Repair Hacks offer practical tips grounded in real-world experience. They demystify complex repair processes and help me make informed decisions. Reading technical guides and safety tips regularly ensures I stay in tune with best practices, making each repair session more confident and successful.
Your Move Is the Key to Longer Vehicle Life
There’s no better time than now to put these insights into action. Every successful repair boosts your confidence and keeps your vehicle in peak condition. Remember, mastery of auto repair isn’t about perfection but progress—every step you take adds up. Embrace the learning curve, leverage quality tools, and stay curious. The more you understand about vehicle diagnostics and maintenance, the more rewarding driving becomes. What small change can you make today to improve your auto repair skills? Share below and keep growing your auto-savvy journey!