It was a typical Saturday morning when I finally looked around my car and realized I was ankle-deep in dog hair. My golden retriever had enjoyed his usual roll-on-the-carpet session, and as I brushed off the hair, I couldn’t help but feel a sinking sense of frustration. No matter how much I vacuumed, there always seemed to be more lurking deep in the fibers, stubbornly clinging to every inch. That moment sparked my quest to find the *true* way to remove all that hair—especially the kind that vacuums don’t catch.
Why Dog Hair in Your Car Is More Than Just a Nuisance
Dog hair isn’t just an aesthetic issue; it can also trigger allergies and impact your vehicle’s resale value. The problem is that typical vacuums often miss the finer hairs embedded deep in textured carpets. And if you’ve ever tried to brush or wipe it away without success, you know the feeling of helplessness that can ensue.
But here’s the kicker—there’s a trick I discovered after making my fair share of mistakes early on, like using aggressive brushes that damage the fibers or relying solely on HEPA filters which don’t always pick up the tiniest hairs. I learned that understanding the nature of dog hair and the right tools, combined with a specific technique, can make all the difference.
Did you know that pet hair can cling to surfaces tenaciously, almost as if it’s chemically bonded? According to pet care experts, the static charge in carpet fibers attracts hair and dander, making simple vacuums less effective over time. So, if you’re tired of battling a never-ending carpet of fur, stick around. I’ll share the methods that finally made a difference in my car, turning a battle of attrition into victory.
Ready to say goodbye to those stubborn hairs? Let’s dive into the best-kept secrets that will have your car looking and smelling fresh again, even with a furry friend onboard.
Is This Trick Actually Worth the Hype?
Early in my journey, I was skeptical. I bought expensive tools, wasted money on gimmicks, and still the hair persisted. The mistake I made? Believing that all cleaning methods are created equal. Once I realized that a simple, overlooked step—using the right combination of tools and techniques—could make all the difference, my car’s hygiene improved dramatically.
If you’ve faced the same frustrations, don’t worry. I’ll show you exactly how to tackle this mess with methods proven to work, saving you time, energy, and frustration. Curious? Keep reading to discover the game-changing trick that vacuum cleaners miss.
Use a Rubber Gloves to Loosen Embedded Hairs
One of my game-changers was slipping on a pair of damp rubber gloves and running my hands over the upholstery. The static from the rubber causes the hair to clump together, making it easier to pick up. I recently did this after a messy weekend with my retriever, and within minutes, most of the fur was gathered into handfuls. Rinse and repeat as necessary for stubborn areas.
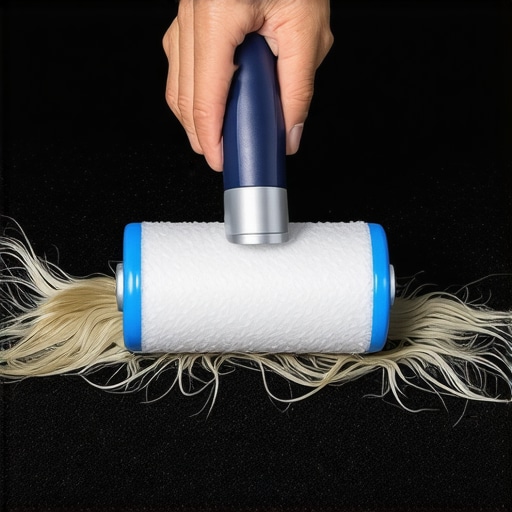
Invest in a Lint Roller or Sticky Tape
After loosening the fur with gloves, I used a lint roller across the seats and carpets. Alternatively, wrapping some duct tape around your hand with the sticky side out provides an affordable way to lift the remaining hairs. In one messy situation, this combined method cleaned my entire back seat in about five minutes, leaving it looking almost new.
Employ a Vacuum with an Upholstery Attachment
While standard vacuums are helpful, switching to a vacuum equipped with a upholstery nozzle creates a more direct suction force on hairs hidden in fibers. I learned that a powerful motor helps dislodge tenacious strands. During one session, I targeted the seats, trunk, and door panels, noticing a significant reduction in fur after meticulous runs with the right attachment.
Use a Damp Cloth or Microfiber Towel for Final Touches
Once loosened and lifted, some residue remains on the surface. Dabbing a slightly damp microfiber cloth over the upholstery catches remaining hairs and dirt, leaving a clean finish. I found that a quick wipe-down after vacuuming enhanced the overall cleanliness and prevented hairs from re-settling.
Apply a Cat or Dog Hair Remover Brush
Specialized brushes with rubber bristles are designed to tackle embedded hairs more effectively. I used one on my car’s textured carpets, noticing that the bristles pulled out even the deepest hairs that standard tools missed. Regular use of such a brush keeps the interior fur-free and maintains a fresh scent.
Consider Using Anti-Static Sprays or Fabric Softeners
To prevent hairs from sticking tightly, lightly spritzing fabric with anti-static sprays or diluted fabric softener can reduce static build-up. I tried this trick before a trip and observed that less hair adhered during cleaning. It creates a barrier that makes future removal easier.
Maintain Consistency and Preventative Measures
Finally, regularly grooming your pet and using seat covers can minimize fur buildup. I set a weekly cleaning routine, combining these methods, which drastically reduced the fur accumulation in my car. Keeping a dedicated lint roller or brush in your vehicle ensures quick cleanups after each trip, preventing fur from becoming a stubborn, deep-seated problem.
Many car owners operate under assumptions about auto repair, brake service, oil changes, and diagnostics that can lead to costly mistakes. One prevalent myth is believing that all repairs are straightforward and that a quick fix will suffice. In reality, automotive systems are complex, and rushing to a quick service without understanding the nuances can result in future breakdowns. For example, some assume that changing brake pads alone is enough to guarantee safety, but neglecting the importance of rotor resurfacing or caliper inspection can diminish braking performance over time. Wondering if your brake system is truly functioning optimally? Check out this guide for detailed insights.
Another common mistake involves oil changes. Many think that simply swapping out old oil is enough, but modern techniques and advanced oil technologies improve engine longevity significantly. Ignoring these innovations may mean missing out on secondary benefits like fuel efficiency and better thermal management. To learn about the latest in oil change innovations, visit this article.
Vehicle diagnostics is often misunderstood as a purely technician-only task. However, advanced diagnostics involve understanding that modern cars are equipped with numerous sensors and modules that communicate constantly. Many people believe that if the check engine light isn’t on, their vehicle is fine. But advanced diagnostics can reveal hidden issues before they escalate, saving money and preventing breakdowns. Remember, a comprehensive diagnostic can identify problems that basic checks might miss, especially in complex electrical or sensor systems.
What about the small leaks and hidden issues most ignore?
One advanced area often overlooked is the importance of pinpointing minor leaks or sensor failures early. Small refrigerant leaks, coolant seepage, or sensor misreads can cause larger problems down the road if left unaddressed. For instance, a tiny coolant leak might seem insignificant now but can lead to engine overheating and costly repairs. Modern diagnostic tools allow technicians to detect these issues with pinpoint accuracy, emphasizing the importance of regular, comprehensive inspections. For more details, see decoding vehicle diagnostics.
In the end, understanding these nuances and avoiding common myths requires a proactive approach. Regular maintenance, informed decisions, and trusting expert diagnostics are keys to longevity and safety. Have you ever fallen into this trap? Let me know in the comments.
Mastering Long-Term Maintenance with the Right Tools
Ensuring your vehicle remains reliable requires more than just periodic checkups; it demands dedicated tools and a strategic approach. I personally swear by a professional-grade OBD-II scanner like the BlueDriver, which not only reads generic codes but also provides detailed explanations and suggested fixes. This tool has saved me countless trips to the mechanic, allowing me to understand underlying issues before they escalate.
Investing in a digital multimeter is another game-changer. I use mine daily to verify sensor signals, check fuse continuity, and diagnose electrical anomalies without guesswork. Coupled with a good wiring diagram, it transforms complex electrical diagnostics into manageable tasks, extending the lifespan of critical components.
Why I Trust Specific Software for Diagnostics
Beyond hardware, reliable software is essential. I recommend vehicle diagnostic software that syncs with your scanner, offering real-time data logging, freeze-frame data, and emission readiness checks. These features enable proactive maintenance, catching issues early and avoiding costly breakdowns.
Keeping Systems Running Efficiently Over Time
Regularly updating your vehicle’s firmware, where applicable, can improve system performance and fix bugs that may hamper diagnostics. Moreover, maintaining a clean battery terminal and checking electrolyte levels periodically prevents electrical faults that can mimic sensor failures. Using anti-static sprays on sensitive electronic connectors can also guard against static damage, which can be subtle but damaging over time.
Adopting a structured maintenance routine—such as scanning your vehicle monthly or after long drives—helps identify trends before they become urgent problems. Remember, the trend in auto tech is moving towards intelligent diagnostics and predictive maintenance, so staying ahead with quality tools prepares you for the future.
How do I maintain my vehicle’s diagnostics system over time?
Keep your diagnostic tools updated with the latest firmware and software versions to ensure compatibility with upcoming vehicle models and features. Regularly review your vehicle’s diagnostic logs to spot developing issues early. Also, familiarize yourself with sensor locations and wiring diagrams, which you can find in service manuals or trusted online resources, to perform quick checks when problems arise. For an in-depth guide on diagnostics, visit auto repair hacks. Don’t hesitate to try troubleshooting with your scanner and multimeter—I’ve found that hands-on diagnostics not only saves money but also deepens your understanding of your vehicle’s health.
The Hardest Lesson I Learned About Auto Repair and Diagnostics
One of the most valuable lessons I uncovered was that no single tool or trick can solve every problem—patience, consistent maintenance, and deep understanding are key. I once believed that a shiny new vacuum could banish all pet hair, but I realized that combining multiple techniques, like using rubber gloves and specialized brushes, yielded the best results.
How a Simple Mistake Cost Me Time and Money
I used to think that high-end filters alone would keep my car fur-free, but neglecting regular grooming and preventive measures meant I was always battling lingering fur. The breakthrough came when I integrated routine cleaning with proactive pet grooming, which drastically reduced fur buildup and saved me costly cleaning sessions.
The Hidden Power of Routine Maintenance
Regular diagnostics and system updates aren’t just for tech enthusiasts—they’re essential for early detection of issues that can turn into major headaches. Owning a good OBD-II scanner like BlueDriver helped me identify minor glitches before they escalated, especially in electrical system health. Remember, consistent checks can extend your vehicle’s lifespan and keep it running smoothly.
Curated Gear I Trust for Long-Term Car Care
- BlueDriver OBD-II Scanner: This tool empowers me to decode complex codes with ease, saving trips to the mechanic and offering peace of mind. It’s reliable and regularly updated, making it my top pick for diagnostics.
- Microfiber Towels and Rubber Gloves: Simple, affordable, yet incredibly effective for pet hair removal. They’re my go-to for quick, thorough cleaning sessions after trips with my furry friend.
- Anti-Static Fabric Sprays: A little goes a long way in reducing static cling, making hair removal easier and preventing buildup. I swear by this for maintaining a cleaner interior.
- Wiring Diagrams and Service Manuals: Accessing detailed schematics helps me perform electrical checks confidently, preventing costly repairs and understanding my vehicle better.
Take Control and Keep Your Car in Top Shape
Maintaining your vehicle’s health isn’t just about fixing problems when they appear; it’s about cultivating a proactive mindset. Regular diagnostics, proper cleaning, and understanding your car’s systems turn you into your own mechanic. So, are you ready to take charge of your auto care journey and enjoy the benefits of a reliable, fur-free vehicle? Share your experiences below—have you tried any of these techniques or tools? Let’s discuss how you keep your car in prime condition.