
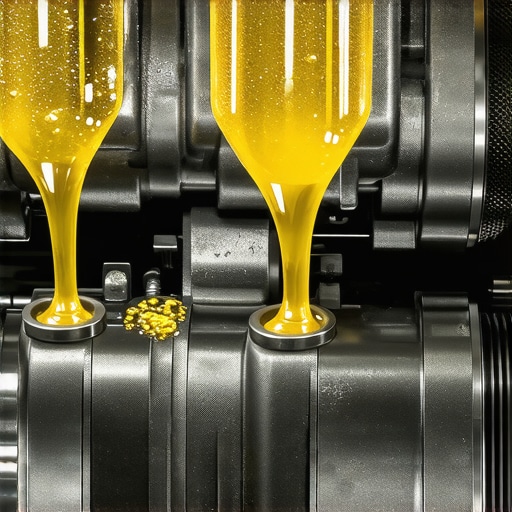
I remember standing over my hood three years ago, wrench in hand, feeling like a total pro because I had just finished my own maintenance. But as soon as I turned the key, my pride vanished. Instead of a smooth purr, I heard a rhythmic, metallic tick-tick-tick-tick. My heart sank. I had just put in the best synthetic oil I could find, yet my engine sounded like a vintage sewing machine on its last legs. I checked the dipstick five times, crawled underneath to look for leaks, and found nothing. If you are sitting in your driveway right now feeling that same cold sweat on your neck, take a deep breath. You tried to be a responsible owner, and now you are wondering if you just turned your car into a giant paperweight. Today, I am going to help you solve this mystery. We are going to look at why this happens and how to fix it without a massive shop bill. We will explore everything from oil change innovations that might be overkill for your ride to the simple mechanical quirks of hydraulic lifters that just need a moment to catch up.
Stop the Tick Before It Breaks Your Heart
The truth is, that tapping noise—often called lifter tick—is usually a sign that something in the top end of your engine is not getting the lubrication it expects. Early in my DIY days, I made a classic blunder that I still kick myself for: I bought a bargain-bin filter from a big-box store just to save four dollars. I thought a filter was just a filter. I was wrong. It turns out that certain oil filter brands lack a quality anti-drainback valve, which allows oil to drain out of the upper engine when it sits, leading to a noisy, dry start. According to the Society of Automotive Engineers, even a minor deviation in oil flow rate or pressure can prevent hydraulic components from priming correctly after a service. Have you ever finished a job only to hear a sound that was not there before? Tell me about it in the comments below; I need to know I am not the only one who has panicked over a fresh oil change! We are going to get your engine quiet again by avoiding the wrong oil viscosity and ensuring your parts are actually compatible.
Is that noise actually worth the panic?
Most drivers assume a new tap means a total engine rebuild is looming on the horizon. In reality, it is often just a temporary communication error between your new oil and your engine’s internal components. We are going to debunk the synthetic oil myths that might be leading you to spend money on products that actually cause more noise than they solve. By the time we are done, you will know exactly how to settle those lifters down and get back to a quiet, confident drive.
Stop the Air Pockets in Their Tracks
Think of your hydraulic lifters as small, oil-filled shock absorbers that require constant pressure to stay firm. When you drain the old oil, air can occasionally sneak into these tiny components, creating a pocket that causes the lifter to become “squishy” rather than rigid. This leads to that rhythmic tap-tap-tap against the camshaft. I remember a particularly stressful Saturday working on a friend’s high-mileage sedan; we finished the oil change, fired it up, and it sounded like a machine gun was under the hood. I panicked, thinking I’d dropped a bolt into the engine, but it was just air. To fix this, you should perform a steady purge. Let the engine reach its normal operating temperature, then safely hold the throttle at a steady 2,000 to 2,500 RPM for about three minutes while parked. This increased pressure usually forces the air out and silences the noise. If the sound lingers, it is time to move on to more specific vehicle diagnostics to ensure your oil pump is providing enough flow.
Check the Anti-Drainback Valve
If the noise is specifically loud when you first start the car after it has been sitting, your oil filter is likely the culprit. Many modern engines rely on an internal flap called an anti-drainback valve to keep oil in the upper engine. If you chose a bargain-bin filter, that valve might be made of cheap rubber that hardens and leaks, allowing oil to drain back into the pan overnight. This is exactly why your engine makes a tapping noise only at startup. I once swapped a cheap filter for a high-quality OEM version and watched the noise vanish instantly. You can actually learn how to tell if your oil filter is actually doing its job by timing how long the oil pressure light stays on; if it flickers for more than a second, the filter is failing you. 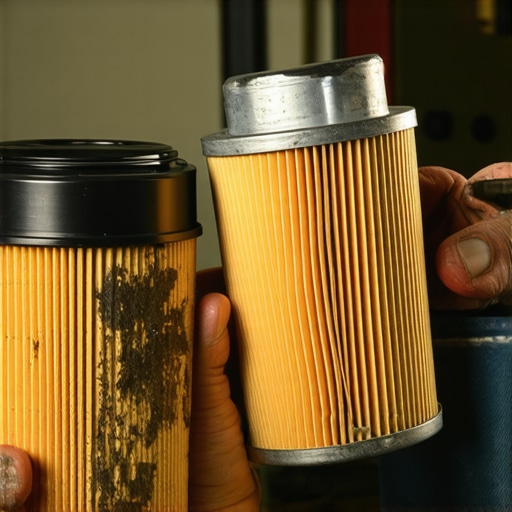
Correct the Viscosity Before Damage Occurs
It is incredibly easy to grab the wrong bottle of oil from a crowded store shelf, but using a 10W-30 in an engine designed for 0W-20 is a recipe for noise. Thick oil in a tight-clearance engine acts like cold molasses; it simply cannot move fast enough through the narrow oil passages to lubricate the top end during those first few minutes of operation. One of the most effective top auto repair tips is to always verify your owner’s manual before pouring. If you realize the weight is wrong, do not try to “wear it in” for a few weeks. Drain the oil and replace it with the manufacturer-recommended weight immediately. This is one of those essential auto repair strategies for frequent drivers that prevents long-term metal-on-metal wear. Finally, double-check your oil level on a flat surface. Even being a half-quart low can cause the oil to aerate, creating bubbles that feed right into your lifters and keep the tapping sound alive.
Stop throwing parts at a diagnostic code
Most DIYers think that a P0300 code or a check engine light is a direct shopping list for the auto parts store. It is not. I have seen countless people spend hundreds on new spark plugs and coils when the real issue was a five-dollar vacuum hose. This is the ‘parts cannon’ approach, and it is the fastest way to drain your wallet. When you are decoding vehicle diagnostics, remember that the computer only tells you which sensor is seeing an out-of-spec reading, not which part is physically broken. For instance, an O2 sensor code often points to a lean condition caused by a leak further up the intake, not a dead sensor. According to a report by CarMD, the oxygen sensor is consistently among the most frequently replaced parts, yet it is often misdiagnosed because drivers fail to check for simple air-fuel ratio imbalances first.
Is your scan tool leading you down an expensive rabbit hole?
Advanced diagnostics require looking at live data, not just stored codes. If you see a fault, look at your short-term fuel trims. If they are spiking, you have an air leak, not a sensor failure. This is where how advanced vehicle diagnostics prevent costly breakdowns by identifying the root cause before you start unbolting components. I once spent an entire afternoon replacing an alternator because a cheap scanner told me the voltage was low, only to realize the battery terminals were just corroded. Have you ever fallen into this trap and replaced a part that was perfectly fine? Let me know in the comments; we’ve all been there!
The thickness trap that kills modern engines
There is a persistent myth in the car community that as an engine gets older, you should switch to a thicker oil like 10W-40 to ‘fill the gaps’ in worn bearings. In my experience, this is dangerous advice for any car built in the last fifteen years. Modern engines use Variable Valve Timing (VVT) systems that rely on incredibly thin oil to actuate solenoids. If you go too thick, those solenoids cannot move fast enough, leading to timing codes and sluggish performance. This is why the truth about using cheap aftermarket sensors combined with the wrong oil can lead to a nightmare of ‘ghost’ mechanical issues. If you are worried about leaks, stick to the recommended weight but switch to a high-mileage formula containing seal swellers instead.
Don’t ignore the hardware that holds it all together
One of the most common ‘oops’ moments happens during the simplest task: the oil change. Many people think the metal washer on the drain plug is permanent. It isn’t. You should never skip the crush washer on your drain plug because it is a one-time-use soft metal seal. Reusing it leads to slow drips that you might mistake for a rear main seal leak. Similarly, when performing a brake service, most people focus solely on the pads. However, brake service myths busted often reveal that the real culprit behind uneven wear is a seized caliper slide pin, not the pad quality itself. If you don’t clean and lube those pins, your brand-new pads will be ruined in months. Always look at the system as a whole, rather than just the part you are replacing.I’ve learned that the difference between a “parts changer” and a “mechanic” is the quality of data they use before they ever crack a bolt. When I’m chasing an intermittent misfire or a weird electronic gremlin, I don’t guess. I reach for my Autel MaxiCOM because it lets me see live data streams that basic scanners miss. If you want to stop the guessing game, you need to master decoding vehicle diagnostics properly. For example, monitoring your Long Term Fuel Trim (LTFT) can tell you if you have a vacuum leak or a failing fuel pump weeks before a code even triggers. According to technical documentation from Mitchell 1 ProDemand, nearly 40% of diagnostic time in professional shops is wasted on improper testing of circuit grounds or simple voltage drops. That is why I always keep a dedicated power probe in my kit; it’s the only way to quickly verify if a component is actually getting the juice it needs to function under load.
How do I keep my car running like new for a decade?
The secret isn’t a magic additive you buy at a gas station; it’s a religious adherence to a maintenance log and the right hardware. I use a simple spreadsheet to track every service, but you can use an app. This is how I spotted that my brake pads were wearing unevenly, leading me to realize I had a stuck slide pin—a classic case where brake service myths busted my assumptions. If I hadn’t been tracking the wear, I would have just replaced the pads and ignored the real issue. For those who do their own work, the trick for a perfect brake bleed every single time is a one-person pressure bleeder. I personally use the Motive Products bleeder because it prevents air from entering the master cylinder, ensuring that firm pedal feel you only get from the factory. 
Shift Your Mindset from Mechanical to Digital
As we look toward the future, the DIY landscape is shifting rapidly. With the rise of electric vehicles and more complex CAN-bus systems, our toolboxes are going to look more like IT labs than traditional grease-stained chests. We won’t just be checking oil levels; we’ll be checking battery cell health and updating module firmware to solve performance issues. This makes top auto repair tips to extend your vehicles lifespan more about software hygiene than just wrenches. Even if you’re driving a traditional internal combustion engine, adopting these essential auto repair strategies for frequent drivers will keep you ahead of the curve as parts become more integrated with electronic sensors. Don’t let the complexity of modern cars scare you off from doing the work yourself. Start small: next time your check engine light comes on, don’t just run to the parts store for a free scan. Use your own scanner to look at your ‘Freeze Frame’ data—it tells you exactly what the car was doing (speed, engine temp, and load) the moment the fault occurred. It’s a total game-changer for troubleshooting. If you ever feel stuck or need to double-check your findings, you can always contact us for advice or check out how advanced vehicle diagnostics prevent costly breakdowns for a deeper dive into the world of professional-grade troubleshooting.
Looking back at my years under various chassis, I have realized that the most expensive tool in my garage isn’t my scanner—it is my own intuition. Moving beyond a simple oil change requires a shift in how you listen to your car. When you hear a tick or a shudder, do not immediately assume the worst. Instead, use these auto repair hacks to narrow down the noise without spending a dime.
Hard Lessons from My Greasiest Days
One of the biggest lightbulb moments I ever had was realizing that the oil pressure light on your dashboard is not a ‘low oil’ warning; it is often an ‘engine is already dying’ warning. By the time that light flickers, your hydraulic lifters are already gasping for air. Another critical realization was that expensive additives are rarely a substitute for high-quality filters. I used to think I could outsmart physics by adding thickeners to stop a leak, but all I did was clog the narrow passages of my VVT solenoids. If you want to keep your ride smooth, focus on auto repair hacks that save money without sacrificing quality, like using a simple stethoscope (or a long screwdriver) to pinpoint where a sound is coming from before you start buying parts.
The Gear That Actually Lives in My Trunk
I don’t carry a full shop with me, but I never leave for a road trip without my Autel MaxiCOM and a reliable pressure bleeder. If you are doing your own work, the ultimate guide to brake service for safety and performance will tell you that a firm pedal is the result of precision, not just new pads. I trust the Motive Products bleeder because it turns a two-person nightmare into a ten-minute solo job. Additionally, keep a dedicated ‘black book’ in your glovebox. Documenting exactly when you noticed a shudder when shifting that feels like a rumble strip can help you or a professional find the pattern much faster. These tools and habits are what separate a frustrated owner from a confident mechanic.
#IMAGE_PLACEHOLDER_E#
Master Your Machine and Drive with Confidence
DIY car care is about more than just saving money; it is about the peace of mind that comes from knowing exactly what is happening under your hood. Whether you are dealing with a post-oil change tick or a mysterious vibration, remember that every problem has a logical solution. Don’t let the technology intimidate you. By staying curious and following top auto repair tips to extend your vehicles lifespan, you can keep your daily driver on the road for decades. You have the tools and the knowledge—now it is time to get your hands dirty. What was the very first ‘scary noise’ you successfully diagnosed on your own? Share your win (or your panic) in the comments below!