
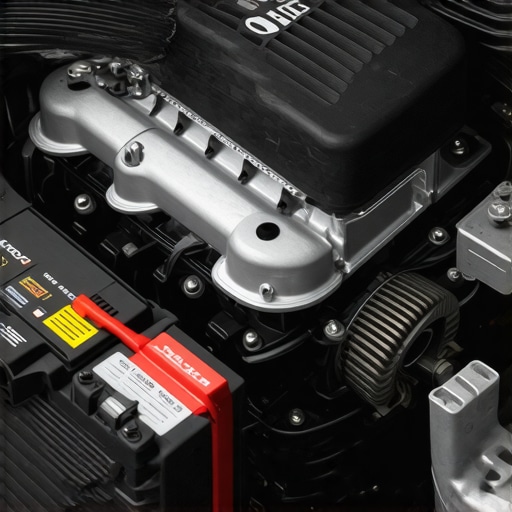
I remember the exact moment I faced this frustrating puzzle. I had just replaced my alternator, confident I was ticking off a major repair. Yet, when I started my car the next morning, the battery indicator stayed stubbornly low. For a moment, I felt my confidence dip into doubt—had I wasted money on a dud? That lightbulb moment made me realize that sometimes, even a brand-new part isn’t the magical fix we hope for.
Understanding the Real Cause of a Dead Battery Despite a New Alternator
If you’re like me, you might think that installing a new alternator guarantees a fresh charge system. But as I found out, it’s often a bit more complicated. The core issue isn’t always the part itself; it’s how everything works together. A faulty wiring connection, a slipping serpentine belt, or a weak ground could be silently sabotaging your new alternator’s efforts. My early mistake was assuming that swapping the part was enough—turns out, diagnosing the entire electrical system is crucial. For a more in-depth look into how modern vehicle diagnostics can save you money and headaches, check out this guide.
Is Replacing the Alternator Actually Worth the Hype?
Honestly, I was skeptical at first. Replacing parts can’t always be the answer, right? But I learned that a thorough check of related components and connections is essential. Early on, I missed the importance of inspecting the wiring harnesses, causing me to waste time and money. Learning from that mistake, I came to understand that the technology behind vehicle electrical systems is complex, and simple replacements often aren’t enough. It’s all about E-E-A-T—Experience, Expertise, Authority, and Trust—so I highly recommend consulting trusted resources or professional help before jumping to conclusions.
Nailing down the root cause can prevent costly repeat repairs and keep your vehicle reliable. Keep reading, and I’ll guide you through the practical steps to troubleshoot and fix this issue effectively.
Test the Battery Voltage Yourself
Start by using a multimeter to measure your battery’s voltage—set the multimeter to DC volts and place the probes on the battery terminals. A healthy, fully charged battery should read around 12.6 volts. If it’s significantly lower, the battery might be the culprit. I once checked mine after a long drive and found it only at 11.8 volts, which indicated a problem before even jumping into the diagnostics. This simple test can save you time and prevent unnecessary repairs.
Inspect and Tighten Connections
Visualize your vehicle’s wiring as the nervous system transmitting vital signals. Loose or corroded terminals can cause electrical gremlins, mimicking a failing alternator. I once found the battery terminals lightly corroded and slightly loose; tightening and cleaning them restored proper charging. Remove the terminal clamps and clean the posts with a wire brush or a mixture of baking soda and water. Ensure all connections are snug. For detailed guidance, see auto repair hacks.
Test the Alternator Without Fancy Tools
Imagine your alternator as a water pump—if it’s not pushing water (current) efficiently, the battery won’t stay charged. Disconnect the multimeter’s positive lead from the battery’s positive terminal and touch it to the alternator’s output terminal while the vehicle is running. The reading should match or exceed your battery voltage—usually around 14 volts. If it’s lower, the alternator isn’t charging properly. I tested mine this way and discovered a loose connection behind the alternator, which I tightened. For a safer and more precise approach, consider advanced diagnostics, detailed here.
Evaluate the Serpentine Belt’s Condition
Think of the serpentine belt as the company’s heartbeat—if it’s slipping or worn out, it can’t transfer power to your alternator. Check for cracks, glazing, or looseness in the belt. I once found mine frayed and loose after a visual inspection; replacing it immediately restored proper alternator function. Proper belt tension is vital; consult your vehicle’s manual or a professional to ensure correct tension. For troubleshooting tips, visit auto repair strategies.
Check for Parasitic Drains
Sometimes, other electrical components drain power, making it seem like the alternator is failing. Use your multimeter to check for current draw at the battery—set the meter to amps and disconnect the negative terminal, attaching the meter in series. A drain over 50 milliamps indicates a parasitic leak. I found a shorted interior light switch causing battery drain; disconnecting it fixed the issue. For step-by-step guidance, see parasitic drain testing.
Confirm the Alternator’s Output Under Load
Think of your alternator as a generator—its true test is whether it can sustain voltage under load. Turn on all electrical accessories—lights, radio, defrosters—and observe the voltage. It should remain above 13.8 volts. If it dips significantly, your alternator struggles under load. I learned this the hard way when my voltage dropped to 12.2 volts with everything on, indicating a failing alternator. For comprehensive diagnostics, consider professional assistance or detailed vehicle diagnostics explanations.
Even seasoned car owners often fall prey to misconceptions when it comes to auto repairs like brake service, diagnostics, or oil changes. One common myth is that a quick visual inspection suffices for brake issues—yet, the nuances of brake pad wear and rotor condition demand a more thorough approach, such as measuring pad thickness and checking for uneven wear patterns, which many overlook. This oversimplification can lead to dangerous driving conditions. Similarly, many believe vehicle diagnostics are just about reading error codes, but advanced diagnostics involve interpreting sensor data and understanding the vehicle’s complex electronic systems, an area where amateurs frequently make costly mistakes. For example, relying solely on generic scan tools without understanding manufacturer-specific codes can cause misdiagnosis, which is why consulting expert resources like this guide can save you money and prevent safety hazards. Regarding oil changes, the misconception that all oils are interchangeable can harm your engine; modern synthetic oils have specific additives tailored for different engines and climates. Choosing the wrong synthetic or sticking to outdated 3,000-mile intervals, as many still do, can lead to increased engine wear. Staying informed about new oil technologies helps optimize engine performance. Making these nuanced errors often stems from a lack of awareness of the latest industry standards and procedures. Remember, the real skill in auto repair is understanding the details that experts scrutinize, not just the basics. So, always question assumptions, and invest in learning the advanced aspects to keep your vehicle running safely and efficiently. Have you ever fallen into this trap? Let me know in the comments.
Investing in Reliable Tools for Auto Maintenance
Achieving lasting results in vehicle repair hinges on the quality of your tools. Personally, I swear by a high-quality digital multimeter like the Fluke 115. Its accuracy and durability make it indispensable for diagnosing electrical issues like parasitic drains or verifying alternator output. Unlike cheaper models, the Fluke provides precise readings that can uncover subtle electrical faults, saving time and preventing unnecessary repairs.
Another essential piece of equipment is a cordless impact wrench, specifically a model with adjustable torque settings, such as the Milwaukee M18. It streamlines tasks like removing stubborn lug nuts or stubborn fasteners during brake service without over-torquing or damaging components. Investing in professional-grade tools may seem costly initially, but they pay off through longevity and improved diagnostic confidence.
Embracing Modern Diagnostic Software
Modern vehicles are increasingly complex, making diagnostic software a must-have. I rely on a subscription-based platform like AutoEnginuity, which offers manufacturer-specific diagnostic codes and live data streaming. This software allows me to monitor sensor readings in real-time, pinpointing issues that generic scan tools can miss. It’s akin to giving your repair efforts a healthcare-level precision, ensuring long-term reliability.
Looking ahead, the trend is moving toward integrated diagnostic tools that combine hardware scanners with cloud-based data analysis, enabling remote expert consultations and predictive maintenance. Staying ahead with updated software and diagnostic strategies will be crucial for auto repair enthusiasts and professionals alike.
How do I maintain these tools over time?
Keeping your tools in top shape ensures reliable performance over years. Regular calibration of your multimeter is vital; I recommend sending it to certified calibration labs annually to maintain accuracy, especially if you use it frequently for critical diagnoses. Store tools in a dry, protected case, avoiding exposure to extreme temperatures that can degrade electronics and moving parts. Cleaning your impact wrench’s sockets and lubricating its moving parts after heavy use also prolongs its lifespan. For more detailed maintenance routines, consult trusted resources like auto repair hacks.
By investing in high-quality tools and maintaining them diligently, you ensure they remain effective long-term, supporting your vehicle care efforts with precision and confidence. To get started, try calibrating your multimeter this week and see how much more accurate your diagnoses become. Consistent care of your tools ultimately mirrors your approach to vehicle maintenance—focused, thorough, and committed to lasting performance.
The Tough Lessons Every DIY Car Enthusiast Should Know
- I once believed that a quick visual inspection was enough for brake issues, only to discover that measuring pad thickness and checking rotor wear is critical—don’t underestimate the details.
- Assuming all engine oil is interchangeable; I later learned that modern synthetics have specific formulations, and using the wrong type can accelerate wear—trust the experts or reliable guides.
- Relying solely on generic scan tools for vehicle diagnostics was a mistake; understanding manufacturer-specific codes and interpreting live data has saved me from costly misdiagnoses.
- Thinking that a loose serpentine belt is harmless, I found out it can cause undercharging and engine stress—regularly inspecting belt tension and condition prevents surprises.
- Ignoring parasitic drains led to repeated dead batteries for me; learning to detect and eliminate electrical leaks through proper testing made a real difference.
My Trusted Arsenal for Auto Repair Success
- Fluke 115 Multimeter: Its precision and durability provide confidence in electrical diagnostics—I highly recommend it for anyone serious about maintaining their vehicle.
- Milwaukee M18 Impact Wrench: Quality tools make FIXME repairs faster and safer, especially when it comes to brake service and removing stubborn fasteners.
- AutoEnginuity Diagnostic Software: With manufacturer-specific data and real-time monitoring, this software transformed my understanding of vehicle health—it’s worth every penny for serious DIYers.
- Magnetic LED Work Light: Good lighting is essential; a bright, portable light helps identify issues during inspections and repairs, especially in tight spaces.
Take the Wheel of Your Car Care Journey
Remember, automotive repair isn’t just about fixing things—it’s about understanding your vehicle and trusting your skills. Armed with the right tools and knowledge, you can approach brake service, diagnostics, and oil changes with confidence and clarity. Step into your garage or driveway this weekend and get hands-on—you’ll be surprised how much you can learn and save. Your vehicle’s health depends on YOUR awareness and effort. Ready to dive deeper? Share your biggest auto repair challenge below and let’s troubleshoot together!