
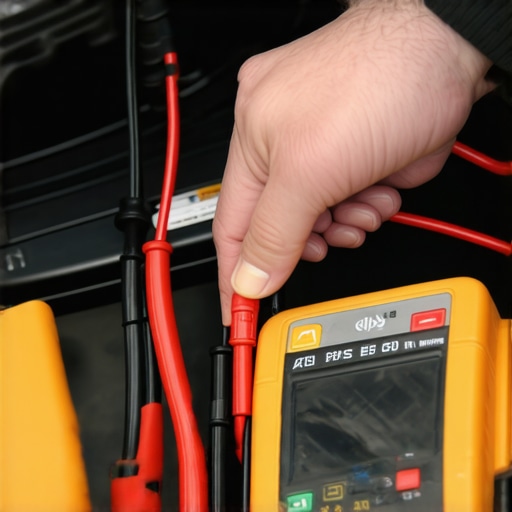
There I was, standing in my driveway at 6:00 AM, coffee in one hand and jumper cables in the other. It was the third time that week my truck wouldn’t start. I felt like an idiot. I’d already replaced the alternator and spent a small fortune on parts, yet the electrical ghost remained. I even made the rookie mistake of buying a second battery before I realized the problem wasn’t the storage—it was a thief in the night. That thief is a parasitic drain, and it doesn’t care how new your car is. Today, I’m going to show you how to stop the cycle of dead mornings and use a basic multimeter to pinpoint exactly which circuit is bleeding your system dry. We’re moving past the frustration of wondering why your new alternator still is not charging the battery and getting straight to the source.
Stop Throwing Money at a Dead Battery
It’s tempting to just keep replacing parts when your car fails to start, but that’s a fast track to an empty wallet. I spent years as a DIYer before I finally embraced the $20 tool every driver needs for basic electrical troubleshooting: the digital multimeter. Most people assume that if the battery is dead, the battery is the problem. However, modern cars are complicated beasts. According to research from Delphi Technologies, a vehicle today can have over 40 networked modules, and if just one of those fails to ‘sleep’ after you turn off the key, it can kill a healthy battery in under 48 hours. This is why vehicle diagnostics are so vital; you need to know which module is staying awake. Have you ever felt the sheer frustration of hearing that hollow ‘click’ when you’re already ten minutes late for work?
Wait, can I actually do this without being an electrician?
I get it. Looking at a fuse box feels like staring at a bowl of technicolor spaghetti. Early in my journey, I actually shorted out a perfectly good AC relay because I didn’t understand how to set my meter correctly. But here is the secret: you don’t need to be an engineer. You just need patience and a systematic approach. We are going to walk through the ‘fuse-pulling’ method and the ‘voltage drop’ method—the same techniques the pros use—to see which circuit is pulling more than the standard 50 milliamps. [image_placeholder] By the time we’re done, you’ll be able to tell if it’s a stuck trunk light, a faulty stereo, or a more serious glitch keeping your lights on all night.
Get Your Car Into Sleep Mode First
Before you even touch your multimeter, you have to convince your car that it’s time to sleep. Modern vehicles are like light sleepers; a single clicked door handle or a popped trunk can wake up the entire network of computers. I once spent four hours chasing a phantom 2-amp draw on a sedan, only to realize the trunk light was staying on because I hadn’t fully latched the catch with a screwdriver. To do this right, you need to trip all the latches—hood, doors, and trunk—using a screwdriver to click the mechanism into the ‘closed’ position while the doors are actually open. This gives you access to the fuse boxes without the car knowing you’re there. This is a crucial part of vehicle diagnostics that most beginners skip, leading to false readings and massive headaches.
Tricking the Computer to Shut Down
Once the latches are ‘tricked,’ lock the car with your remote and wait. Some high-end German cars can take up to 45 minutes to fully enter a sleep state where the modules stop communicating. If you start pulling fuses too early, you might wake a module up and have to start the timer all over again. During this wait time, it’s a good idea to check for obvious heat signatures. I’ve found stuck relays just by feeling which one was warm to the touch. It’s one of those auto repair hacks that saves you time before you even pull out the heavy equipment. If you find a warm relay, there’s a good chance you’ve found your thief.
Setting Up the Amperage Test
Now, grab that $20 tool every driver needs for basic electrical troubleshooting. To measure the draw, you need to put your multimeter in series with the battery. This means disconnecting the negative battery terminal and touching one probe to the terminal post and the other to the cable end. [image_placeholder_B] This forces all the electricity leaving the battery to flow through your meter. Always start on the 10A (high) setting. If you start on the milliamp (mA) setting and the draw is high, you’ll pop the internal fuse of your meter instantly—an annoying mistake I’ve made more times than I care to admit. Once you see a reading lower than 0.50, you can safely switch to the more sensitive mA scale for precision.
Why the Voltage Drop Method is Often Better
While the ‘fuse-pulling’ method is famous, it can be problematic because plugging a fuse back in can ‘wake up’ a computer module, skewing your results. A more advanced move is checking for ‘voltage drop’ across the top of the fuses. Every fuse has two tiny metal test points on the top. By setting your meter to millivolts and touching these points, you can see if current is flowing through that specific circuit without ever unplugging it. If you see anything above 0.0mV, that circuit is active. I used this trick to find a faulty AC relay that was intermittently staying on. It’s a cleaner, faster way to work through a crowded fuse box. You might find a glitch keeping your lights on or a radio that refuses to power down. If you’re struggling to find the source, remember that your OBD-II scanner can’t find the real electrical ghost; it takes physical probing and a systematic sweep of the fuse panel to catch the culprit.
We often think we’re being thorough by following the old-school rules, but modern engineering has moved the goalposts. Take oil changes, for example. The industry mantra is “clean oil means a clean engine,” but there is often the hidden sludge building up behind your clean dipstick that most drivers never see. Relying solely on the look of your oil is a risky habit, especially as oil change innovations allow synthetic fluids to stay golden while harmful deposits collect in the variable valve timing solenoids. In my experience, waiting for the oil to turn black is often too late; oxidation and additive depletion happen at the molecular level long before the color shifts.
The Hidden Danger of Pulling Fuses
Everyone says the easiest way to find a battery drain is to start yanking fuses until the amp reading drops. I’m here to tell you that’s a dangerous gamble on a modern vehicle. When you pull a fuse, you break a circuit. When you put it back, you send a “wake-up” spike to the car’s computer network, known as the CAN-bus. According to technical data from SAE International, a single module wake-up can draw significantly more power during its initialization phase than its steady state. If you’re pulling fuses, you might accidentally wake up a sleeping module and spend hours chasing a “drain” that you actually created yourself. This is why how advanced vehicle diagnostics prevent costly breakdowns by focusing on non-intrusive testing methods like voltage drop. 
Why does my car wake up when I touch a fuse?
It’s all about the communication network. Your car’s computers are constantly talking to each other. If you pull the fuse for the radio, the Body Control Module (BCM) might start “looking” for it, sending out signals that wake up the instrument cluster and the security system. It’s a domino effect that ruins your diagnostic window. Instead, using the voltage drop method allows you to test the circuit while it remains closed and the car remains asleep. This level of precision is one of those auto repair hacks that separates the driveway warriors from the experts. Have you ever fallen into this trap? Let me know in the comments.
The Brake Service Mistake That Ruins Rotors
Even a standard brake job has its nuances that most DIYers miss. Most people just slap on new pads and call it a day, but the real failure point is often the hardware. If you don’t know how to tell if your caliper slide pins are bone dry, your new pads will drag, overheat, and warp your rotors within a few thousand miles. You’ll end up with a brake pedal that vibrates only when you’re exiting the highway, and you’ll be left wondering why the brand-new parts are already failing. Don’t be fooled by brake service myths busted by enthusiasts; the chemistry of the grease and the integrity of the slide pins matter just as much as the friction material itself. Precision isn’t just for the engine; it’s about every moving part that lives in the road salt and grime.
I used to think my basic socket set and a cheap code reader were all I needed to keep my vehicles on the road forever. I was wrong. As cars transition from mechanical machines to rolling computers, the ‘keep it working’ philosophy has changed from just changing fluids to managing data and thermal loads. If you want to avoid the headache of a car that constantly lets you down, you need to graduate from basic tools to what I call the ‘Diagnostic Tier.’ I personally stopped relying on those free scans at the local parts store because they only tell you the symptom, not the cause. Instead, I invested in a bidirectional scan tool. Why? Because being able to command a fuel pump to turn on or a cooling fan to spin up from your tablet is the ultimate way to verify a component is actually dead before you spend a dime on a replacement.
The Pro Tool Kit That Pays for Itself
If you’re serious about long-term results, you need a thermal imaging camera. It might sound like overkill, but it is one of the most powerful auto repair hacks in my arsenal. Remember that parasitic drain we talked about? A thermal camera can ‘see’ a hot fuse or a stuck relay in seconds, without you ever having to pull a single circuit. It’s also incredible for vehicle diagnostics on your cooling system; you can literally watch the coolant flow through the radiator and spot a partial clog before your temperature gauge even moves. This level of insight is how you catch small issues before they become catastrophic failures that leave you stranded.

Beyond the high-tech gadgets, your maintenance schedule needs to evolve. Most people treat the ‘Severe Service’ schedule in their owner’s manual like a suggestion, but if you live in a city with stop-and-go traffic, it’s your bible. I’ve seen the hidden sludge building up behind your clean dipstick in engines that followed the standard 10,000-mile interval. To fight this, I perform a chemical engine flush every fourth oil change to keep the variable valve timing solenoids clear. According to technical documentation from Robert Bosch GmbH, even microscopic debris in the oil can delay solenoid response times by up to 15%, leading to poor fuel economy and ‘ghost’ misfires that frustrate even the best mechanics.
How do I maintain my car’s electronics over the long haul?
The secret isn’t in the wires; it’s in the connections. Every two years, I go through my engine bay and apply a high-quality dielectric grease to the major sensor connectors. This prevents the ‘green crusties’ (corrosion) from building up and causing high resistance. This simple habit is why my twenty-year-old truck doesn’t have the flickering lights or erratic idling issues common in older vehicles. It’s a foundational part of how advanced vehicle diagnostics prevent costly breakdowns; by maintaining the integrity of the data paths, you ensure the computer gets a clean signal every time. Don’t forget that the ultimate guide to brake service for safety and performance also includes checking the ABS sensors and their wiring harnesses for road debris damage.
Looking ahead, the next frontier is software-defined vehicles. We are moving toward a future where you might ‘flash’ a firmware update to your transmission to fix a shift flare instead of turning a wrench. But for now, the hardware still rules. I challenge you to try the ‘voltage drop’ method we discussed earlier on your battery ground cable tonight. It takes five minutes, and you might be shocked to find your ‘weak’ starter is actually just struggling with a dirty ground connection. Taking that one extra step is what keeps your car out of the shop and on the road.
Why Precision Always Beats Speed in My Garage
Reflecting on my years under the hood, the biggest shift in my mindset happened when I stopped trying to be fast and started trying to be accurate. First, I learned never to trust my eyes over my tools; a battery cable can look perfectly clean but have enough internal corrosion to cause a massive voltage drop that mimics a dead starter.
Second, I realized that decoding vehicle diagnostics is more like being a detective than a mechanic. You have to follow the actual voltage evidence rather than following a gut feeling that usually leads to buying parts you do not need. [image_placeholder_E]
Third, I discovered that ignoring small signals, like a faint ticking or a slightly soft brake pedal, always leads to a much more expensive weekend later. Real success in the driveway comes from adopting top auto repair tips to extend your vehicles lifespan through consistent, data-driven checks rather than reactive repairs.
Build Your Own Diagnostic War Chest
If you want to move beyond basic maintenance, you need a few specialized items that I swear by for my own fleet. I personally trust the Fluke 87V Digital Multimeter because its precision is vital when you are chasing tiny millivolt drops across a fuse. For seeing thermal ghosts like a stuck relay, a thermal imaging camera is a game-changer that pays for itself in one use.
When it comes to fluids, stay away from “magic” fixes in a bottle; I have seen the truth about those stop leak additives in your radiator and they usually clog your heater core long before they fix a leak. Instead, lean into oil change innovations and high-quality synthetic fluids that protect your engine at a molecular level. These tools are the foundation of how advanced vehicle diagnostics prevent costly breakdowns by letting you see what the naked eye misses.
Your Journey From Parts Changer to Troubleshooter
The transition from someone who just replaces parts to someone who truly understands vehicle diagnostics is incredibly rewarding. No more guessing why the battery is dead at dawn or why your dashboard is glowing like a Christmas tree. You now have the framework to test, verify, and fix your car with total confidence. Remember, every master technician started with a single dead battery and a confusing fuse box. Don’t be afraid to get your hands dirty and trust your senses—sometimes you can even diagnose a failing wheel bearing using only your ears before the grinding becomes a safety hazard. Take it one circuit at a time, and your car will stay on the road for years to come. Have you ever found a parasitic battery drain that completely stumped you? Let me know in the comments below!