

It was 7:15 AM on a Monday. I was already ten minutes behind for a big meeting when I hopped into my car, twisted the key, and encountered the sound every driver dreads: a pathetic, rhythmic clicking. I popped the hood, expecting the worst, and there it was. My positive battery terminal was completely buried under a mountain of fuzzy white and blueish crust. It looked like a science experiment gone horribly wrong. In my early days of DIY wrenching, I made the classic mistake of just pouring a can of sugary cola over the corrosion to ‘clean’ it off. Not only did that leave a sticky mess that attracted every bit of dust in the county, but it did not solve the underlying problem. I eventually learned that this ‘battery dandruff’ is a cry for help from your electrical system. Ignoring it is the fastest way to find yourself needing the simple test to see if your battery is actually dead.
What is That Crusty Stuff Anyway?
That white powder is essentially lead sulfate crystals. It forms when sulfuric acid vapor escapes from the battery vents and reacts with the lead in the terminals or the copper in your cable ends. Think of it as a chemical tantrum your car is throwing. If you have been decoding vehicle diagnostics on your own, you might have noticed your lights flickering or your radio acting weird—that is because this corrosion creates massive electrical resistance. According to experts at the Battery Council International, even a thin layer of this buildup can choke the flow of electricity, forcing your alternator to work overtime and potentially leading to how advanced vehicle diagnostics prevent costly breakdowns. I used to think a dirty engine was just an aesthetic issue, but after failing to start in a parking lot once, I realized why the secret to keeping your engine bay clean is actually a vital maintenance step.
Is this white powder going to explode?
It is the number one fear I hear from folks in the neighborhood. While the powder itself is not an explosive, it is highly acidic and can cause skin irritation or ruin your favorite shirt. The real concern is the gas that creates it. If your battery is constantly ‘off-gassing’ enough to build a coral reef of corrosion, your charging system might be overcharging the battery. Have you ever opened your hood only to find your battery terminals looking like they were dipped in powdered sugar? It is incredibly frustrating when you just want to get to work. Today, I am going to show you exactly how to clean this mess safely and ensure it never comes back to haunt your Monday mornings again.
Safety Gear and the Order of Operations
Before you even touch a wrench, put on some safety glasses and nitrile gloves. That white powder is acidic and loves to eat through jeans and sting skin. I learned this the hard way during a quick oil change session when a flake of corrosion landed right in a small cut on my finger. It stung like a hornet. First, you must disconnect the negative (black) terminal before the positive (red). Think of the negative terminal as the “anchor” to the car’s frame; if you leave it connected and your wrench touches the metal body while loosening the positive side, you will create a massive, terrifying spark. Using auto repair hacks save money without sacrificing quality, but safety is the one area where you never cut corners.
Neutralize the Acid with a Kitchen Staple
You do not need fancy chemicals to melt that crust away. A simple mixture of one tablespoon of baking soda and a cup of water is your best friend here. When you pour this solution over the terminals, it will fizz and bubble aggressively—that is the baking soda neutralizing the sulfuric acid. It is like a chemical battle happening right before your eyes. I remember the first time I did this on my old truck; the fizzing was so loud I thought the battery was actually boiling! This process is as vital to your electrical health as a brake service is to your stopping power. Once the fizzing stops, the acid is neutralized.
Getting Down to the Metal with a Wire Brush
Now that the heavy lifting is done by the chemistry, it is time for some elbow grease. Use a dedicated battery terminal brush—these are cheap, usually under five dollars, and have a female end for the posts and a male end for the cable clamps. You want to see shiny metal. If the metal looks dull or pitted, keep scrubbing. If you find the cable itself is frayed or thinning, you might be looking at more essential auto repair strategies for frequent drivers to replace the cable entirely. A clean connection ensures your starter gets the full “juice” it needs. It is much like how the secret to keeping your engine bay clean relies on precision rather than just blasting water everywhere.
Seal the Deal to Prevent a Repeat Performance
Once everything is dry—and I mean bone dry—you need to prevent the air and moisture from starting the reaction all over again. Use a thin layer of dielectric grease or specialized battery terminal protector spray on the metal surfaces before reconnecting. It acts like a raincoat for your electrical connections. This is one of those top auto repair tips to extend your vehicles lifespan that only takes thirty seconds but saves years of headache. When reconnecting, reverse the order: positive first, then negative. If you are still seeing issues after a thorough cleaning, you should check how to tell if your alternator is dying before the battery dies, as overcharging often causes excessive gassing. Making sure your connections are tight is as fundamental as debunking brake service myths busted what really matters for safety; it’s the small details that keep you on the road.
Stop Over-Tightening Your Terminals Before You Crack the Casing
I see it all the time: a DIYer gets those terminals shining like new, slides them back on, and then cranks down on the nut until the lead actually starts to deform. More is not better here. In fact, over-tightening is a classic “oops” factor that causes microscopic cracks where the post meets the battery case. These cracks allow even more acid vapor to escape, meaning you’ll be back under the hood with your baking soda in a month. It is a cycle of frustration that often leads people to believe they need a full brake service myths busted what really matters for safety or other unrelated repairs because the electrical noise is messing with the sensors. When you tighten, it should be snug enough that you cannot move the terminal by hand, but not a millimeter more.
What If the Corrosion Only Happens on One Side?
This is where things get interesting for the advanced reader. Most people think corrosion is just a random chemical byproduct, but the location tells a story. If you see buildup primarily on the positive terminal, it’s often a sign of overcharging—your alternator might be shoving too much voltage into the cells. If it’s the negative side, you’re likely looking at undercharging. Citing the experts at the Battery Council International, chronic overcharging is the leading cause of premature grid corrosion. If you keep seeing that blueish fuzz, it is time for decoding vehicle diagnostics to see what the voltage regulator is actually doing while you drive. Simply cleaning the mess without fixing the charging rate is just treating a symptom, not the disease.

Beyond the battery, I have found that many drivers mistakenly assume a “clean” terminal means a healthy electrical system. You could have perfectly silver posts but still suffer from a parasitic battery drain with a simple multimeter that kills your car overnight. I once spent three days chasing a “bad battery” only to realize a tiny glovebox light was staying on. It is these nuances that separate a parts-changer from a true mechanic. Even during a routine oil change innovations technologies that save your engine session, I always peek at the terminal seals. If they look damp or wet with acid, the internal pressure is too high, and no amount of cleaning will save that battery long-term.
The Hidden Risk of Disconnecting Cables With the Engine Running
Whatever you do, never disconnect a battery terminal while the engine is running to “test” the alternator. This is an old-school trick that worked on 1960s tractors but will absolutely fry the sensitive ECUs in a modern car. Without the battery acting as a giant capacitor to stabilize the electrical system, the alternator can send a high-voltage spike through the car. You might end up needing how advanced vehicle diagnostics prevent costly breakdowns just to figure out which module you burnt out. Have you ever fallen into this trap or accidentally sparked a terminal while working? Let me know in the comments below, and let’s make sure we’re all keeping our electronics safe.
The one tool I absolutely refuse to lend out is my Fluke 87V digital multimeter. Most people think a five-dollar tester from the bargain bin is fine, but when you are dealing with sensitive automotive electronics, precision is the difference between fixing a wire and replacing a three-hundred-dollar sensor. I learned this while hunting down a ghost in the machine that turned out to be the secret to finding a parasitic battery drain with a simple multimeter. Cheap meters often have lower input impedance, which can actually load down the circuit you are testing, giving you a false reading. When I am neck-deep in decoding vehicle diagnostics, I need to know the millivolt drop across a fuse is real. It is a level of accuracy that transforms auto repair hacks save money without sacrificing quality from a risky gamble into a professional-grade strategy.
Stop Guessing with Better Diagnostic Scanners
Beyond the multimeter, your toolbox needs a dedicated OBDII scanner that can read live data streams. I personally use an Autel unit because it allows me to see real-time fuel trims and oxygen sensor voltages. This is far superior to the free code scans at the local parts store that just tell you ‘Oxygen Sensor Bad.’ Often, the sensor is fine, but a vacuum leak is confusing it. Using a high-quality scanner is how you master how advanced vehicle diagnostics prevent costly breakdowns. If you can see the data before the Check Engine light even turns on, you are miles ahead of the average driver. 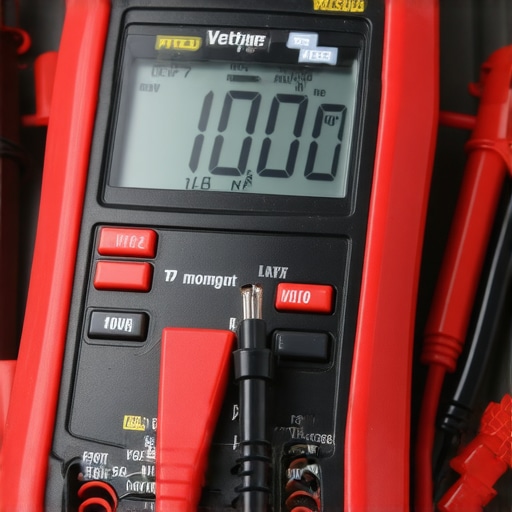
How do I keep my electrical system healthy for years?
To keep your car from becoming a paperweight, I recommend performing a ‘voltage sanity check’ every six months. Using your multimeter, check the battery with the engine off—it should be a solid 12.6V. Then, start the engine and ensure the alternator is putting out between 13.7V and 14.7V. This simple habit, combined with top auto repair tips to extend your vehicles lifespan, catches a failing alternator before it strands you. According to the SAE J1979 standard, which governs how your car reports diagnostic data, even slight variations in system voltage can trigger ‘pending’ trouble codes that haven’t lit up your dashboard yet. Getting ahead of these hidden codes is part of essential auto repair strategies for frequent drivers who cannot afford an unexpected breakdown. I truly believe we are moving toward a world where remote, cloud-based diagnostics will be the norm, where your car might even book its own appointment. But until that day comes, you still need to be the brain behind the wrench. If you have been putting off a checkup, take ten minutes this weekend to perform vehicle diagnostics explained easy checks before your road trip. It is the easiest way to ensure your Monday morning starts with a roar instead of a click.
Hard Lessons from a Cold Parking Lot
One of the biggest mistakes I made early on was treating battery maintenance as a once-a-year chore. I learned that corrosion is a silent killer of modern electronics. If that blue fuzz keeps coming back, you aren’t just looking at a dirty battery; you’re likely dealing with an alternator issue. I have spent hours decoding vehicle diagnostics only to find that a simple loose terminal was the culprit all along. Another lightbulb moment came when I realized that even ‘maintenance-free’ batteries aren’t actually immune. They still vent gases that can slowly eat away at your connections. Integrating a quick terminal check into your regular oil change routine is one of the most effective top auto repair tips to extend your vehicles lifespan.
The Gear That Separates Mechanics from Parts-Changers
To move beyond guessing, you need a kit that provides actual data. I swear by my digital multimeter for finding the secret to finding a parasitic battery drain with a simple multimeter. It is my most-used tool for troubleshooting electrical ghosts. I also recommend using a dedicated terminal protector spray over just globbing on grease; the spray creates a more uniform seal that won’t melt in summer heat. For those who want to dive deeper into essential auto repair strategies for frequent drivers, a decent OBDII scanner that reads live data is non-negotiable. I trust my Autel unit because it shows me exactly what the voltage regulator is doing in real-time, preventing me from buying parts I don’t need.
#IMAGE_PLACEHOLDER_E#
Take Charge of Your Morning Starts
Don’t wait for the dreaded clicking sound to act. Modern cars are essentially rolling computers, and they demand stable, clean voltage to function correctly. By taking twenty minutes to clean your terminals and check your charging system, you are doing more than just simple auto repair; you are ensuring your own peace of mind. Perform these vehicle diagnostics explained easy checks before your road trip to ensure your journey is uninterrupted. If you hit a wall or find a problem you can’t solve, do not hesitate to reach out through our contact us page. Have you ever been stranded because of a battery you thought was perfectly fine? Let me know your story in the comments below!