

I was halfway through a six-hour trek to the coast when the rhythm of the road was interrupted by something far more sinister than a pothole. It was a tink-tink-tink. A subtle, plastic-on-metal vibration emanating from somewhere deep behind my vents. I tried turning up the radio, but I knew it was there. I tried pounding on the dash like a frustrated caveman, but that only made it worse. By the time I reached my destination, I wasn’t thinking about the beach; I was thinking about tearing my interior apart with a pry bar. If you have ever found yourself obsessively pressing on every piece of trim while waiting at a red light, you are not alone. That phantom noise is a ghost in the machine, and today, we are going to find it and silence it forever.
Finding the Source Without Losing Your Mind
Dashboard rattles are the ultimate test of patience. My biggest mistake early on? I assumed the noise was coming from exactly where I heard it. I spent hours stuffing foam tape into the A-pillar, only to realize later the sound was actually a loose screw vibrating against the firewall. It is a classic case of acoustics playing tricks on you. Before you start ripping out your stereo, you need to realize that vibrations travel through the frame in ways that would baffle a physicist. In fact, J.D. Power consistently reports that interior noise and squeaks remain some of the most persistent complaints among vehicle owners, regardless of price point.
We are going to tackle this by using some clever auto repair hacks that cost next to nothing but save your hearing. Sometimes, what you think is a deep mechanical failure is just a stray coin in a vent or a loose clip. If you’ve been hearing a different kind of noise, like the clicking sound under your dash that happens even when you aren’t moving, that might be an actuator—but for the rhythmic rattles that happen over bumps, we are looking for loose hardware.
Is a DIY Fix Actually Safe for My Interior?
I get it. You are worried that by prying off a trim piece, you’ll snap a plastic tab and end up with a dash that looks like a jigsaw puzzle gone wrong. That fear is exactly what keeps people living with annoying noises for years. But honestly? Most of these panels are designed to be removed. I once broke a trim clip on my old sedan because I didn’t use the right tool, and let me tell you, a five-dollar set of plastic pry bars is worth its weight in gold compared to the cost of a replacement panel. Have you ever tried to fix a noise and accidentally created two more? Tell me your horror stories in the comments! Before any major road trip, I always perform vehicle diagnostics and easy checks to ensure the car is solid, but the dash rattle is a beast of its own. We’re going to use a systematic approach to isolate the culprit before we even pick up a screwdriver.
Clear Out the Junk Before You Start Prying
Before you commit to dismantling your vehicle’s interior, you must perform a total sweep. I cannot tell you how many times I have ‘fixed’ a dashboard rattle simply by removing a pair of sunglasses from the overhead console or a stray penny from the door pocket. It sounds simple, but vibrations are deceptive; they travel through hard plastic surfaces like sound through a telephone wire. I once spent an entire Saturday afternoon convinced my glovebox hinge was failing, only to realize my passenger-side seatbelt buckle was vibrating against the B-pillar. Clear everything out—every coffee cup, every charging cable, and every item in the center console. If the noise persists in a bare-bones cabin, you’ve officially graduated to the investigation phase.
Pinpoint the Vibration with a Buddy
Finding a rattle while driving is not only difficult; it is dangerous. You need a second set of ears. My favorite technique involves having a friend drive while I sit in different seats, pressing my palm firmly against various sections of the dash. This is the ‘pressure test.’ When the rattle stops because you’ve pressed on a specific piece of trim, you’ve found your culprit. It’s similar to how we use specific checks to determine the difference between a bad wheel bearing and a noisy tire; it’s all about isolating the variable. If the noise is coming from inside the dash, a mechanic’s stethoscope or even a simple piece of vacuum hose held to your ear can help you home in on the specific screw or clip that has vibrated loose over the miles.
Apply the Right Tension to Plastic Gaps
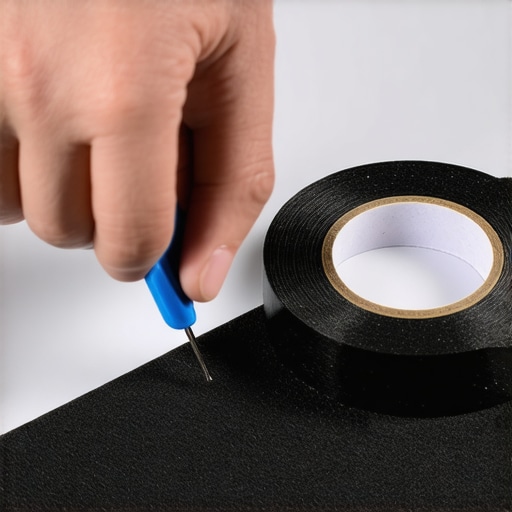
Once you’ve identified the loose panel, the fix is rarely about tightening a screw. Most modern car interiors are held together by friction and plastic clips. Over time, heat cycles cause these plastics to expand and contract, eventually creating tiny gaps that allow for movement. The ‘meat’ of the fix is creating tension. I swear by adhesive-backed felt tape and thin EVA foam. I once had a rattle in a luxury sedan that felt like a personal insult every time I hit a pothole. After prying the trim piece back just a fraction of an inch, I slid a small strip of felt into the seam. The silence was immediate. It’s a low-cost solution that mirrors some of my favorite auto repair hacks that prioritize cleverness over expensive replacements.
Use the Right Tools to Avoid Costly Damage
Whatever you do, put down the flat-head screwdriver. Metal on plastic is a recipe for gouges and cracked panels. You need a dedicated set of nylon trim removal tools. These are stiff enough to pop a clip but soft enough not to mar the finish. If you’ve ever had to learn how to remove a broken bolt without losing your mind, you know that using the wrong tool always makes the job twice as long. When prying, apply steady, even pressure. If a panel isn’t moving, look for hidden screws—often tucked behind the door handle covers or inside the bottom of a cup holder. If you are dealing with a rhythmic noise that seems more structural, it’s worth noting that dash rattles are high-frequency, whereas a sound like why your suspension squeaks like a rusty gate over speed bumps is usually a lower-frequency groan coming from outside the cabin. Keep your focus on the contact points where two pieces of trim meet.
These contact points represent a deeper scientific struggle between different types of plastic. Everyone says you just need to tighten a bolt, but in my experience, over-tightening is actually the fastest way to warp a panel and create a brand-new noise. This is where the engineering concept of ‘stick-slip’ comes into play. Research by SAE International (Standard J2917) into Buzz, Squeak, and Rattle (BSR) engineering demonstrates that most interior noises aren’t caused by loose hardware, but by materials grabbing and releasing each other at high frequencies. When you tighten a screw too much, you increase the surface tension, making that stick-slip effect even more pronounced.
Stop Chasing Ghosts with a Digital Scanner
While many DIYers reach for an OBD-II scanner at the first sign of trouble, I have found that decoding vehicle diagnostics for interior issues requires a more tactile approach. A scanner can tell you if a sensor is failing, but it cannot hear a vibrating heater duct. There is a common misconception that modern cars are purely digital, but your cabin is an analog environment. People often fall into a similar trap when they assume brake service myths are facts, like believing a squeal always means the pads are gone. Just as a brake squeal might just be a lack of anti-seize, a dash rattle is often just a dry plastic seam. Don’t be tempted to buy cheap aftermarket sensors or generic trim clips to solve the problem; if the fit isn’t identical to the OEM part, the vibration will return within a week.
Can Neglected Maintenance Actually Cause Interior Rattle?
It sounds crazy, but a vibration in your dashboard can sometimes be the first warning sign of a mechanical issue elsewhere. If your engine mounts are starting to harden, they stop absorbing the powertrain’s natural harmonics, sending those vibrations directly into the dash assembly. I’ve seen owners tear their interiors apart looking for a rattle that was actually caused by a rough idle or a slight misfire. This is why I always emphasize the importance of small details, such as why you should never skip the crush washer during an oil change. When you maintain the ‘smoothness’ of the vehicle’s operation, you prevent the vibration frequencies that lead to interior panels coming loose in the first place.

Don’t Melt Your Trim with the Wrong Lubricant
The biggest ‘oops’ factor I see involves the choice of lubricant. I once saw a guy try to silence a creaking glovebox with standard WD-40. Within a month, the petroleum solvents had started to chemically react with the ABS plastic, softening the finish and turning it into a sticky, ruined mess. If you aren’t using a dry PTFE (Teflon) spray or dedicated interior felt tape, you are playing with fire. Petroleum and plastic are enemies. Use a silicone-based or dry film lubricant that won’t attract dust or degrade the polymers. Have you ever fallen into this trap or used a ‘quick fix’ that ended up making the problem worse? Let me know in the comments! Taking the time to do it right is the difference between a quiet cabin and a dashboard that looks like it’s melting.
I’ve spent years hunting noises with nothing but my ears and a flashlight, but my breakthrough came when I started treating my car like a precision instrument instead of a bucket of bolts. For the stuff you can’t hear, I’ve started using a FLIR thermal imaging camera. It sounds overkill, I know, but if you want to know exactly why a wheel is humming, a thermal scan will show you a hot hub before the bearing even starts to play. It’s the same logic we apply to the ultimate guide to brake service for safety and performance; you want to see the friction before it becomes a failure. When a brake caliper drags, it creates a harmonic vibration that travels through the steering column and manifests as a dash rattle. If you only fix the dash, you’re just ignoring the symptom.
Beyond fancy cameras, my go-to is a high-quality OBD-II scanner with live data graphing. When I’m looking at oil change innovations and technologies, I’m not just looking at the oil; I’m looking at how the variable valve timing reacts to different viscosities. According to technical documentation from SAE International regarding vehicle NVH (Noise, Vibration, and Harshness), the precision of modern engine components means even a tiny deviation in fluid pressure can cause the subtle vibrations that eventually rattle your dash apart. I always cross-reference my physical findings with the digital pulse of the car.
How do I keep my car rattle-free for the next ten years?
The secret isn’t a one-time fix; it’s about managing the vibration environment. Every time you perform top auto repair tips to extend your vehicles lifespan, you should be checking your rubber components. Think of your engine mounts and suspension bushings as the shock absorbers for your interior trim. If those harden, your dash doesn’t stand a chance. I make it a habit to spray my door seals with a high-end silicone once a year—it keeps the rubber pliable so the doors don’t ‘chatter’ against the frame. This prevents the frame-to-body movement that translates into dashboard stress.
In the next few years, I predict we’re going to see AI-powered apps that use your phone’s microphone to perform a frequency analysis of your cabin in real-time. You’ll be able to hold your phone up, and the app will tell you, ‘That’s a 140Hz vibration, check your blower motor.’ We are moving away from guessing and toward pure data-driven repairs. For now, though, your best defense is a proactive eye. Before your next commute, take five minutes to learn how to tell if your serpentine belt is about to fail. A belt with a slight chunk missing can send a rhythmic pulse through the entire chassis that feels exactly like a loose dash screw. Go pop your hood today and give it a literal feel—just make sure the engine is off first!
The Hard Truth About My Failed Silence Quests
After years of hunting rattles, I have realized that patience is the only tool you cannot buy. First, never try to fix a plastic rattle when it is freezing outside; the tabs are brittle and will snap like dry twigs. Wait for a warm day or run the heater for twenty minutes first. Second, if you cannot find the source, check your doors and how to stop them from creaking, as that noise often echoes through the chassis and sounds like it is coming from the dash. Finally, I have learned that 90% of ‘mechanical’ dashboard noises are actually just loose debris like pens, coins, or sunglasses in the glovebox. Always empty the car before you pull the trigger on a teardown.
My Personal Gear for a Rattlesnake-Free Drive
I do not leave for a long trip without a few essentials in my garage. I highly recommend picking up a multi-piece Nylon Trim Removal Kit; it is the difference between a clean fix and a permanently scarred dashboard. For the actual silencing, Automotive Grade Felt Tape is my secret weapon for every plastic seam. I also suggest investing in advanced vehicle diagnostics tools like a digital scanner that graphs RPMs, which helps you identify if an engine vibration is the root cause of your interior buzz. Lastly, keep a bottle of Dry PTFE Lubricant handy; it solves plastic-on-plastic friction without the greasy mess of traditional sprays.
Take Control of Your Driving Environment Today
You spend hundreds of hours a year inside your car. Do not let a tiny piece of vibrating plastic ruin that experience or distract you from the road. Mastering auto repair does not always mean rebuilding a transmission; sometimes, the greatest victory is a silent cabin during a sunset drive. Whether you are performing a routine brake service or just securing a loose vent, every small action counts toward a more peaceful commute. By using these auto repair tips to extend your vehicles lifespan, you ensure that your car feels as solid and premium as the day it left the showroom. What is the most frustrating phantom noise you have ever had to hunt down in your car? Let me know in the comments below!