
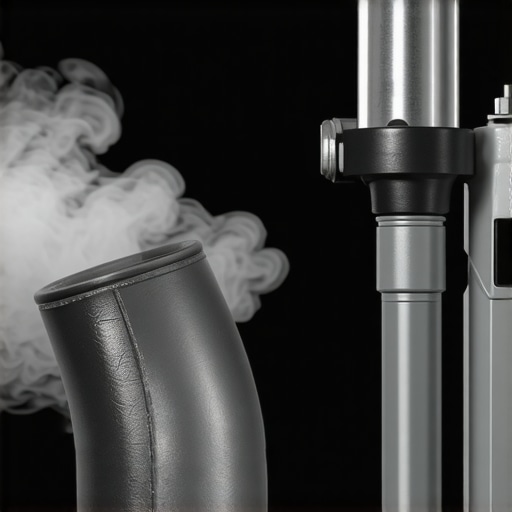
It was a cold Saturday morning when my car suddenly sputtered and refused to start properly. That panic feeling, you know—the jolt of realization that maybe I was about to bleed money at the shop again. Turns out, my problem wasn’t the fuel pump, as I initially suspected, but a loose intake boot causing a vacuum leak. That lightbulb moment changed everything for me. Have you ever dealt with a stubborn engine misfire that just wouldn’t go away? Well, today I’m going to share how I identified and fixed a common but sneaky culprit—an intake boot that looks innocent but can mimic a failing fuel pump, leading to costly repairs and frustration.
Perform a Visual Inspection of the Intake System
Start by locating the intake boot connecting your air filter to the engine. Remove any covers or components blocking access. Look for cracks, tears, or loose clamps. I once had a ’98 Honda Civic where a tiny crack in the intake boot caused shaky idling; a quick visual revealed the damage. Use a flashlight to spot small leaks or damaged areas. If you see damage, replacing the intake boot is straightforward—just unclip and swap it out.
Listen for Hissing Sounds During Engine Run
Start the engine and listen carefully around the intake manifold and boot. A hissing sound indicates escaping vacuum, pointing to a leak. I remember sitting beside my car when I heard that high-pitched whistle—once I tightened the clamps, the issue disappeared. Use a mechanic’s stethoscope or a long screwdriver as a listening tool. Place it on the intake hose, and if you hear a leak, it’s time for action.
Use Soapy Water for Leak Detection
Spray a mixture of soap and water onto the intake boot while the engine idles. Bubbles will form over any small leaks. During a previous repair, this method revealed a tiny crack I couldn’t see with my eyes. Be sure to keep the engine running at idle, then observe the spray area. If bubbles appear, mark that spot for repair or replacement.
Conduct a Vacuum Test with a Handheld Gauge
Connect a vacuum gauge to a port on the intake manifold. Watch for consistent vacuum levels; fluctuations indicate leaks. I once attached a gauge during a tune-up, noticing a sudden drop in vacuum—found a cracked boot that way. To do this, remove the spark plug wires or coils to access the port, then attach the gauge securely. If the needle flickers or drops, replace the faulty intake component.
Employ a Smoke Machine if Available
A smoke machine is the most precise tool for locating leaks. Pump smoke into the intake system and inspect for escaping smoke around connections or cracks. I borrowed a smoke tester from a local auto shop once; within minutes, the trail of smoke led to a tiny tear. This method is best for thorough diagnostics, especially on stubborn leaks. If smoke escapes, replace or reseal the affected part.
Replace or Repair the Intake Boot
Once you’ve identified the leak, purchase a compatible replacement. Always opt for OEM or high-quality aftermarket parts. During a repair on my Ford truck, I replaced the cracked boot, which instantly cured the misfire and rough idle. Loosen the clamps on both ends, remove the damaged boot, and install the new one, ensuring clamps are snug, but not overtightened.
Finish With a Test Drive and Re-Check
Start the engine and observe its behavior—smooth running indicates success. For reassurance, repeat the soap water spray or listen around the intake. Connecting a diagnostic scanner or checking engine codes can confirm the fix. Remember, a vacuum leak can mimic other issues, so verifying the repair helps prevent future roadblocks.
Many car owners approach maintenance and repairs with assumptions rooted more in myths than facts. One common misconception is that DIY repairs are always cheaper and better, but without proper knowledge, this often leads to costly mistakes that could have been avoided through professional diagnostics. For example, a simple oil change might seem straightforward, but using the wrong type of synthetic oil or neglecting to reset the oil service light can affect engine longevity. Dive into our article on [auto repair hacks to save money](https://repairmycarpro.com/auto-repair-hacks-save-money-without-sacrificing-quality) to discover smarter approaches.
Another widespread myth concerns brake service — many believe that once pads are replaced, no further maintenance is necessary. However, neglecting rotor inspection or not replacing worn hardware can compromise braking performance and safety. Read [brake service myths busted](https://repairmycarpro.com/brake-service-myths-busted-what-really-matters-for-safety) to learn how to spot genuine issues versus outdated beliefs.
Vehicle diagnostics often get oversimplified; people think that a check engine light automatically indicates a serious problem. Yet, many codes are minor or test-related. Advanced diagnostics, especially using modern scan tools, unveil nuances missed by basic code readers. To understand how sophisticated diagnostics prevent costly breakdowns, visit [this guide](https://repairmycarpro.com/how-advanced-vehicle-diagnostics-prevent-costly-breakdowns).
One essential nuance is that not all issues are immediately visible or audible but could be lurking beneath the surface, like subtle vacuum leaks or sensor failures. Relying solely on visual checks or ‘feel’ can be dangerous. For instance, a small vacuum leak can cause engine misfires that confuse inexperienced technicians. Implementing proper diagnostic procedures ensures accurate repairs, saving you money in the long run.
Furthermore, awareness of common pitfalls can help you avoid expensive trap scenarios, such as overlooking the importance of quality replacement parts. Using cheap, non-OEM components might seem cost-effective initially but often results in quick wear or further damage. Quality parts paired with precise diagnostics — see [vehicle diagnostics explained](https://repairmycarpro.com/decoding-vehicle-diagnostics-what-your-car-is-trying-to-tell-you) — safeguard your vehicle’s health.
Are you falling into any of these misconceptions? Recognizing the nuance in auto repair practices is crucial for extending your vehicle’s lifespan and ensuring safety. Remember, quick fixes and outdated beliefs could be costing you more than you think. To deepen your understanding, explore our tips on [top auto repair strategies for frequent drivers](https://repairmycarpro.com/essential-auto-repair-strategies-for-frequent-drivers). Have you ever fallen into this trap? Let me know in the comments.
Gear Up with Precision: Tools I Trust for Long-Term Vehicle Care
Maintaining your vehicle’s health over the years demands not just knowledge but also the right equipment. My top recommendation begins with a high-quality OBD-II scanner like the BlueDriver. This device bridges the gap between you and your car’s complex electronics, providing comprehensive diagnostics that are invaluable for spotting issues early, as detailed in this guide. I personally find it indispensable because it pairs seamlessly with my smartphone, making diagnostics accessible and efficient.
Next, I advocate for a set of precision torque wrenches such as the Beam Fish Model. Proper torque application prevents over-tightening or under-tightening critical components—like the intake boot I once replaced—long-term. Accurate torque ensures the longevity of repairs and prevents future leaks or failures. I calibrate my torque wrenches routinely to keep them reliable, which in turn saves me from unnecessary rework.
Another must-have is a digital multimeter. Beyond simple voltage checks, I use mine for testing complex sensor signals and diagnosing electrical issues before they become expensive repairs. For those interested in more advanced troubleshooting, this article shows how to use multimeters for quick alternator diagnostics—an essential skill for every DIYer.
What Will Keep Your Vehicle Running Smoothly Over Time?
Implementing routine diagnostics with reliable tools like the ones mentioned can significantly improve your vehicle’s lifespan. Check engine lights, strange noises, or performance shifts are often warning signs that shouldn’t be ignored. Investing in quality diagnostic equipment allows you to catch these issues early, avoiding costly repairs down the line. Additionally, maintaining a well-stocked toolkit with essential items ensures you’re prepared for minor repairs before they escalate.
For example, a well-calibrated vacuum gauge helps in detecting tiny leaks that can cause engine misfire and reduced fuel efficiency. Regularly inspecting and replacing parts like vacuum hoses and sensors using precise tools can prevent problems from snowballing.
Looking ahead, the trend is moving toward more integrated, software-driven diagnostics. As vehicle electronics become more complex, adopting universal diagnostic platforms compatible with OEM systems will be key. Staying updated with the latest tools and techniques is vital—consider attending workshops or subscribing to industry updates.
If you haven’t already, try using a multimeter to check your car’s sensor signals. It’s a straightforward yet powerful way to verify the health of vital components and prevent unexpected breakdowns. Remember, quality tools paired with consistent maintenance routines are your best allies in keeping your vehicle reliable and safe on the road.
Lessons That Changed How I Approach Auto Fixes
- I’ve learned that sometimes, the smallest crack or loose clamp can mimic more serious issues, reminding me always to look closer before jumping to conclusions.
- While tools are vital, trusting my intuition after a thorough inspection often leads to faster, more accurate repairs.
- Patience in diagnostics saves money and prevents unnecessary part replacements—sometimes, the simplest fix is hiding in plain sight.
- Sharing these lessons has helped me realize that a methodical approach to detecting vacuum leaks can empower any DIY enthusiast to take control of their vehicle maintenance.
Tools That Make the Difference in Diagnosing Vacuum Leaks
- An advanced vehicle diagnostic scanner has been indispensable for quick code reading and system checks, saving me time and guesswork.
- A quality digital multimeter helps me verify sensor signals and electrical connections, ensuring I don’t overlook electrical issues masquerading as vacuum leaks.
- Using a smoke machine provides pinpoint accuracy in leak detection, especially on stubborn leaks that evade other tests.
- A sturdy set of torque wrenches ensures clamps and fittings are properly secured, preventing future leaks.
Your Drive to Better Vehicle Care Starts Now
Taking charge of diagnosing vacuum leaks transforms frustration into confidence, leading to more reliable and efficient vehicle operation. Remember, mastering these inspection techniques and investing in the right tools not only saves money but also elevates your skills as a car owner. The road to confident DIY auto repairs begins with a curious mind and a willingness to learn. Dive into these methods, trust your observations, and keep your vehicle running smoothly for miles to come. How about sharing your own experience with engine diagnostics below? Let’s learn from each other’s journeys to better car care!
,