
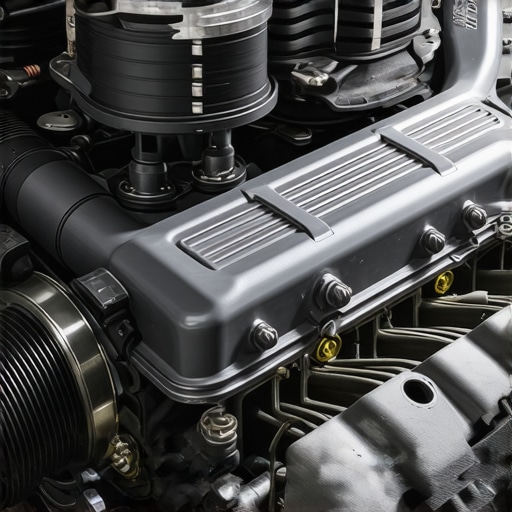
Ever been cruising down the highway, feeling confident in your ride, only to notice that your turbo boost is weaker than it used to be? Maybe your gas mileage has taken a nosedive, and you’re left scratching your head, wondering what went wrong. I remember the firsthand frustration—thinking I could ignore a small hissing sound, only to find out later it was a sneaky vacuum leak silently sabotaging my engine’s performance.
Why Your Turbo and Gas Mileage Are Suffering—And How a Small Leak Is the Culprit
After years of tinkering with cars, I’ve learned that a tiny vacuum leak can make a huge difference. It might seem insignificant—just a faint whistle here or a slight rough idle there—but underneath, it’s messing with your turbo’s ability to spool up and your engine’s fuel efficiency. Think of it as a leaky faucet dripping away your car’s power and your hard-earned gas money. The good news? It’s often an easy fix once you know where to look and what to do.
Is Ignoring a Vacuum Leak Actually Worth the Risk?
I’ll be honest—I used to ignore those subtle signs. I thought, “It’ll go away,” or “It’s just a small annoyance.” Early on, I made the mistake of ignoring a small hiss near the engine bay, assuming it was nothing serious. But that tiny leak led to more significant problems, including reduced turbo boost and increased fuel consumption. Over time, I realized that neglecting this issue could lead to costly repairs, like replacing the turbo or damaging valves. For more on diagnosing such issues, check out vehicle diagnostics tips.
Now, I want to share what I’ve learned so you won’t have to go through the same frustration. We’ll dive into how to identify that sneaky vacuum leak, why it’s so damaging, and what practical steps you can take to fix it yourself. Trust me, catching this problem early can save you a lot of money and headaches down the road. Ready to turn that nagging engine issue into a simple repair? Let’s get started.
Locate the Leak with Simple Checks
Start by inspecting the vacuum hoses under the hood. These are flexible rubber tubes connecting various engine components, acting as the car’s breath pipes. I once found a cracked hose near the throttle body by carefully feeling for loose or brittle parts—an approach I recommend over just visual inspection because cracks can be tiny and hidden. Use a flashlight to look for signs of wear, swelling, or disconnects. If you notice a hose that looks old or damaged, replace it immediately to prevent further issues. You can also listen for hissing sounds around the intake manifold or vacuum hoses while the engine is idling—this often indicates a leak. Remember, vacuum leaks are often caused by cracked hoses, loose clamps, or faulty gaskets, so check those areas diligently.
Use a Smoke Machine or DIY Methods
Applying Smoke for Visualization
If you have access to a smoke machine designed for automotive diagnostics, this task becomes straightforward. You insert the smoke device into the intake system and watch for the smoke escaping through any cracks or loose connections. I once borrowed a smoke machine from a local auto shop for a weekend and quickly pinpointed a tiny leak that was causing rough idling. If you don’t have a smoke machine, a good DIY alternative is the use of carburetor cleaner spray—spray it around hoses and gaskets while the engine runs. If the engine RPM changes or smooths out during spraying, you’ve found the leak location. Be cautious: avoid spraying near hot surfaces or open flames.
Test with Your Hands and Simple Tools
Another effective method involves using your hand or a piece of cardboard to feel or listen for escaping air. For example, with the engine running, gently press your hand or a piece of paper near suspect hoses while listening for a change in engine RPM. When the leak is present, you’ll feel the air pushing against your hand or hear the paper fluttering. I once used a piece of tissue paper to locate a leak near the intake manifold—when the paper fluttered, I knew I was on the right track. Remember, even small leaks can cause significant performance issues, so be thorough. Check the vacuum reservoir, check all hose clamps, and ensure gaskets are sealed tightly—these small steps save big troubleshooting time later.
Confirm Your Fixes Before Finalizing
Once you’ve replaced or sealed suspected leaks, start the engine again and check for signs of improvement. Listen for hissing sounds and observe engine behavior—smooth idle, stable RPMs, and good turbo response indicate success. To be confident, consider performing a second inspection or applying a quick smoke test to ensure the leak no longer exists. Remember, vacuum leaks can be sneaky; sometimes, small cracks reopen after tightening clamps or hoses shift. So, give it a detailed check, and drive for a test loop to verify improvements before calling the job complete. Keeping this process structured will help you tackle vacuum leaks efficiently, saving you time and money on unnecessary repairs.
Many car enthusiasts and even seasoned DIYers fall into common misconceptions when it comes to auto repair—especially regarding routine tasks like oil changes, vehicle diagnostics, and brake service. Let’s dig deeper into some nuanced truths that can save you time, money, and headaches. Contrary to popular belief, regular oil changes are not just about changing the filter and topping off; modern engine oil technologies require understanding specific formulations for optimal protection. For example, synthetic oils now outperform conventional ones in high-temperature stability and cleaning properties, which significantly extends engine longevity. However, many overlook the importance of the latest oil tech, risking engine wear from outdated oil choices.
Advanced Vehicle Diagnostics: Are You Missing Critical Clues?
When troubleshooting, most people rely on generic scanner codes or visual cues, but understanding the subtle signals your vehicle sends can prevent costly breakdowns. A common myth is that if the check engine light isn’t on, everything is fine. In reality, advanced diagnostics reveal minor sensor deviations—like a slight oxygen sensor drift—that, if ignored, can lead to reduced fuel economy and increased emissions. Expert tip: Regularly reviewing diagnostic data, even when warning lights are off, enhances proactive maintenance.
Brake Service: The Overlooked Details That Keep You Safe
Many drivers believe that new brake pads mean their brakes are perfect for 50,000 miles. But this ignores the nuanced roles of components like rotors, calipers, and brake fluid. For instance, ignoring uneven rotor wear can cause pulsation and reduce brake effectiveness. Furthermore, using the wrong brake fluid, or neglecting to bleed it properly, can lead to spongy pedals and compromised safety. Remember, a complete brake service considers all these factors, not just pad replacements. Pro tip: Regular inspection of brake calipers and fluid condition is crucial—don’t wait until you hear squealing.
So, what’s the real edge in auto repair? It’s about understanding the nuances and advanced details that people often overlook. Applying this knowledge means fewer breakdowns, better safety, and long-term savings. If you want to explore more about diagnosing vehicle issues before they become emergencies, check out vehicle diagnostics explained. And for practical tips on extending your car’s lifespan, visit top repair tips.
Have you ever fallen into this trap? Let me know in the comments! Staying ahead with informed maintenance makes all the difference in keeping your vehicle performing at its best.
Keeping Your Vehicle in Top Shape with the Right Tools
Maintaining a vehicle’s performance over time requires more than just knowing basic procedures; it necessitates investing in reliable, precise tools tailored for auto repair and diagnostics. Personally, I swear by a high-quality digital multimeter for wiring checks and sensor testing. I prefer this type because it provides quick, accurate readings essential for diagnosing electrical issues like faulty oxygen sensors or weak alternators. Additionally, a handheld scan tool that supports advanced diagnostic codes lets me delve deeper than generic OBD2 readers, uncovering hidden problems before they escalate. When selecting tools, always opt for professional-grade equipment; it saves you time and ensures safety during repairs.
Beyond hardware, software plays a crucial role. I rely on professional diagnostic platforms such as Toyota Techstream or OBDLink, which connect to my vehicle via Bluetooth or USB. These platforms give insights into live sensor data, engine parameters, and trouble codes—information vital for preemptive maintenance. For those new to diagnostics, investing in user-friendly apps that interface with reliable scanners can bridge the gap, helping you interpret what your vehicle reports and act accordingly.
Regular maintenance isn’t just about specific repairs but establishing a routine. I recommend creating a schedule for checking critical system components — think of it as an annual health check-up for your car. Using tools like brake fluid testers or coolant refractometers ensures you catch issues early. For example, testing brake fluid with a dedicated tester can alert you to moisture contamination that could impair stopping power, aligning with best practices outlined in brake service guidelines.
What About Long-Term Results and Scaling?
Scaling your auto maintenance practices depends on understanding your vehicle’s evolving needs. As vehicles age, upgrading to more sophisticated diagnostic tools like an oscilloscope or portable refrigerant leak detectors can provide deeper insights. I predict that in the future, continual advancements in sensor technology and onboard diagnostics will make vehicle maintenance more automated and less invasive—think self-diagnosing components and predictive analytics. Embracing these tools now will position you at the forefront of auto care.
How do I maintain tools and equipment over time?
Proper upkeep of your tools ensures their longevity and accuracy. Keep digital devices calibrated regularly—most scan tools come with calibration instructions or software updates. Store physical tools in a dry, organized environment to prevent corrosion and damage. Periodically test your multimeter against known voltage sources to confirm accuracy. Remember, well-maintained tools lead to precise diagnostics, saving you money and reducing guesswork. For more tips on extending your vehicle’s lifespan through proactive maintenance, visit top auto repair strategies. Don’t forget to schedule periodic reviews of your diagnostic software licenses and update firmware to ensure compatibility with the latest vehicle models.
By integrating these specialized tools and maintenance routines, you’re not just reacting to problems but proactively ensuring your vehicle remains dependable for the long haul. Remember, the right equipment paired with consistent upkeep can transform auto repair from a hassle into a manageable part of your routine. I encourage you to try out a diagnostic scan with your existing tools this week—it’s a game-changer in understanding your vehicle’s health. Need help selecting the best gear? Feel free to reach out through our contact page.
Uncovering the Unexpected in Car Maintenance
One of the most surprising lessons I’ve discovered is that small issues, like tiny vacuum leaks, can have outsized impacts on your vehicle’s performance. Recognizing early signs and understanding their root causes prevented costly repairs down the line.
Another insight came from realizing how vital the quality of diagnostic tools truly is. Investing in reliable equipment transformed my troubleshooting process, allowing me to identify problems faster and with greater confidence.
Finally, I learned that maintenance isn’t just about fixing things when they break but developing a proactive mindset. Regular inspections and understanding your vehicle’s nuances lead to a smoother, safer driving experience—and peace of mind that your car is in top shape.