There I was, sitting in my driveway, pressing hard on the brake pedal yet feeling that unsettling sponge-like softness. I had already bled the brake lines twice, followed every step in the manual, and still, the pedal felt like I was pushing through a marshmallow. Frustration rose as I wondered, what am I missing? It was a lightbulb moment—sometimes, even after following standard procedures meticulously, things don’t improve. And that’s exactly what I want to help you with today.
Because Your Brakes Should Feel Solid, Not Spongey
When your brake pedal feels spongy or soft, it can be deceptive—and dangerous. Many assume that bleeding the lines a couple of times will solve the problem. But what if it doesn’t? In my experience, I learned that this common issue often has underlying causes that go beyond just air in the lines. Understanding these hidden factors can save you time and, more importantly, ensure your safety on the road.
Questioning the Fix: Is Bleding Twice Enough?
Early on, I made the mistake of believing that bleeding the brakes twice was the magic fix. It’s a widespread misconception. Brake fluid is hygroscopic, meaning it absorbs moisture over time—this moisture can cause sponginess or reduced braking efficiency. But if you bleed the lines and the problem persists, it’s time to consider other culprits. For example, old or contaminated brake fluid might be the real villain, or a hidden leak could be letting air and moisture sneak back into the system. And yes, I even overlooked the possibility that the master cylinder itself was causing the issue, a mistake I learned the hard way. To avoid this pitfall, I recommend checking the entire brake system comprehensively. If you’re curious about more common mistakes, I explain a few in my article on why your car whistles at highway speeds.
Understanding these nuances is crucial because the brake system works as a delicate balance—any inconsistency can compromise your safety. Now, let’s dive into why your brakes might feel this way and how to fix it once and for all.
Inspect the Brake Fluid for Contamination
Start by checking the brake fluid reservoir; if the fluid appears dark, murky, or has particles, it signals contamination. Old brake fluid can cause spongy brakes because it absorbs moisture and loses its lubricating properties. To address this, I once drained and replaced my brake fluid, which improved pedal firmness immediately. Use a clean cloth to wipe the reservoir cap and ensure no dirt contaminates the fluid during refilling.
Flush and Replace Brake Fluid
Flushing brake fluid involves connecting a brake bleeder kit or using a pressure bleeder. Attach the kit to the master cylinder and pump new brake fluid through each wheel’s caliper or drum. While doing this, I followed a detailed tutorial, ensuring I replaced all the old fluid. This action removes moisture and air bubbles that cause sponginess. Remember, always use the manufacturer-recommended brake fluid type.
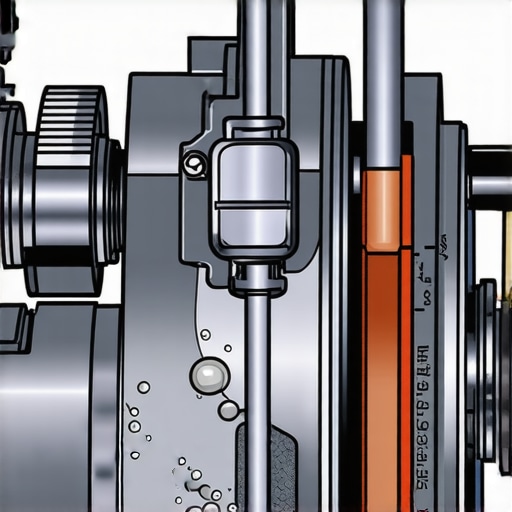
Check for Leaks and Hidden Rust
Proceed by inspecting brake lines, hoses, and fittings for leaks or corrosion. Rust often forms inside brake lines, creating blockages that lead to inconsistent braking. During a check, I found a rusty spot on my rear brake line, which was causing a leak. Replacing rusty sections prevents air from entering the system. Also, inspect the connection points for tightness and corrosion buildup, which can cause air ingress and reduce braking effectiveness.
Test and Replace the Master Cylinder if Needed
The master cylinder supplies brake fluid pressure; if it’s failing, pedal feels soft despite other repairs. To test, press the brake pedal multiple times; if it sinks gradually or feels spongier even after flushing, the master cylinder might be faulty. In my case, replacing the master cylinder involved bleeding the entire system afterward. When replacing, ensure no dirt enters the system and follow a proper bleeding sequence to prevent air pockets.
Verify Caliper and Brake Pad Functionality
Sticking calipers can cause uneven pad wear and a soft pedal. Remove the wheels and check caliper pistons for free movement. I used a pry bar to push back pistons after loosening the caliper bolts, ensuring smooth operation. If pistons are stuck, cleaning or replacing calipers is necessary. Also, assess brake pads for uneven wear, as unevenly worn pads affect pressure and pedal feel.
Perform a Test Drive and Final Inspection
After completing repairs, carefully test the brakes at low speed. Pump the brake pedal to confirm firmness, and press gradually to assess response. During a test drive, I noticed improved pedal firmness and confident braking. Always recheck for leaks, and ensure all bolts and fittings are tight. Regular maintenance and cautious diagnostics safeguard your safety while driving.
Many car enthusiasts and even seasoned DIYers believe that following standard procedures like basic brake bleeding or oil changes is enough to maintain vehicle health. However, this mindset often overlooks subtle nuances and hidden pitfalls that can lead to recurring issues or even accidents. For example, a common myth is that fresh brake fluid or a simple fluid flush guarantees long-term brake performance—yet, in my experience, neglecting to inspect other system components can be detrimental. Proper diagnostics require attention to detail and an understanding of how interconnected systems influence each other.
Watching Out for the Hidden Traps in Diagnostics
A prevalent mistake is assuming that symptoms like soft pedals or rough idling are solely due to obvious causes. Often, residual issues lurk beneath the surface—corrosion in brake lines, faulty sensors, or electrical interference—that are easy to overlook but crucial for accurate diagnosis. For instance, a rusted brake line not only causes leaks but can also harbor internal blockages, leading to inconsistent brake feel. To avoid such pitfalls, I recommend thorough inspections and considering less obvious causes, especially when initial fixes fail. For a deeper dive into electrical diagnostics that can sometimes mimic mechanical problems, see my guide on hidden fuses.
Why Does My Car Still Feel Off After Repair
This is a question I frequently encounter from readers. Often, the root cause isn’t just the part you’ve recently replaced or repaired but the cumulative effect of overlooked issues. For example, installing new brake pads without checking the caliper pistons or the master cylinder can lead to premature wear or soft pedal feel. Advanced diagnostics involve using scan tools, pressure gauges, and a systematic approach to pinpoint the true problem source—not just the first symptom. Studies like those published in the Journal of Vehicle Diagnostics emphasize how comprehensive testing can reduce repeat visits and enhance safety.
Another common trap is relying solely on visual inspections. While seeing corrosion or leaks helps, it’s equally important to perform functional tests—pressure tests on brake lines or power window load tests—to uncover hidden faults. This layered approach minimizes the risk of missing critical issues that can escalate over time.
Advanced Techniques to Elevate Your Repair Strategy
To truly master vehicle diagnostics, embracing tools like diagnostic scanners and multimeters is essential. Properly interpreting sensor data or electrical signals can reveal issues such as parasitic drains or faulty temperature sensors—problems that might not trigger dashboard warning lights but cause performance dips. For example, a small electrical short can drain your battery rapidly without obvious signs. Learning to read these signals can prevent unforeseen breakdowns, saving you money and stress.
Remember, not all faults present with clear symptoms. Sometimes, the real culprit is a delayed or misunderstood diagnosis—an oops that can lead to unnecessary part replacements or safety risks. Always take the time for deep diagnostics, especially if initial fixes don’t stand the test of time.
So, what’s your experience with overlooked vehicle issues? Have you ever fallen into this trap? Let me know in the comments!
Keep It Running with the Right Tools
Maintaining your vehicle’s health over time requires more than just basic know-how; it demands precision tools that can help you diagnose issues accurately and perform long-lasting repairs. Among my favorites is a digital multimeter. I personally rely on a high-quality multimeter because it allows me to pinpoint electrical drains and test sensors efficiently, saving time and preventing unnecessary replacements. Additionally, a pressure brake fluid tester helps ensure your brake pedal feels firm, which is critical for safety and longevity.
For diagnosing complex issues, I favor an OBD-II scanner. I recommend models that provide real-time data and customizable dashboards, such as the BlueDriver, which connects seamlessly via Bluetooth and offers detailed fault code explanations. Knowing how to interpret these codes means catching problems early, before they escalate. Moreover, investing in a mechanic’s creeper can make inspections more comfortable, especially when working under the car for extended periods.
How do I maintain diagnostics tools over time?
Regular calibration and software updates are essential to keep your diagnostic tools accurate and reliable. For instance, keeping your OBD-II scanner’s firmware updated ensures compatibility with the latest vehicle models. I set a quarterly reminder to perform these updates and check battery life on handheld devices, preventing unexpected failures in critical moments. Also, storing your tools in a dry, clean environment prolongs their lifespan.
Leverage Technology for Long-Term Success
Beyond tools, high-quality diagnostic software can enhance your repair process significantly. Platforms like AutoEnginuity offer comprehensive modules for advanced systems, including ABS and transmission diagnostics. While they come with a learning curve, mastering them pays dividends in diagnosing elusive issues, much like understanding the nuances behind why your car might whistle at highway speeds—something I’ve detailed in my article here.
Looking ahead, the trajectory of vehicle diagnostics points toward increased integration with mobile apps and cloud-based data analysis. The future promises quicker, more accurate diagnostics accessible right from your phone—making DIY repairs more practical than ever. To stay ahead, I recommend investing time in learning these tools now; it’s an investment that pays off with safer, more reliable vehicle performance.
How do I keep my diagnostic tools effective over time?
Maintaining calibration, updating software, and proper storage are key to longevity. For example, ensuring your multimeter’s calibration is within spec prevents misleading readings that could lead to misdiagnosis. I routinely check my equipment against known standards once a year and follow manufacturer instructions for storage. Doing so minimizes drift and keeps your diagnostics trustworthy, ultimately helping your vehicle stay in top shape for the long haul.
By choosing the right equipment and practicing diligent maintenance, you enhance your ability to troubleshoot and repair effectively. Remember, a well-equipped toolbox coupled with updated knowledge is your best defense against unexpected vehicle troubles. Don’t hesitate to try out that advanced multimeter tip—accurate diagnostics could be just a measurement away from saving you money and stress!
,
The Hardest Lesson I Learned About Vehicle Diagnostics, Oil Change, and Brake Service
- Always look beyond the obvious signs; a soft brake pedal might hide rusted lines or a failing master cylinder, not just air in the system.
- Overlooking the importance of fresh, contaminant-free brake fluid can lead to recurring issues despite repeated bleeding.
- Regularly inspecting and updating diagnostic tools minimizes misdiagnosis and enhances trust in your repairs.
- Patience in the diagnostic process often uncovers hidden rust spots or electrical glitches that simple tests might miss.
- Learning from each repair experience builds intuition, turning challenges into opportunities for mastery rather than frustration.
My Essential Toolkit for Auto Repair and Maintenance
- High-Quality Multimeter: Critical for electrical diagnostics, I trust the multimeter guide I followed to prevent misreading subtle signals.
- OBD-II Scanner: Real-time data helps catch issues early. I recommend models like BlueDriver for their reliability and deep diagnostics, making troubleshooting more straightforward.
- Brake Fluid Tester: Ensures your brake system’s health after flushing, confirming that your pedal firmness is restored effectively.
- Mechanical Tools: Including a pry bar and a set of impact wrenches, they save time when dealing with stuck calipers or frozen components.
Embrace Your Vehicle’s Future with Confidence
Every repair journey teaches us that vehicle diagnostics and maintenance are as much about patience as precision. Your willingness to learn and invest in quality tools makes all the difference in ensuring safety and performance. Remember, each troubleshooting step is an investment in your vehicle’s longevity and your peace of mind. Don’t hesitate to experiment with advanced techniques and tools—beautiful results often come from persistent curiosity and care.
What’s the most stubborn issue you’ve successfully tackled with new diagnostic knowledge? Share your story below—I love hearing about the breakthroughs that drive us all forward.
⬇️