Ever been in the middle of a jam, and suddenly your radio cuts out? You pop the fuse box cover, only to see the tiny filaments toasted again. It’s frustrating, right? I’ve been there myself—fighting that all-too-familiar blow, trying to figure out what’s causing the short. And let me tell you, the lightbulb moment came not from guessing, but from understanding the root cause of that persistent short circuit.
The Hidden Culprit Behind Blown Radio Fuses
That annoying popped fuse isn’t just a minor inconvenience; it’s a sign of an underlying electrical issue. If ignored, it can lead to more serious damage or even leave you stranded. I’ve made the mistake early on of replacing the fuse repeatedly without inspecting the wiring, only to see it blow again. That was a waste of time and money. The truth is, short circuits can hide deep within the wiring harness, often caused by damaged insulation, corrosion, or faulty components.
Knowing how to trace that elusive short means you save yourself headache and unnecessary repairs. Today, I’ll share the proven methods I’ve used to pinpoint and fix those sneaky faults—methods that have saved me time and money. Trust me, understanding the wiring and having a plan makes all the difference.
Is Finding the Short Circuit Worth It
You might be skeptical—”Is this really manageable DIY territory?” Honestly, I was too. I thought I needed a specialist and costly tools. Turns out, with patience and some basic tools, you can identify the short yourself. One early mistake I made was assuming the problem was always in the fuse box itself, when in reality, the wiring or connected components were the real troublemakers. For example, corroded ground connections can cause those sneaky shorts, and many overlook them.
Getting it right from the start is crucial. If you’re tired of chasing the same blown fuse and want a Reliable, step-by-step way to find and fix that short, keep reading. I’ll take you through the process that finally put this issue to bed in my own garage—and it can do the same for you. And if you’re curious about related electrical gremlins, you might find [this article on faulty sensors](https://repairmycarpro.com/the-dirty-sensor-causing-your-car-to-stall-at-red-lights) helpful to understand other hidden electrical issues.
Ready to dive into the troubleshooting strategy that will save your radio—and your sanity?
Start with Visual Inspection
Begin by disconnecting the battery to prevent further damage and then thoroughly examine the wiring harness near the fuse box and affected circuits. Look for obvious signs like melted insulation, corrosion, or damaged connectors. Remember, sometimes the sneakiest shorts hide behind the dirt and grime.
For instance, I once found a frayed wire rubbing against the metal frame, creating a constant short that kept blowing the fuse. Carefully inspecting these areas can save you hours of guesswork and unnecessary replacements.
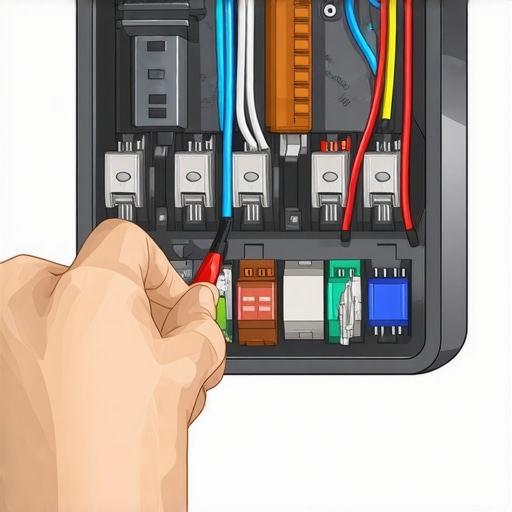
Use a Test Light or Multimeter to Trace Wires
Connect a test light or multimeter in series with the circuit to pinpoint the fault. Set your multimeter to resistance mode, then probe the wires while the vehicle’s wiring is energized. A low-resistance reading indicates a short to ground.
During my own troubleshooting, I clipped a multimeter to the suspected wire, and when I saw the resistance drop sharply, I knew I was close. Testing systematically from the fuse to the components helps localize the problem area efficiently.
Isolate the Circuit Components
Disconnect individual connectors and components within the suspect circuit to see if the fuse holds. If disconnecting a particular sensor or module stops the fuse from blowing, you’ve identified the culprit.
For example, I once disconnected a faulty sensor and noticed the fuse stayed intact. Replacing that sensor resolved the short circuit entirely, illustrating the importance of isolating parts to narrow down the exact problem.
Check Ground Connections Carefully
Ground faults are a common source of shorts. Ensure all ground wires are securely attached, free of corrosion, and have a good connection to the chassis or engine block. Loose or corroded grounds can create unpredictable shorts that blow fuses unexpectedly.
In my case, cleaning the corroded ground terminal restored proper grounding and eliminated the fuse-blowing issue. Regularly inspecting and maintaining ground connections can prevent short circuits from recurring.
Use a Power Probe for Persistent Shorts
If the short isn’t obvious, a power probe allows you to activate circuits individually without removing wiring. Carefully apply power to specific branches and observe if the fuse blows or stays intact. This method is especially useful for tracing hidden shorts within complex wiring bundles.
During one troubleshooting session, I used a power probe to energize each circuit step-by-step, which finally exposed a damaged wire under the dash that was grounding out against metal. This targeted approach saved me from tearing apart the entire dash.
Consult Service Manuals and Wiring Diagrams
Refer to your vehicle’s service manual for detailed wiring diagrams. Knowing the precise layout helps you understand where the fault may be hiding and assists in testing specific wires or connectors efficiently.
When I first attempted to diagnose my car’s electrical short, consulting wiring diagrams guided me directly to the problematic circuit—saving me extensive trial-and-error and ensuring a quicker fix.
Take Preventive Steps to Avoid Future Shorts
After fixing the short, secure all wiring with proper clips and protect vulnerable areas with loom or conduit. Replace any damaged wires promptly to prevent recurrence. Regular inspections during maintenance can spot worn insulation or corrosion before they cause a fuse blowout.
Adding protective coverings and being vigilant about wire condition ensures your vehicle stays reliable, avoiding unnecessary repairs down the road.
Many vehicle owners assume that following the basic recommended intervals for oil changes and brake service guarantees optimal performance. However, for seasoned mechanics and automotive experts, the true nuance lies in understanding the unique needs of each vehicle and recognizing the pitfalls of one-size-fits-all advice. For instance, the common myth that all oils can be changed at the same interval ignores factors like driving habits, climate, and engine type. High-mileage or spirited drivers often require a different approach, and neglecting this can accelerate wear and tear.
Similarly, brake service often gets oversimplified into just replacing pads when squealing occurs. But the real expertise involves inspecting the entire brake system, including rotors, calipers, and brake fluid condition. Failing to recognize the early signs of issues like contaminated brake fluid can lead to costly repairs down the road.
In vehicle diagnostics, many drivers trust scan tools blindly, assuming they reveal the full story. Yet, a sophisticated issue such as a failing sensor or a wiring fault might not trigger a fault code but still impair vehicle performance. An experienced technician will know to dig deeper beyond the diagnostic code and physically inspect components or interpret subtle symptoms.
One often overlooked nuance in auto repair is the importance of preventive maintenance tailored to your vehicle’s specific usage. For example, a vehicle regularly subjected to stop-and-go city driving may need more frequent transmission or coolant system checks. Missing these subtle cues and relying solely on generic schedules can lead to premature component failure.
Beware of common traps like neglecting to replace old hoses, which can rupture under pressure, or assuming that a squealing brake always indicates worn pads—sometimes, it’s a sign of contaminated brake fluid or even warped rotors. An advanced mistake many make is ignoring the fine print in service manuals, which sometimes specify different intervals for certain components based on operating conditions.
Make sure to stay informed and attentive to your vehicle’s specific needs. Regular, detailed inspections combined with understanding the nuances can save you significant money and prevent inconvenient breakdowns. Want to learn more about nuanced car care? Check out [this article on brake fluid deterioration](https://repairmycarpro.com/the-dangerous-reason-your-brake-fluid-is-getting-dark-so-fast) for deeper insights.
Have you ever fallen into this trap? Let me know in the comments.
Keeping your vehicle running smoothly over the years requires more than just routine oil changes and brake pad replacements. Investing in the right tools and adopting effective methods can significantly extend your vehicle’s lifespan and enhance safety. One tool I find indispensable is a high-quality scan tool like the OBD-II scanner. I personally recommend the Autel MaxiCOM because it provides comprehensive diagnostic capabilities, allowing me to pinpoint issues before they escalate. Regularly scanning your vehicle can reveal hidden problems, such as failing sensors that might cause your engine to stall or your brake system to underperform — for example, issues discussed in this article.
In addition to diagnostic tools, maintaining a good set of mechanic’s essentials — including a digital multimeter, ratchet set, and brake bleeder kit — makes repairs more manageable. I prefer a digital multimeter with auto-ranging features because it saves time when testing circuits or checking sensors. For brake services, I rely on a power bleeder to ensure a thorough, hassle-free brake fluid flush. This simplifies a traditionally messy process and prevents air from entering the system, which can compromise braking performance.
When it comes to long-term results, consistent use of specialized lubricants and quality replacement parts pays off. For example, using synthetic oils tailored to your driving style can better protect engine components, especially in extreme conditions. Additionally, trusting OEM parts or quality aftermarket equivalents reduces the likelihood of future failures. For instance, replacing worn CV joints before they fail completely can save you from roadside breakdowns — information detailed in this guide.
How do I keep my vehicle functioning smoothly over time?
First, establish a regular maintenance schedule that includes not only fluid changes but also inspecting critical components like belts, hoses, and electrical connections. Use diagnostic tools periodically to catch problems early. For example, checking brake fluid condition ensures your braking system remains responsive, aligning with advice in this article. Additionally, consider investing in a digital wheel alignment sensor or a tire pressure monitoring system to prevent uneven wear and improve fuel efficiency. As technology advances, vehicle diagnostics will become even more sophisticated, enabling proactive maintenance rather than reactive repairs.
Start by trying out a professional-grade scan tool like the Autel MaxiCOM mentioned earlier. Running regular diagnostics is a game-changer for catching potential issues early and ensuring your vehicle remains reliable for years to come.
The Hard-Won Lessons that Changed My Approach to Vehicle Care
One of the most valuable insights I gained was understanding that not every electrical issue is a quick fix. Sometimes, the root cause lies beneath layers of grime, corrosion, or unnoticed damage, and rushing to replace parts without proper diagnosis only wastes time and money. I learned to trust my inspection skills over relying solely on diagnostic tools, knowing that a careful visual and tactile examination uncovers problems hidden in plain sight.
Another lesson was realizing the importance of maintaining proper grounding and insulation. Simple things like cleaning corrosion from ground connections or applying protective loom can prevent many shorts before they cause fuses to blow. It’s a small investment of time for a big payoff in vehicle reliability. These preventative measures are often overlooked but can save hours of troubleshooting later.
Finally, I discovered that patience is a mechanic’s best friend. Tracking down a mysterious short circuit might take hours of systematic testing, but rushing through the process increases the risk of misdiagnosis. Methodical isolation of circuits, combined with the right tools like a multimeter or power probe, transforms a daunting task into an achievable repair. Understanding these lessons has turned me from a frustrated hobbyist into a confident DIYer who can handle unexpected electrical hiccups with clarity and calm.
Tools and Resources That Keep Me Going
My go-to diagnostic companion is the OBD-II scanner, which helps me monitor engine health and catch issues early. Pairing it with a quality multimeter, like the Fluke 117, allows for precise circuit testing—knowledge that has saved me from replacing parts blindly.
For detailed wiring schematics, I rely on the vehicle service manual. It’s like having a road map during troubleshooting, guiding me directly to problematic areas instead of wasting effort trying random fixes. And I always keep a high-quality set of electrical connectors and protective loom on hand to reinforce wiring and prevent future shorts.
Books like Auto Repair for Dummies have also been invaluable, providing foundational knowledge and troubleshooting tips distilled into practical advice. These resources aren’t just reference points—they’re companions that empower me to take control of my vehicle’s health, extend its lifespan, and save money on repairs.
Embrace Your Inner Troubleshooter and Drive Forward
Every challenge you encounter on your auto repair journey is an opportunity to learn something new. With patience, the right tools, and a curious mind, you can uncover hidden faults and keep your vehicle running smoothly for years to come. Remember, the skills you develop today will transform your approach to every repair—making you less dependent on others and more confident in your abilities. So go ahead, take control of that diagnosing process. Your car—and your wallet—will thank you.
What’s the trickiest electrical problem you’ve faced in your garage? Share your experience below and let’s learn from each other’s stories!