
It was 5 PM on a Friday, and a nasty summer storm was brewing on the horizon. I was sitting at a drive-thru, just trying to grab a quick burger, when I hit the switch to roll my window back up. Nothing. No movement, no motor sound, just a pathetic little ‘click’ and the sound of my own rising blood pressure. My interior was about to become a swimming pool. I’ve been there before, and I’ll be honest with you: years ago, I panicked and paid a shop nearly $500 to replace a window regulator, only to find out later that the real culprit was a dirty contact I could have cleaned in minutes. Talk about a blow to the ego. Today, I’m going to make sure you don’t repeat my expensive mistakes.
Stop Toggling the Switch and Try This Instead
We’ve all been there. You press the button, and instead of that satisfying hum, you get silence or a weak, agonizing groan. Before you assume your motor is fried or your wiring has vanished into the abyss, I’m going to show you the ‘slam method’ and a few other tricks that have saved my hide more times than I can count. We aren’t just talking about temporary band-aids; we’re looking for the root cause. Sometimes it’s a simple case of why your power windows are moving slower than they used to, and other times, it’s just a temporary ‘brain fart’ in the car’s computer. We are going to get that glass back into the door frame where it belongs, and we’re going to do it without you losing your mind or your hard-earned savings.
Is this actually going to work or am I wasting my time?
I get it. You’re skeptical. You think if a motor is dead, it’s dead. But here’s a secret from someone who has spent way too many weekends covered in grease: mechanical parts often just get ‘stuck’ on a dead spot. According to data from RepairPal, a window regulator replacement can cost anywhere between $300 and $600. That’s a massive amount of money to gamble before trying a five-minute hack. I once made the mistake of ignoring a dashboard that was flashing like a Christmas tree, thinking it was unrelated, only to realize my battery was weak—and a weak battery is the mortal enemy of power windows. Have you ever been stuck at a toll booth or a drive-thru with a window that refused to close? Tell me your ‘stuck window’ horror story in the comments.
Why Your Window Is Ghosting You
The reality is that car parts are like humans; they get tired and they get dirty. Dust and grime build up in the tracks, creating friction that eventually overpowers the motor. If you’ve noticed the glass struggling lately, you might just need to revive a sticky window motor with a silicone spray rather than replacing it entirely. It’s often a simple matter of vehicle diagnostics that you can perform right in your own driveway. We’re going to look at the fuse box, the switch contacts, and the ‘percussive maintenance’ trick that surprisingly works on about half the cars I’ve worked on. It’s about being smarter than the machine, not just throwing parts at a problem.
Check the Fuse Before You Waste Your Saturday
Before you start ripping off door panels and buying expensive parts, you need to check the simplest point of failure: the fuse box. Think of a fuse as a tiny sacrificial lamb; it blows so your car’s computer doesn’t. If multiple windows stopped working at once, this is almost certainly your culprit. I remember spending three hours stripping a door panel on my old 2004 sedan in a hot parking lot, convinced the motor was fried because of a faint metallic smell. Halfway through, I checked the panel and realized a 10-cent fuse had popped. It’s a classic auto repair hack that saves more time than anything else. Locate your fuse diagram—usually under the dash or the hood—and look for the one labeled ‘PWR WNDW’ or similar. If the metal bridge inside is broken, swap it out. If it isn’t the fuse, we move to the ‘action’ phase.
The Magic of Percussive Maintenance
This sounds like a joke, but it works because of how electric motors are built. Over time, the carbon brushes inside the motor can get stuck on a ‘dead spot’ or become coated in a thin layer of oxidation. By applying a localized shock while sending power to the motor, you can often jar those brushes back into contact. Here is the trick: turn your ignition to the ‘on’ position, hold the window switch in the ‘up’ position, and firmly slam the car door. If the door is already closed, give the area near the speaker (where the motor usually sits) a solid, controlled strike with the palm of your hand. It’s a bit like giving a TV a ‘technical tap’ in the 90s. I once helped a neighbor whose window was stuck down in a rainstorm using this exact method; the window shot up instantly, and we both just stood there laughing at how easy it was. 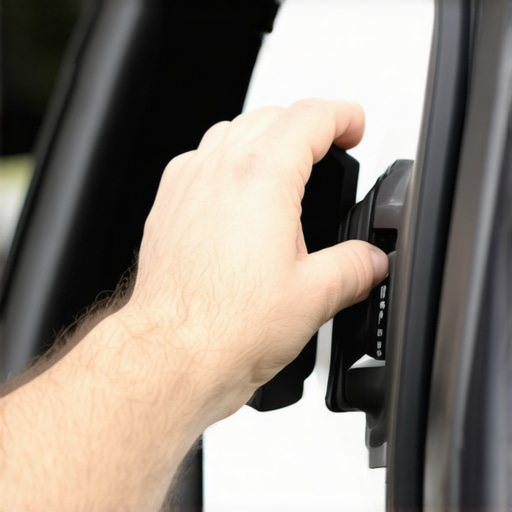
Testing the Switch Without a Multimeter
If the slam didn’t work, we need to see if the signal is even reaching the door. Pay attention to your lights. If you notice why your headlights dim when you use the power windows, it actually tells you a lot. That dimming means the switch is working and the motor is trying to pull current, but it’s physically stuck. If nothing happens—no click, no dimming, no groan—the switch itself is likely dead. Over years of use, the internal copper contacts get carbon buildup. You can sometimes bypass a bad driver’s side switch by using the master control on the other door, or by performing some basic vehicle diagnostics to see if the wiring in the door hinge has frayed from years of opening and closing.
Slippery Tracks Make Happy Motors
Sometimes the motor is fine, but it’s fighting a losing battle against friction. Windows slide through rubber channels that, over time, dry out and become like sandpaper. When this happens, the motor works twice as hard and eventually gives up. You should revive a sticky window motor with a silicone spray by dousing those side tracks. Use a dedicated dry silicone lubricant; never use WD-40 or grease, as those attract dust and will eventually turn into a thick paste that makes the problem worse. Lower the window (if you can) and spray the channels from top to bottom. It’s like putting a car on ice; suddenly, that ‘weak’ motor has no resistance and the glass glides like it’s brand new. I’ve seen this simple maintenance step extend the life of a dying regulator by years.While that window hack works for the mechanical side, the electrical and computer systems in your car require a bit more finesse. Most people think that once they plug in a cheap OBD-II scanner, the car tells them exactly what part to buy. This is the biggest lie in modern auto repair. A code for a lean condition doesn’t mean you need a new sensor; it means the sensor is doing its job and reporting a problem elsewhere. If you go out and buy a $150 sensor based on a five-second scan, you’re playing what we call ‘The Parts Cannon’—firing expensive components at a problem until something finally sticks. This is why how advanced vehicle diagnostics prevent costly breakdowns is about logic, not just reading a screen. In my experience, a ‘bad’ sensor is often just a symptom of a vacuum leak or a frayed wire that costs five cents to tape up.
The Parts Cannon Will Drain Your Bank Account
I’ve seen DIYers spend hundreds on new fuel pumps and injectors because of a stumble, only to find out the real culprit was the 10-dollar sensor that causes your car to stumble during acceleration. The trap here is thinking that ‘new’ equals ‘fixed.’ Sometimes, the truth about using cheap aftermarket sensors in your engine is that they are worse than the old OEM part you’re throwing away. Modern cars are calibrated to such tight tolerances that a slightly ‘off’ voltage from a budget sensor can send the ECU into a tailspin.
Why Does My Scanner Show a P0171 Code When the Sensor is Fine?
This is a question I get constantly from friends who have just ‘scanned’ their car at a local parts store. A P0171 code means your engine is running lean (too much air, not enough fuel). Most people immediately buy an O2 sensor. However, according to experts at Consumer Reports, diagnostic errors and unnecessary part replacements are one of the leading causes of inflated repair bills. Often, that ‘lean’ code is actually a cracked plastic intake boot or a loose hose. Before you buy the sensor, check the rubber. It’s the same logic we used for the window: check the tracks (the physical stuff) before you blame the motor (the expensive stuff).
Don’t Fall for the Free Diagnostic Trap
Many shops offer a ‘free diagnostic,’ but there is a nuance here that most drivers miss. A free code scan is not a diagnostic. A real diagnostic involves using a multimeter and a smoke machine to verify the failure. I once had a client who was told they needed a $2,000 brake system overhaul because of a vibration. After looking at brake service myths busted, we realized it was just uneven pad deposits from sitting too long, which we cleared with a few hard stops. Whether it’s an engine light or a squeaky stop, always look for the simplest mechanical cause first. Have you ever fallen into the ‘parts cannon’ trap? Let me know in the comments. 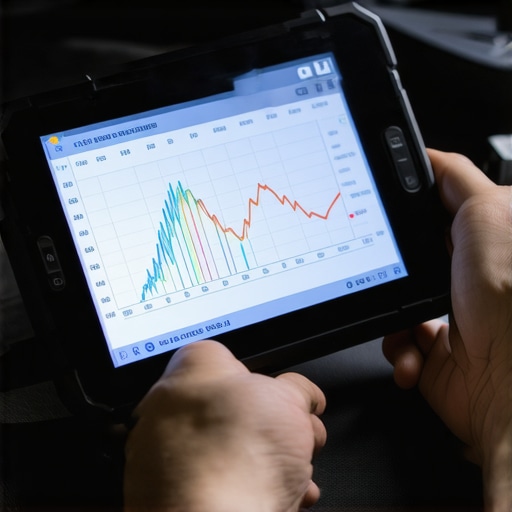
Oil and Brakes Require More Than Just a Swap
Even something as simple as an oil change has hidden nuances that can ruin your weekend. For example, the synthetic oil myth that costs you fifty dollars every visit suggests that high-mileage cars always need the most expensive stuff, but sometimes the high-detergent count in synthetics can actually cause older, brittle seals to start weeping. It’s all about balance and essential auto repair strategies for frequent drivers that prioritize long-term health over flashy marketing. Always double-check your work, verify the data, and remember: the car is trying to talk to you, you just have to learn the language.Learning the language of your vehicle is only half the battle; you need the right translator to make sense of the data. While most people stop at a basic code reader, I recommend investing in a high-quality digital multimeter. Unlike a simple test light that just tells you if power is present, a multimeter lets you measure the exact resistance in a circuit. This is crucial when you are trying to figure out if a wire is frayed or if a component is simply drawing too much current. I’ve personally used a Fluke 87V for years because its accuracy is unmatched when testing sensitive sensors. It is one of those essential auto repair strategies for frequent drivers who want to avoid the guesswork that leads to the ‘parts cannon’ frustration we discussed earlier.
Invest in These Tools or Pay the Mechanic Later
Another tool that has saved me countless hours is an infrared thermometer. If you think you have a sticking brake caliper, don’t touch the wheel and burn your hand. Point the laser at the rotor after a short drive. If one side is 100 degrees hotter than the other, you’ve found your problem. This kind of vehicle diagnostics explained in practical terms is what keeps your car on the road and your money in your pocket. Using a thermal reading is far more reliable than just listening for squeaks. When it comes to fluids, precision is everything. For instance, oil change innovations and technologies that save your engine have made modern synthetic oils incredibly resilient, but they still can’t overcome a poor seal. This is exactly why you should never skip the crush washer on your drain plug. That tiny copper or aluminum ring is the only thing standing between a clean driveway and a slow, persistent leak that eventually starves your engine of lubrication. 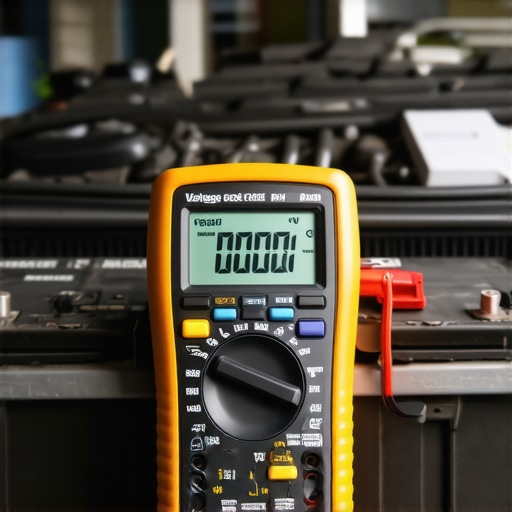
How do I maintain my car’s diagnostic health over time?
Consistency beats intensity every single time. Instead of waiting for a light to pop up on the dash, make it a habit to check your fluids once a month. Look specifically for the brake fluid color that means you need a flush immediately; if it looks like maple syrup or coffee, it’s already absorbed enough moisture to start corroding your lines from the inside out. Following top auto repair tips to extend your vehicle’s lifespan means being proactive. I also suggest keeping a dedicated logbook of every brake service and oil change. According to the Car Care Council, vehicles with documented maintenance histories retain significantly higher resale value and suffer 40% fewer roadside breakdowns.
The Future of Your Driveway Repairs
We are moving toward an era of predictive maintenance. In the next five years, expect to see more telematics tools that plug into your OBD-II port and send real-time health reports to your smartphone before a part even fails. This isn’t science fiction; many fleets already use this to minimize downtime. For the DIYer, this means decoding vehicle diagnostics will become even more streamlined. However, no software can replace the physical inspection. You still need to get under the car and look for leaks or worn bushings. I challenge you to go out this weekend and perform one check you’ve been avoiding—whether it’s testing your battery voltage or checking your brake fluid clarity. You’ll be surprised at how much confidence a little bit of data can give you.
The Shift in Mindset That Saved Me Thousands
Looking back at my years under the hood, the biggest lightbulb moment wasn’t a technical skill, but a mental one. I realized that auto repair is 90% observation and 10% wrench-turning. If you approach a problem expecting it to be expensive, you’ll likely overlook the five-minute fix. For example, before you assume a major engine issue, always try the simple test for a failing fuel pump; it’s much easier than dropping a tank for no reason. I also learned that forcing a repair usually leads to more breakage. If a part feels stuck, don’t just pull harder; instead, learn the secret to removing a rusted bolt without snapping the head to save yourself a massive headache. Finally, never underestimate the power of a quiet car. If you can learn how to stop the annoying rattle behind your dashboard, you’ll find that your driving experience becomes far less stressful, allowing you to actually hear what your engine is trying to tell you.
A Minimalist Toolkit for Serious Diagnostics
You don’t need a professional garage to get professional results. I personally rely on a few high-value items that have paid for themselves ten times over. First, a reliable Digital Multimeter is non-negotiable for vehicle diagnostics. Second, always keep a can of high-quality silicone spray in your trunk; it’s the easiest way to prevent window motor strain. Third, I highly recommend using a Bluetooth OBD-II adapter paired with an app like Torque Pro. It gives you live data that traditional scanners often miss. Lastly, I always check vehicle diagnostics explained easy checks before your road trip to ensure my tools are actually pointing me in the right direction before a long haul. #IMAGE_PLACE_HOLDER_E#
You Are More Capable Than the Machine
The modern car can feel like a rolling computer designed to lock you out, but at its core, it still follows the basic laws of physics. Whether you are performing a routine oil change or diving into a complex brake service, remember that your greatest asset is your own logic. Don’t let a flashing light or a weird sound intimidate you. You have the tools, the data, and the community to figure this out. Take it one step at a time, verify your findings, and keep your hands dirty. What’s the most frustrating car noise you’ve ever had to track down? Let me know in the comments below!