
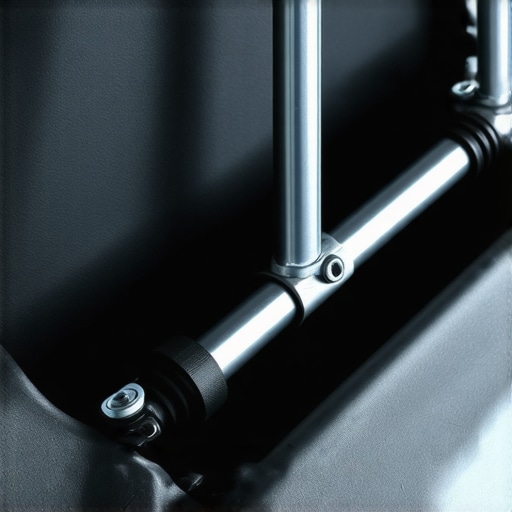
I was wrestling with three heavy bags of groceries and a gallon of milk when it happened. I leaned into the trunk, and without so much as a creak of warning, the heavy steel lid came crashing down right on the back of my skull. For a second, I actually thought I had been tackled. It is a classic “old car” rite of passage, but honestly, it is one of the most annoying—and literal—headaches you can deal with. We have all seen that guy at the hardware store using a literal 2×4 or a sawed-off broomstick to keep his hatch from falling. Do not be that guy. It is dangerous, it looks terrible, and it is entirely unnecessary.
Stop Propping Your Trunk with a Broomstick
The truth is, those hydraulic lift supports (those little black shocks on the sides) have a specific lifespan, and once the pressurized gas leaks out, they are basically just decorative metal rods. I will be honest: back when I first started tinkering with my own vehicles, I made the embarrassing mistake of trying to spray the pistons with silicone lubricant, thinking they were just “stuck.” That did absolutely nothing because the problem is internal pressure loss. Today, I am going to show you how to swap these out in about ten minutes with nothing more than a flathead screwdriver. It is one of those auto repair hacks that makes you feel like a pro without needing a professional lift or an expensive toolset. By handling this yourself, you are following the same top auto repair tips that keep your car functional for years to come.
Is this repair actually worth the hassle?
You might be thinking you can just live with the inconvenience, but you are playing a dangerous game with your fingers and your head. I have seen trunk lids weigh forty or fifty pounds; that is enough to cause a real injury. Plus, keeping up with these minor fixes is part of the essential auto repair strategies that keep your car from feeling like a rolling junker. According to a study by the Car Care Council, nearly 80% of vehicles on the road are in need of at least one minor service or repair, and neglecting these small items leads to a general decline in vehicle safety. These parts are cheap, the labor is easy, and the satisfaction of a trunk that stays up on its own is surprisingly high. Have you ever had a trunk lid try to take you out in a grocery store parking lot? I have been there, and I promise you, fixing it is way easier than explaining that bruise on your forehead to your coworkers. Let’s get into the nitty-gritty of how to identify the right part and pop those old ones off safely.
Identify the correct gas strut for your make and model
Before you buy anything, you need to know that not all lift supports are created equal. Even if two shocks look identical, their pressure ratings can be vastly different. One might be designed for a lightweight trunk, while another is built to lift a heavy glass hatch with a rear wiper motor attached. Think of it like decoding vehicle diagnostics; your car is literally telling you what it needs via the part number printed on the side of the old strut. Usually, there is a long string of numbers followed by an “N” for Newtons of force. If you cannot read the label, most auto parts stores can look it up, but I always double-check the length from eyelet to eyelet when the trunk is fully open to ensure a perfect fit.
Secure the hatch before you touch a single bolt
This is where most DIYers get hurt. The second you remove one of the two supports, the remaining one—which is already failing—will almost certainly give way. I learned this the hard way during a rainy afternoon. I thought I could shoulder the weight of my SUV’s hatch while I popped the clip. The second the pressure released, the hatch felt like it turned into lead, nearly trapping my hand against the frame. Use a sturdy piece of wood or a telescoping prop rod to keep the lid at its maximum height. This takes the tension off the ball joints, making the removal of the old parts a breeze. It is one of those auto repair hacks that turns a frustrating struggle into a smooth ten-minute job. 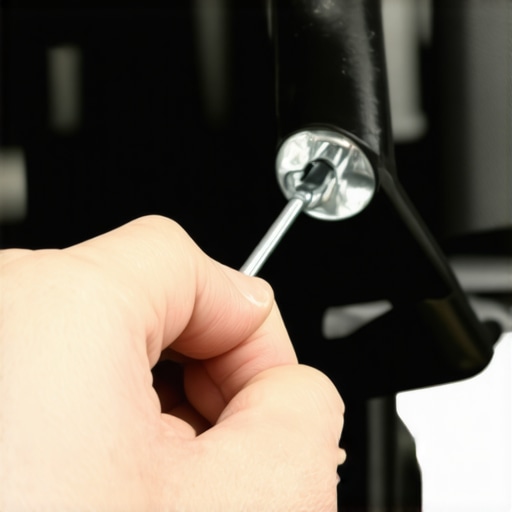
Work the metal retaining clips with a flathead screwdriver
If you look at the ends of your new lift supports, you will see a small, flat metal band wrapping around the socket head. This is the C-clip. You do not need to remove it entirely on the new part, but on the old one, you just need to slide a thin flathead screwdriver under the center of that band and pry it outward about a quarter-inch. You will hear a satisfying click as the tension releases. Once that band is lifted, the strut should pop right off the ball stud on the car body with very little effort. If it feels stuck, do not yank it; check if there is any grit or rust built up around the ball. This kind of attention to detail is what separates a quick fix from the top auto repair tips followed by seasoned mechanics.
Press the new support onto the ball joint
Now for the satisfying part. You usually do not even need the screwdriver to install the new ones. Simply line up the socket with the ball stud and give it a firm push with the heel of your hand. You should hear it snap into place. This is much like a ball-and-socket joint in your own shoulder, providing a full range of motion while staying securely seated under pressure. Make sure the body of the strut, which is the thicker part containing the gas, is oriented the same way the old one was. Usually, the rod should point downward when the trunk is closed to keep the internal seals lubricated with oil. It is a small detail, but ignoring it is a common mistake that leads to premature failure, much like how the oil filter brand that causes low oil pressure lights can ruin an otherwise perfect engine service. Once both sides are snapped in, remove your prop rod slowly to ensure the new gas pressure is holding the weight properly.While swapping out gas struts is a straightforward win, there is a dangerous trend I see in the DIY community: the ‘parts cannon’ approach to repairs. Most folks buy a cheap scanner and think they have mastered decoding vehicle diagnostics. But here is the contrarian truth: the code is just the start of the sentence, not the final answer. If you get a P0171 ‘Lean’ code, most people immediately buy an O2 sensor. In reality, it is often a vacuum leak you could find for pennies. This is exactly how advanced vehicle diagnostics prevent costly breakdowns—by teaching you to test, not guess.
Stop treating your code reader like a crystal ball
When you rely solely on the tool, you miss the physical cues your car is giving you. I once saw a guy spend $400 on sensors when the real culprit was the sensor that causes your car to stall at stop signs being covered in carbon gunk. A simple cleaning would have fixed it. This is why essential auto repair strategies always include a visual inspection before a credit card swipe. 
The filtration failure that kills engines silently
Everyone argues about synthetic versus conventional oil, but they ignore the filter. This is a massive ‘oops’ factor. I’ve seen high-end builds ruined because the oil filter brand that causes low oil pressure lights used a cheap cardboard bypass valve that collapsed. The National Institute for Automotive Service Excellence (ASE) emphasizes that component compatibility is just as vital as the fluid itself. If the filter fails, the ‘best’ oil in the world won’t save your bearings. It’s part of the oil change innovations we should actually care about.
Why does your brand new brake job still feel like a vibration-fest?
You just spent three hours on a brake service, but the pedal still pulses. Most people blame ‘warped’ rotors, but that is a myth; it’s usually uneven pad deposition or rusted hub surfaces. If you don’t clean the hub with a wire brush, the rotor won’t sit true, leading to why your brake pedal vibrates when you stop on a hill. It is these tiny nuances that separate a ‘driveway hack’ from a professional-grade repair. Have you ever fallen into this trap of replacing a part only to find the problem was something much smaller? Let me know in the comments. By focusing on top auto repair tips like proper cleaning and torque, you ensure your car stays safe for the long haul.To move beyond being a ‘driveway hack,’ you have to stop relying on luck and start relying on precision. I used to think a calibrated elbow was enough for tightening bolts, but after snapping a grade-8 stud on a water pump, I learned that precision isn’t just for pros—it is for anyone who doesn’t want to spend their Sunday drilling out broken metal.
Precision pays for itself
The single most important tool in my chest isn’t the biggest wrench; it is a high-quality digital torque wrench. Modern engines use aluminum components and torque-to-yield bolts that require an exactness most people ignore. If you are doing a brake service and you over-tighten the slide pins, you are asking for a seized caliper. I personally use a split-beam style wrench because it doesn’t need to be turned back to zero after every use, which preserves its calibration longer. This is the same logic behind top auto repair tips: doing it right the first time prevents the ‘cascading failure’ where one bad repair leads to three new problems. If you do run into trouble with an old fastener, knowing the secret to removing a rusted bolt without snapping the head can save your entire weekend.
The diagnostic tool that actually talks back
Most people buy a $20 code reader and think they are ready to fix anything, but that is like trying to perform surgery with a butter knife. I recommend investing in a bidirectional scanner. Why? Because it allows you to actually command the car’s computer to perform tests, like cycling an ABS pump or testing an EVAP vent valve. This is how advanced vehicle diagnostics prevent costly breakdowns—it lets you verify a failure before you buy the part. As noted in the Bosch Automotive Handbook, the complexity of modern CAN bus systems means that ‘visual inspection’ is no longer enough; you need to see what the sensors see in real-time. 
How do I stay ahead of mechanical wear?
Long-term vehicle health is about consistency and data. I keep a digital log of every fluid change and diagnostic scan. This allows me to notice when my fuel trims are drifting before a check engine light even appears. It is a level of essential auto repair strategies that separates a 100,000-mile car from a 300,000-mile car. I predict that within the next five years, we will see consumer-level AI that integrates with these scanners to predict alternator failure or battery death weeks before they happen by analyzing voltage ripple patterns. Until then, you have to be the brain. If you suspect a problem but can’t see it, try the cardboard trick to find a tiny oil leak overnight. It is a low-tech way to get high-tech results. For those annoying rattles that aren’t mechanical, you can often fix a rattling heat shield for the price of a hose clamp and keep your sanity intact. My challenge to you: next time your car makes a noise, don’t just turn up the radio. Hook up a scanner, check the live data, and see what the machine is trying to tell you.
Moving from a casual owner to a confident DIYer requires more than just a set of wrenches; it requires a shift in how you perceive your vehicle’s health. I have spent years getting grease under my fingernails, and the most important thing I have learned is that patience is your best tool. Whether you are swapping out trunk struts or diving into the complex world of computer codes, remember that every successful fix builds your confidence for the next one.
The Hardest Lessons I Learned While Working Under My Own Hood
One of my biggest lightbulb moments was realizing that a clean workspace is not about being tidy; it is about safety. I once missed a hairline crack in a brake line simply because the component was covered in road grime. Always clean the area you are working on first. Another vital realization was that the ‘cheapest’ part often costs the most in the long run. I once ignored the warnings about the oil filter brand that causes low oil pressure lights and ended up doing the same job twice within a month because the internal valve failed. Now, I prioritize high-quality components to ensure my top auto repair tips to extend your vehicles lifespan actually stick. Finally, never ignore your gut. If a bolt feels like it is about to snap, stop. Heat, penetrant, and patience are cheaper than a trip to the machine shop.
Tools That Transformed My Repair Game
If you are serious about maintaining your ride, you need to invest in a few key pieces of gear. First, a digital torque wrench is non-negotiable for modern engines where aluminum is the norm. Second, move beyond basic readers and get a bidirectional scanner. It is the only way to truly understand how advanced vehicle diagnostics prevent costly breakdowns by letting you test components individually. I also highly recommend keeping a physical copy of the Bosch Automotive Handbook on your shelf; it provides the deep engineering context that YouTube videos often skip. These tools allow you to apply essential auto repair strategies with the same precision as a Master Technician.
The Future of Your Garage Starts Today
Taking control of your car’s maintenance is one of the most empowering things you can do as a driver. You are not just saving money; you are gaining a deep understanding of the machine that keeps you and your family safe on the road. Don’t be intimidated by the sensors and the software. With the right auto repair hacks and a commitment to doing things the right way, you can keep any vehicle running like new for decades. Have you ever replaced a part only to realize the real problem was a two-dollar sensor or a loose wire? Let me know your ‘parts cannon’ stories in the comments below!