
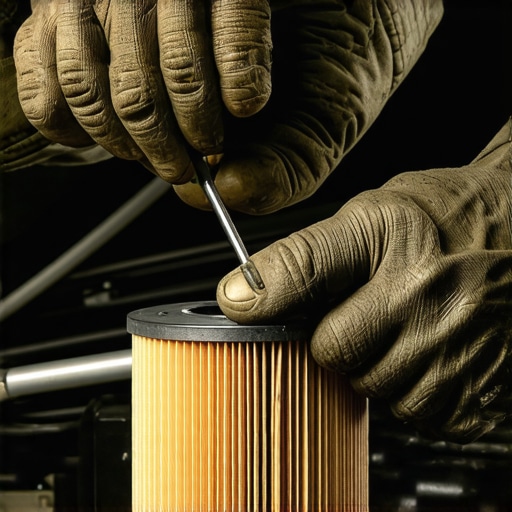
I was lying on a cold concrete floor, a single bead of sweat stinging my left eye, and my knuckles were already raw from slipping off the canister for the fourth time. There I was, halfway through what should have been a twenty-minute job, staring up at a metal cylinder that seemed to have fused itself to my engine block. We’ve all been there. You go in for a quick DIY maintenance session, maybe even trying out some of those new oil change technologies you read about, and suddenly, you’re stuck. My wrench wouldn’t fit in the tight space, and my grip was failing. It felt like the car was mocking me. I made the classic rookie mistake years ago of thinking ‘the tighter, the better,’ but that day, I was paying the price for someone else’s over-torquing. Today, I’m going to show you exactly how to break that seal without needing a fancy tool or a trip to the store.
The Day My Routine Maintenance Turned Into a Test of Will
It’s funny how a three-inch piece of metal can ruin your entire Saturday. I used to think I was a pro because I knew how to tell if a mechanic actually did their job, but there I was, outsmarted by a gasket. The problem usually starts with a simple oversight: either the last person didn’t lube the O-ring, or they used a wrench to tighten it. Heat cycles do the rest, essentially ‘baking’ the filter onto the housing. According to the Car Care Council, neglected or improperly performed oil changes are a leading cause of preventable engine wear, but struggling with a stuck filter can lead to even bigger problems—like a cracked housing—if you get desperate and reckless. I once tried to use a pair of channel locks that were too small, and all I did was crush the filter wall, making it even harder to grip. It was a mess.
Is the Screwdriver Through the Can Trick Actually Worth the Risk?
You’ve probably heard the old-school advice: just hammer a screwdriver through the middle and twist. I’ll be honest, I was terrified the first time I tried it. I was worried I’d shear the threaded stud right off the engine. But when you’re out of options and your hands are covered in grease, desperation breeds courage. Have you ever felt that sinking feeling when a simple bolt or filter just won’t budge? Drop a comment and tell me your most frustrating ‘stuck’ story.
Why That Metal Can Is Acting Like It’s Welded On
It’s not just bad luck; it’s science. When you don’t apply a thin film of fresh oil to that rubber gasket before installation, the dry rubber creates an incredible amount of friction against the mounting surface. Combine that with the constant expansion and contraction of the engine block, and you’ve got a recipe for a permanent bond. This is why smart auto repair hacks are so vital; they save your sanity when the ‘official’ way fails you. We aren’t just trying to get the filter off; we’re trying to do it without sending metal shavings into the oil galleys or ruining the threads.
Increase Your Leverage Before You Break a Sweat
Before you start swinging a hammer, you need to maximize the friction between your hand and that slippery metal cylinder. Most people reach for a rag, but oil-soaked rags are basically lubricants in disguise. One of my favorite auto repair hacks for a stubborn filter is using a simple sheet of 80-grit sandpaper. Wrap the sandpaper around the filter with the rough side facing the metal. This gives you a level of ‘bite’ that even the most expensive mechanic gloves can’t match.
The Sandpaper Grip and Why It Beats Rubber Gloves
I remember working on an old sedan where the filter was tucked so close to the exhaust manifold I could only get three fingers on it. I tried every pair of gloves in my garage, but I just kept sliding. Once I wrapped that sandpaper around the base, the filter broke free with one solid grunt. It’s a low-tech solution that prevents you from having to resort to more violent methods that might damage nearby components, like causing a radiator hose failure you cannot see from the top due to a slipping tool.
Which Wrench Is Actually Worth Your Money
If hand strength isn’t enough, you need to choose the right tool for the specific clearance of your engine bay. Not all wrenches are created equal. A strap wrench is great for open spaces, but in a cramped bay, a ‘cup-style’ socket that fits over the end of the filter is a lifesaver. Using the wrong tool is a common mistake, much like choosing the oil filter brand that causes low oil pressure lights—it might look right, but it won’t perform when the pressure is on.
Choosing Between the Claw and the Strap
The ‘claw’ type wrench is my go-to for filters that are truly stuck. As you turn your ratchet, the three metal fingers dig into the filter walls. Yes, it will crush the filter, but that’s fine—you’re throwing it away anyway. This tool is essential among top auto repair tips to extend your vehicles lifespan because it ensures you actually get the old, dirty filter off so the new one can do its job. I once saw a DIYer leave an old filter on for three oil changes simply because they couldn’t get it off. They didn’t realize how to tell if your mechanic actually changed the oil, and the buildup eventually caused a massive drop in lubrication.
The Messy Reality of the Screwdriver Method
When all else fails and the metal is starting to tear, the screwdriver method is your ‘nuclear option.’ You take a long, sturdy flathead and a heavy mallet. Position the tip about two-thirds of the way up the filter, away from the engine block. Drive it straight through both sides of the canister. This gives you a massive T-handle for maximum leverage. I had to do this on a truck that had been sitting in a field for three years. The gasket had essentially vulcanized to the metal. It was a literal bloodbath of old, black oil, but that screwdriver gave me the 360-degree torque needed to snap the seal. Just be warned: once you puncture that metal, there is no going back. You are committed to finishing the job right then and there.Once you finally wrench that stubborn canister free, don’t let the adrenaline rush lead you into the most expensive mistake of your life. I see DIYers celebrate a victory over a stuck filter only to fall straight into the ‘double gasket’ trap. This happens when the old O-ring stays stuck to the engine block while you spin the new filter on top of it. The moment you fire up the engine, the oil pressure will blow past those two competing seals, and you’ll lose your entire oil pan’s contents in seconds. Always wipe the mounting surface clean and verify the old gasket is actually on the old filter. Have you ever fallen into this trap? Let me know in the comments.
The Synthetic Myth That Refuses to Die
Many people believe that once you switch to synthetic oil, you can never go back to conventional. This is a complete myth. Modern engine oils are chemically compatible; while it’s not ideal for performance to mix them, your engine won’t explode. Furthermore, there’s a common contrarian view that you should wait until a car has 10,000 miles to switch to synthetic. In reality, oil change innovations and technologies allow many high-performance cars to come with synthetic right from the factory. Understanding the truth about synthetic oil vs conventional in older high-mileage cars is vital, because for some older seals, the high detergency of synthetic can actually ‘clean’ away the sludge that was preventing a leak.
Does Synthetic Oil Actually Cause Leaks in Older Engines?
According to research by SAE International, synthetic oil doesn’t ’cause’ leaks, but its smaller molecular structure can find its way through gaps that thicker, sludge-heavy conventional oil couldn’t. This is why people think the oil caused the problem, when it actually just revealed a pre-existing seal failure. If you’re worried about your budget, remember the synthetic oil myth that costs you fifty dollars every visit; you don’t always need the most expensive brand to get the best protection.
Stop Trusting the Dashboard Without a Real Scan
We’ve all seen the ‘Check Engine’ light and hoped it would just go away. Sometimes your check engine light turns off on its own, but that doesn’t mean the problem is solved. Most beginners think a code reader tells you exactly what part to replace. If you get a ‘Lean’ code, most people buy a new O2 sensor, but it’s often just a $5 vacuum leak. This is where decoding vehicle diagnostics becomes an art. You need to look at live data, not just the code.
Why New Brakes Squeak Right Out of the Box
Another area where the ‘expert’ advice fails is brake service. Everyone says to just ‘take it easy’ on new pads. In reality, brake service myths busted show that many performance pads require a specific ‘bedding’ process—intentional hard stops to transfer a layer of friction material to the rotor. If you don’t do this, you might find why your brand new brake pads are already squealing even though they have zero wear. Proper maintenance is about the nuances, not just the nuts and bolts.To move from a weekend tinkerer to someone who truly understands their machine, you have to stop guessing and start measuring. I spent years throwing parts at problems, but everything changed when I invested in a dedicated bidirectional scan tool. While a cheap $20 dongle can clear codes, decoding vehicle diagnostics requires seeing how the engine breathes in real-time. I personally use an Autel MaxiCOM because it allows me to perform active tests—like firing a fuel pump or cycling an ABS solenoid—without ever leaving the driver’s seat. This level of control is exactly how advanced vehicle diagnostics prevent costly breakdowns, saving you from the ‘parts cannon’ approach that drains your wallet. According to the Service Technicians Society, approximately 70% of misdiagnosed repairs result from technicians relying on generic code definitions rather than analyzing live PID data.
Stop Guessing and Start Scanning
The biggest jump in my repair game happened when I learned to graph fuel trims. If your car is stumbling, don’t just buy new spark plugs. Watch the oxygen sensors react to a shot of brake cleaner sprayed near the intake manifold. That’s the difference between a ‘hacker’ and a master of auto repair hacks that actually work.
The Torque Wrench is Your Best Friend
We talked about over-tightening oil filters earlier, but when it comes to your suspension and brakes, precision is a safety requirement. I never touch a caliper bolt without a calibrated torque wrench. It might feel ‘tight enough’ by hand, but uneven torque on lug nuts or caliper brackets is often the reason your car pulls to one side during hard braking. Following the ultimate guide to brake service for safety and performance means respecting the foot-pound specs found in your service manual.
How Do I Maintain My Vehicle Longevity Over Time?
Consistency beats intensity every single time. You don’t need to do a full overhaul every month; you just need to keep an eye on the details. This is the core of top auto repair tips to extend your vehicles lifespan. I keep a digital log of every fluid swap and visual inspection. For those who drive more than the average commuter, implementing essential auto repair strategies for frequent drivers—like checking your CV boots for tears every time you rotate your tires—can save you a $500 axle replacement later. Looking ahead, I predict we are moving toward a ‘predictive maintenance’ era where AI-driven dongles will alert you to a failing alternator weeks before it leaves you stranded.
Don’t Wait for the Warning Light
My challenge to you today is this: don’t wait for a light to pop up. Go out to your car, plug in your scanner, and look at your ‘Long Term Fuel Trim.’ If it’s more than 5% away from zero, you have a tiny vacuum leak or a dirty sensor waiting to become a big problem. Catching these small deviations is how you transition from reacting to your car’s failures to truly mastering its health. Check your data before your next big drive as part of your vehicle diagnostics explained easy checks before your road trip routine.
The Hardest Lessons I Learned While Struggling Under a Chassis
After years of wrenching, I’ve realized that the most expensive tool in your garage isn’t a scanner—it’s your own ego. I used to think I could ‘feel’ if a part was failing, but the truth is that modern cars are far too precise for guesswork. One of the biggest shifts in my perspective came when I stopped viewing maintenance as a chore and started seeing it as data analysis. I’ve learned that how advanced vehicle diagnostics prevent costly breakdowns is by catching a 5% deviation before it becomes a 100% mechanical failure. Another hard truth? Never assume the new part is good out of the box. Always verify. This mindset is what separates those who constantly fix their cars from those who actually maintain them using essential auto repair strategies for frequent drivers. Whether you are checking your oil or following the ultimate guide to brake service for safety and performance, precision is your only protection against a repeat repair.
#IMAGE_PLACEHOLDER_E#
My Essential Toolkit for Avoiding the Mechanic
If you want to move beyond the basic oil change, you need to invest in gear that gives you professional-grade insights. I always recommend a high-quality bidirectional scan tool; it’s the only way to truly understand what the car’s computer is seeing in real-time. Beyond the electronics, keep a set of flare nut wrenches for brake lines and a reliable, calibrated torque wrench. Understanding brake service myths busted by professionals will save you more time and money than any power tool ever could. I also keep a digital log and pay close attention to the brake fluid color that means you need a flush immediately so I never have to guess when the last service occurred. These tools don’t just fix cars; they build the confidence needed to tackle any project.
Stop Waiting for a Breakdown and Start Taking Control
Your car is likely the second largest investment you’ll ever make, so treat it with the respect it deserves. Don’t be afraid to get your hands dirty or to fail during your first few attempts. Every pro you see started exactly where you are: staring at a stuck bolt or a confusing dashboard light. By mastering decoding vehicle diagnostics and staying ahead of scheduled maintenance, you are taking back power from the dealership service centers. You’ve got the knowledge, you’ve got the hacks, and now you have the plan. Go out there and make your machine run better than the day it left the factory.
Have you ever had a DIY repair go completely sideways, only to fix it with a simple trick? Let me know your best ‘save’ in the comments below!