
I was halfway to the coast when the humming started. At first, I blamed the asphalt. Then, I blamed the radio. Finally, the steering wheel started dancing in my hands. I’ve been working on cars for twenty years, but that day? I felt like a complete rookie. I had ignored the reason your tires are making a humming sound on the highway because I didn’t want to deal with the hassle. I once spent nearly two hundred bucks on a new set of tires, convinced the noise was just “chopped” tread, only to find out the bearing was the real culprit. It was a costly mistake I don’t want you to repeat. Today, I’m going to show you exactly how to diagnose this at home so you can stop guessing and start fixing.
Catching the Hum Before the Shake
Most people assume that if their car isn’t shaking, everything is fine. That’s a dangerous game to play. When a wheel bearing starts to go, it doesn’t always announce itself with a bang. It starts as a whisper—a low-frequency drone that changes when you turn the wheel. If you’ve noticed why your steering wheel vibrates only when you hit the brakes or at high speeds, you might already be in the danger zone. Before you head out, performing vehicle diagnostics explained easy checks before your road trip is essential for peace of mind. Have you ever felt that strange vibration and just hoped it would go away? Drop a comment and let me know; we’ve all been there.
Wait, Isn’t This Just a Professional Job?
I get it. The idea of messing with your wheel assembly sounds intimidating. You might think you need a massive shop and a lift. But the truth is, checking for “play”—that tiny bit of unwanted movement in the wheel—is something you can do in your driveway with a basic jack. It’s very similar to the simple way to check your ball joints with a pry bar, requiring more technique than brute strength. According to industry data from manufacturers like SKF, wheel bearings can last over 100,000 miles, but heavy rain, salt, and those nasty potholes we all hit can cause premature failure. If you ignore it, the bearing can literally seize or, in extreme cases, the wheel can depart from the vehicle. We’re going to make sure that never happens to you.
Lift the Car and Test for Physical Play
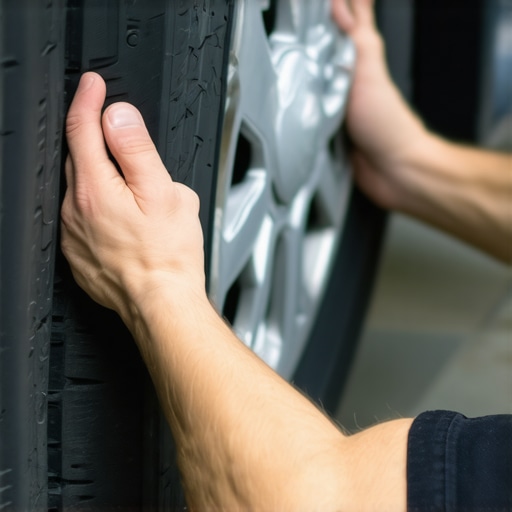
To get an honest answer from your car, you need to get the weight off the wheels. Think of your jack like a doctor’s stethoscope—it allows you to isolate the ‘patient’ from the noise of the road. Use a sturdy jack and always set the vehicle on jack stands before you even think about putting your hands near the tire. Once the wheel is suspended, grab it firmly at the 12 o’clock and 6 o’clock positions. Give it a forceful push-pull shake. If you feel even a tiny ‘clunk’ or a clicking sensation, you’ve found ‘play.’ This movement means the internal races of the bearing have worn down, leaving a gap where there should be a tight seal. I remember working on an old sedan where the owner was convinced they needed a whole new steering rack because of the steering rack-failure that feels exactly like a bad alignment. I lifted the front end, gave the tire a shake, and it wobbled like a loose tooth. It was a fifty-dollar bearing, not a thousand-dollar rack. Trust the shake test; it rarely lies.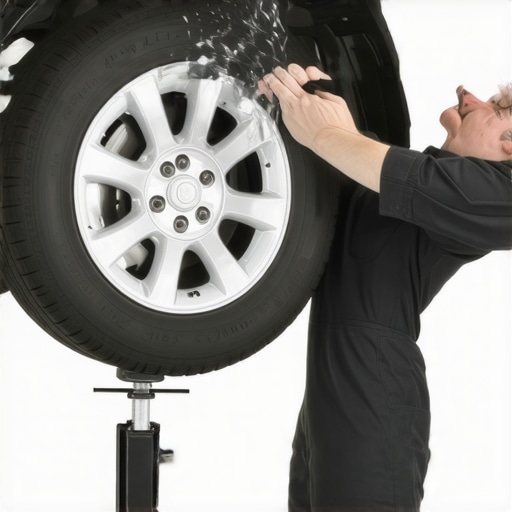
Feel the Vibration Through the Coil Spring
Sometimes a bearing is failing but hasn’t developed physical play yet. This is where the ‘spring trick’ comes in. While the car is still jacked up, place one hand on the large coil spring behind the wheel and use your other hand to spin the tire as fast as you can. A healthy bearing is silent and smooth, like a hot knife through butter. A failing bearing will transmit a grainy, rhythmic vibration through the suspension. If the spring feels like it’s buzzing or vibrating against your palm, that bearing is toast. Using this method is one of those auto repair hacks save money without sacrificing quality because it lets you catch the failure before it ruins your spindle or hub. It’s the difference between sliding your hand over polished glass versus grit-filled sandpaper.
Distinguish Between Bearing Growl and Brake Drag
It is incredibly easy to misdiagnose a sound as a bearing when it’s actually just your brakes. If you hear a light, metallic scraping—a ‘shhh-shhh’ sound—it might just be why your brand new brake pads are already squealing or a slightly warped rotor rubbing against the pads. To be sure, have a buddy sit in the car and lightly press the brake pedal while you spin the wheel. If the noise stops or changes drastically, the issue is likely in your braking system. However, if the growl is deep and constant, regardless of the brakes, you’re looking at a bearing replacement. If you run into trouble getting the tire off to inspect closer, remember the secret to getting a stuck wheel off your car so you don’t spend three hours fighting a rusted hub. Precision here saves you from buying parts you don’t need.I’ve seen guys spend all Saturday afternoon replacing a bearing, only to have the same noise return two weeks later. Most people think a brand-new part is a guaranteed fix, but here is the cold truth: cheap, “white-box” bearings from discount sites are often worse than the worn-out OEM part you’re replacing. In my experience, if the price seems too good to be true, the steel quality and grease inside are likely substandard. It’s one of those auto repair hacks save money without sacrificing quality where spending more on a reputable brand actually saves you from doing the job twice. Have you ever bought a “bargain” part that failed immediately? Let me know in the comments; I still have a few “never again” brands on my blacklist.
The One Mistake That Kills New Bearings Instantly
This is where most DIYers—and even some pros—get into trouble. There’s a common myth that the tighter you get the axle nut, the more secure the wheel will be. In reality, modern sealed hub units are precision-engineered. If you go “full-strength” with an impact wrench, you can actually deform the internal races before the car even leaves the driveway. This isn’t like the truth about synthetic oil vs conventional in older high mileage cars where you have a little bit of wiggle room; with bearings, the torque spec is a law, not a suggestion.
Can You Actually Over-Tighten a Sealed Bearing?
Yes, and it happens more often than you’d think. According to technical bulletins from Timken, one of the world’s leading bearing manufacturers, improper torque is a leading cause of premature failure because it creates excessive heat and destroys the lubrication film. This causes the metal to expand beyond its tolerances, leading to that familiar hum in record time. Always use a calibrated torque wrench to hit the exact foot-pounds required for your specific year and model. 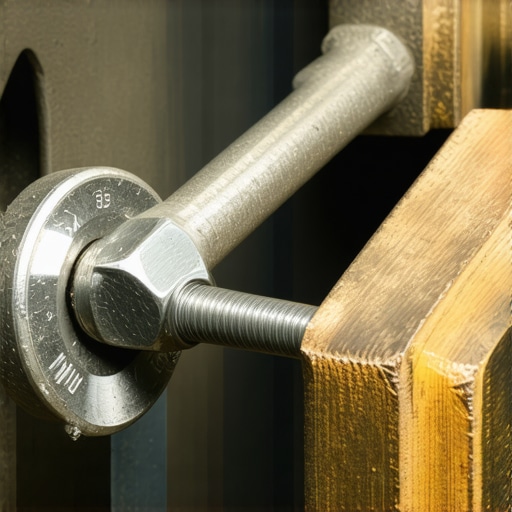
Why a Wire Brush is More Important Than You Think
Another nuance people miss is the “phantom” vibration. You might swear it’s a bad bearing, but why your brakes squeak even though the pads are new often comes down to the same root cause: a dirty hub surface. If there is even a tiny flake of rust trapped between the hub and the rotor, it creates “run-out,” which can feel like a bearing wobble. Before you press in that new unit or bolt on the hub, take a wire brush to every mating surface. These brake service myths busted what really matters for safety apply here too; mechanical cleanliness is the difference between a pro-level repair and a frustrating comeback.
Protect the Magnetic Sensor at All Costs
Finally, watch out for the ABS trap. On many modern cars, the wheel speed sensor reads a magnetic ring built directly into the bearing seal. If you press the bearing in backward—which is surprisingly easy to do on some models—or nick that seal with a screwdriver, your dashboard will light up with error codes immediately. Understanding how advanced vehicle diagnostics prevent costly breakdowns means knowing that the mechanical and electronic systems are now one and the same. Treat that bearing like a piece of high-end electronics, not just a hunk of metal, and you’ll save yourself hours of troubleshooting later.
I used to think my ‘calibrated’ elbow was enough for tightening bolts, but after snapping a wheel stud on a rainy Saturday night, I changed my tune. If you are serious about doing your own work, you need a split-beam torque wrench. Unlike the cheap clicker-types that lose their calibration if you leave them under tension in your toolbox, a split-beam stays accurate because it does not rely on a compressed internal spring. It is one of those auto repair hacks save money without sacrificing quality that pays for itself the first time you do not have to drill out a broken bolt or replace a warped rotor because the lugs were uneven. Pair that with a decent mid-range OBDII scanner that handles live data streaming, and you are no longer just a parts changer—you are a true diagnostician. You will be able to see decoding vehicle diagnostics what your car is trying to tell you in real-time, catching a wheel speed sensor glitch before the ABS light even blinks.
#IMAGE_PLACE_HOLDER_D#
How do I maintain my wheel assembly over the long haul?
Maintenance is not just about the moment of repair; it is about the thousands of miles that follow. For those of us who spend a lot of time behind the wheel, following essential auto repair strategies for frequent drivers usually starts with a simple diagnostic log. I track every single odd sound or steering pull in a dedicated notebook. If a hum starts only at 40 mph, I write it down. This prevents ‘maintenance amnesia’ where you forget small symptoms until they become catastrophic failures. It is the same logic behind top auto repair tips to extend your vehicles lifespan: consistency is more powerful than any one-time fix. According to technical documentation from Moog’s ‘Problem Solver’ series, nearly 30% of hub assembly failures are actually caused by external contamination or improper torque sequence during previous services. By keeping the area clean and using proper tools, you are statistically ahead of the curve.
The Digital Shift in Your Garage
Looking ahead, the trend in auto repair is shifting toward ‘Predictive Maintenance.’ We are moving toward a future where your car might send a notification to your phone that a bearing is beginning to vibrate at a frequency humans cannot even hear yet, thanks to advanced telematics. While we see oil change innovations technologies that save your engine evolving rapidly, the physics of a spinning wheel will always require mechanical precision. Even on electric vehicles, the heavy battery weight puts even more stress on those bearings and suspension components. Mastering the ultimate guide to brake service for safety and performance today ensures you have the foundational skills for the vehicles of tomorrow. Don’t wait for a shake to start caring; grab a wire brush and clean your mating surfaces during your next tire rotation. It is a five-minute habit that prevents ‘run-out’ and keeps your ride buttery smooth for another 100,000 miles.
I was halfway to the coast when the humming started. At first, I blamed the asphalt. Then, I blamed the radio. Finally, the steering wheel started dancing in my hands. I’ve been working on cars for twenty years, but that day? I felt like a complete rookie. I had ignored the reason your tires are making a humming sound on the highway because I didn’t want to deal with the hassle. I once spent nearly two hundred bucks on a new set of tires, convinced the noise was just “chopped” tread, only to find out the bearing was the real culprit. It was a costly mistake I don’t want you to repeat. Today, I’m going to show you exactly how to diagnose this at home so you can stop guessing and start fixing.
Catching the Hum Before the Shake
Most people assume that if their car isn’t shaking, everything is fine. That’s a dangerous game to play. When a wheel bearing starts to go, it doesn’t always announce itself with a bang. It starts as a whisper—a low-frequency drone that changes when you turn the wheel. If you’ve noticed why your steering wheel vibrates only when you hit the brakes or at high speeds, you might already be in the danger zone. Before you head out, performing vehicle diagnostics explained easy checks before your road trip is essential for peace of mind. Have you ever felt that strange vibration and just hoped it would go away? Drop a comment and let me know; we’ve all been there.
Wait, Isn’t This Just a Professional Job?
I get it. The idea of messing with your wheel assembly sounds intimidating. You might think you need a massive shop and a lift. But the truth is, checking for “play”—that tiny bit of unwanted movement in the wheel—is something you can do in your driveway with a basic jack. It’s very similar to the simple way to check your ball joints with a pry bar, requiring more technique than brute strength. According to industry data from manufacturers like SKF, wheel bearings can last over 100,000 miles, but heavy rain, salt, and those nasty potholes we all hit can cause premature failure. If you ignore it, the bearing can literally seize or, in extreme cases, the wheel can depart from the vehicle. We’re going to make sure that never happens to you.
Lift the Car and Test for Physical Play
To get an honest answer from your car, you need to get the weight off the wheels. Think of your jack like a doctor’s stethoscope—it allows you to isolate the ‘patient’ from the noise of the road. Use a sturdy jack and always set the vehicle on jack stands before you even think about putting your hands near the tire. Once the wheel is suspended, grab it firmly at the 12 o’clock and 6 o’clock positions. Give it a forceful push-pull shake. If you feel even a tiny ‘clunk’ or a clicking sensation, you’ve found ‘play.’ This movement means the internal races of the bearing have worn down, leaving a gap where there should be a tight seal. I remember working on an old sedan where the owner was convinced they needed a whole new steering rack because of the steering rack-failure that feels exactly like a bad alignment. I lifted the front end, gave the tire a shake, and it wobbled like a loose tooth. It was a fifty-dollar bearing, not a thousand-dollar rack. Trust the shake test; it rarely lies.
Feel the Vibration Through the Coil Spring
Sometimes a bearing is failing but hasn’t developed physical play yet. This is where the ‘spring trick’ comes in. While the car is still jacked up, place one hand on the large coil spring behind the wheel and use your other hand to spin the tire as fast as you can. A healthy bearing is silent and smooth, like a hot knife through butter. A failing bearing will transmit a grainy, rhythmic vibration through the suspension. If the spring feels like it’s buzzing or vibrating against your palm, that bearing is toast. Using this method is one of those auto repair hacks save money without sacrificing quality because it lets you catch the failure before it ruins your spindle or hub. It’s the difference between sliding your hand over polished glass versus grit-filled sandpaper.
Distinguish Between Bearing Growl and Brake Drag
It is incredibly easy to misdiagnose a sound as a bearing when it’s actually just your brakes. If you hear a light, metallic scraping—a ‘shhh-shhh’ sound—it might just be why your brand new brake pads are already squealing or a slightly warped rotor rubbing against the pads. To be sure, have a buddy sit in the car and lightly press the brake pedal while you spin the wheel. If the noise stops or changes drastically, the issue is likely in your braking system. However, if the growl is deep and constant, regardless of the brakes, you’re looking at a bearing replacement. If you run into trouble getting the tire off to inspect closer, remember the secret to getting a stuck wheel off your car so you don’t spend three hours fighting a rusted hub. Precision here saves you from buying parts you don’t need.I’ve seen guys spend all Saturday afternoon replacing a bearing, only to have the same noise return two weeks later. Most people think a brand-new part is a guaranteed fix, but here is the cold truth: cheap, “white-box” bearings from discount sites are often worse than the worn-out OEM part you’re replacing. In my experience, if the price seems too good to be true, the steel quality and grease inside are likely substandard. It’s one of those auto repair hacks save money without sacrificing quality where spending more on a reputable brand actually saves you from doing the job twice. Have you ever bought a “bargain” part that failed immediately? Let me know in the comments; I still have a few “never again” brands on my blacklist.
The One Mistake That Kills New Bearings Instantly
This is where most DIYers—and even some pros—get into trouble. There’s a common myth that the tighter you get the axle nut, the more secure the wheel will be. In reality, modern sealed hub units are precision-engineered. If you go “full-strength” with an impact wrench, you can actually deform the internal races before the car even leaves the driveway. This isn’t like the truth about synthetic oil vs conventional in older high mileage cars where you have a little bit of wiggle room; with bearings, the torque spec is a law, not a suggestion.
Can You Actually Over-Tighten a Sealed Bearing?
Yes, and it happens more often than you’d think. According to technical bulletins from Timken, one of the world’s leading bearing manufacturers, improper torque is a leading cause of premature failure because it creates excessive heat and destroys the lubrication film. This causes the metal to expand beyond its tolerances, leading to that familiar hum in record time. Always use a calibrated torque wrench to hit the exact foot-pounds required for your specific year and model.
Why a Wire Brush is More Important Than You Think
Another nuance people miss is the “phantom” vibration. You might swear it’s a bad bearing, but why your brakes squeak even though the pads are new often comes down to the same root cause: a dirty hub surface. If there is even a tiny flake of rust trapped between the hub and the rotor, it creates “run-out,” which can feel like a bearing wobble. Before you press in that new unit or bolt on the hub, take a wire brush to every mating surface. These brake service myths busted what really matters for safety apply here too; mechanical cleanliness is the difference between a pro-level repair and a frustrating comeback.
Protect the Magnetic Sensor at All Costs
Finally, watch out for the ABS trap. On many modern cars, the wheel speed sensor reads a magnetic ring built directly into the bearing seal. If you press the bearing in backward—which is surprisingly easy to do on some models—or nick that seal with a screwdriver, your dashboard will light up with error codes immediately. Understanding how advanced vehicle diagnostics prevent costly breakdowns means knowing that the mechanical and electronic systems are now one and the same. Treat that bearing like a piece of high-end electronics, not just a hunk of metal, and you’ll save yourself hours of troubleshooting later.
I used to think my ‘calibrated’ elbow was enough for tightening bolts, but after snapping a wheel stud on a rainy Saturday night, I changed my tune. If you are serious about doing your own work, you need a split-beam torque wrench. Unlike the cheap clicker-types that lose their calibration if you leave them under tension in your toolbox, a split-beam stays accurate because it does not rely on a compressed internal spring. It is one of those auto repair hacks save money without sacrificing quality that pays for itself the first time you do not have to drill out a broken bolt or replace a warped rotor because the lugs were uneven. Pair that with a decent mid-range OBDII scanner that handles live data streaming, and you are no longer just a parts changer—you are a true diagnostician. You will be able to see decoding vehicle diagnostics what your car is trying to tell you in real-time, catching a wheel speed sensor glitch before the ABS light even blinks.
#IMAGE_PLACE_HOLDER_D#
How do I maintain my wheel assembly over the long haul?
Maintenance is not just about the moment of repair; it is about the thousands of miles that follow. For those of us who spend a lot of time behind the wheel, following essential auto repair strategies for frequent drivers usually starts with a simple diagnostic log. I track every single odd sound or steering pull in a dedicated notebook. If a hum starts only at 40 mph, I write it down. This prevents ‘maintenance amnesia’ where you forget small symptoms until they become catastrophic failures. It is the same logic behind top auto repair tips to extend your vehicles lifespan: consistency is more powerful than any one-time fix. According to technical documentation from Moog’s ‘Problem Solver’ series, nearly 30% of hub assembly failures are actually caused by external contamination or improper torque sequence during previous services. By keeping the area clean and using proper tools, you are statistically ahead of the curve.
The Digital Shift in Your Garage
Looking ahead, the trend in auto repair is shifting toward ‘Predictive Maintenance.’ We are moving toward a future where your car might send a notification to your phone that a bearing is beginning to vibrate at a frequency humans cannot even hear yet, thanks to advanced telematics. While we see oil change innovations technologies that save your engine evolving rapidly, the physics of a spinning wheel will always require mechanical precision. Even on electric vehicles, the heavy battery weight puts even more stress on those bearings and suspension components. Mastering the ultimate guide to brake service for safety and performance today ensures you have the foundational skills for the vehicles of tomorrow. Don’t wait for a shake to start caring; grab a wire brush and clean your mating surfaces during your next tire rotation. It is a five-minute habit that prevents ‘run-out’ and keeps your ride buttery smooth for another 100,000 miles.
How I Finally Stopped Chasing Ghost Noises
I once replaced an entire CV axle because I was sure the clicking was a joint failure, only to realize a tiny stone was lodged in my brake dust shield. Always verify the diagnosis twice before spending a dime. Also, remember that heat is the ultimate tell-tale sign; if you suspect a bearing, carefully feel the center of the wheel hub after a drive. If one side is significantly hotter than the rest, you have found your friction point. These small auto repair hacks save money without sacrificing quality are what separate the veterans from the part-changers.
Building Your Own Pro-Grade Diagnostic Kit
You do not need a shop full of computers, but a few specific items will change how you work. I never touch a wheel without my split-beam torque wrench because precision prevents the bearing from overheating. I also highly recommend digging into the technical bulletins from Timken or Moog; they offer deep dives into metallurgy that most manuals skip. For those who want to master decoding vehicle diagnostics what your car is trying to tell you, a decent infrared thermometer is a game-changer for spotting failing components before they start making noise. These are the foundations for top auto repair tips to extend your vehicles lifespan.
Get Back on the Road with Total Confidence
Fixing a bad wheel bearing is about more than just silencing a hum; it is about reclaiming that feeling of safety when you hit the highway. You have the tools, the technique, and the knowledge to handle this yourself. Don’t let a little noise turn into a massive headache. Trust your hands, follow the torque specs, and you will be cruising smoothly in no time. Have you ever replaced a part only to find out the noise was coming from somewhere else entirely? Let me know in the comments below!