

I remember cruising down the I-85 last summer, feeling like the king of the road in my old sedan. Then, a traffic jam appeared. I tapped the brakes, and suddenly, my steering wheel started dancing like it was possessed. My hands were shaking, my heart was thumping, and I honestly thought my front wheels were about to fly off into the sunset. It is a terrifying sensation that turns a relaxing drive into a white-knuckle nightmare in seconds. If you have ever felt that rhythmic judder under your palms the moment you try to slow down, you know exactly what I am talking about. It feels like the car is fighting you. Have you ever felt that terrifying shimmy when coming to a stop on a highway off-ramp?
Why Your Hands Are Shaking Every Time You Slow Down
For a long time, I made the classic rookie mistake of thinking my tires were just out of balance. I spent money on a balance and alignment, but the shaking stayed right where it was. It turns out, the steering rack failure that feels exactly like a bad alignment isn’t always the culprit when the trouble only starts when you hit the pedal. I used to think my car was just getting old and “getting the jitters.” I’d tell myself it was just the rough roads or that I probably just needed an oil change, but the truth was much more mechanical. When you hit those brakes, you’re clamping two pads onto a spinning metal disc. If that disc—the rotor—isn’t perfectly flat or has uneven patches of brake material stuck to it, those pads are going to bounce. That bounce travels right up through the suspension, into the steering column, and straight into your hands. I once let it go so long that it actually started loosening up my ball joints. Don’t be like me. Understanding decoding vehicle diagnostics is the first step to saving your car and your wallet.
Is a little vibration really a big deal?
You might be tempted to ignore it, especially if the car stops just fine otherwise. I did that for months until I realized I was wearing out my front-end components prematurely. According to the experts at Car and Driver, even a thickness variation of just 0.001 inches on your rotor can cause noticeable pulsation. This isn’t just about comfort; it is about how your car handles in an emergency. If you are noticing why your brake pedal vibrates when you stop on a hill, it is your car’s way of screaming for help before a total failure occurs. Today, we are looking at the ultimate guide to brake service for safety and performance to get your ride smooth again. Let’s break down the myths and get to the truth about brake service myths busted so you don’t waste money on parts you don’t need. We will solve this together and make sure your next drive is as smooth as glass.
Get Down to the Metal to Stop the Vibration
To fix a shaking steering wheel, you have to think like a record player. Your brake rotor is the vinyl, and your brake pads are the needle. If that record has a warp or a piece of gum stuck to it, the needle is going to jump. Most people assume the rotor is ‘warped’ from heat, which can happen, but often it is actually ‘disc thickness variation.’ This happens when your pads leave uneven deposits of friction material on the rotor surface. It is like a bumpy road that you can’t see with the naked eye. Before you start throwing parts at the problem, you need to verify if the vibration is coming from the front or the back. Generally, if you feel it in your hands, it’s the front; if you feel it in your seat, it’s the rear. But we are focusing on those shaky hands today, so let’s pull those wheels off and look for the real culprit.
Identify the Warped Rotor Hot Spots
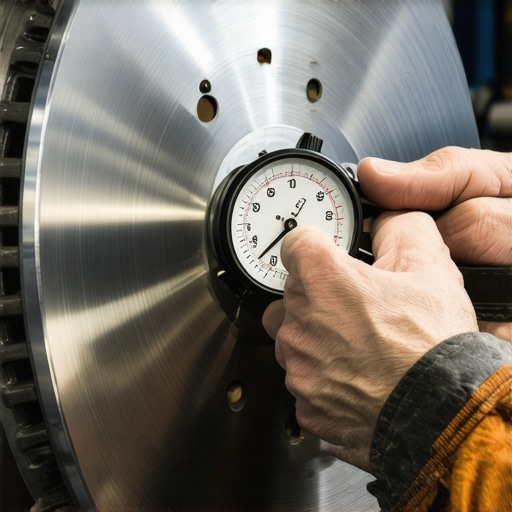
Once you have the car safely on jack stands, you need to inspect the rotor surface. Look for dark, blueish spots or shiny streaks that look like polished glass. These are ‘hot spots’ where the metal has physically changed its structure due to extreme heat. If you see these, the rotor is likely toast. I recommend using a dial indicator to measure the ‘runout.’ This is a fancy way of saying you check if the rotor wobbles as it spins. Even a tiny wobble will translate into a massive shake at 60 mph. While you are in there, it is a great time to how to spot a bad ball joint using a floor jack, because a loose joint will amplify every tiny vibration into a violent shudder.
Scrape Away the Rust Hiding on Your Hub
I learned this lesson the hard way on a rainy Saturday afternoon. I had just installed brand-new rotors and pads on my old truck, thinking I was a genius. Two days later, the shaking was back. I was furious. I tore it all apart and realized that a tiny flake of rust, no thicker than a fingernail, was trapped between the wheel hub and the new rotor. That tiny bit of debris made the rotor sit at a slight angle. It felt like I was driving over a washboard every time I touched the brakes. You must use a wire brush or a drill with a wire wheel to get that hub surface as shiny as a new nickel. This is one of those auto repair hacks save money without sacrificing quality that professionals always do but rookies skip. A clean mating surface is the difference between a smooth stop and a vibration that rattles your teeth.
Use a Torque Wrench Instead of Guessing
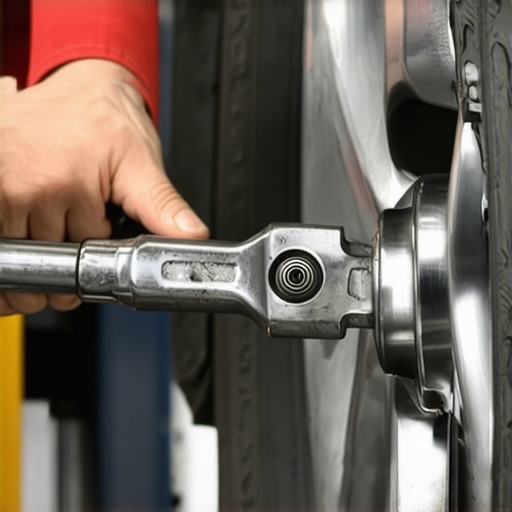
The biggest mistake you can make when putting everything back together is over-tightening your lug nuts with an impact wrench. If you tighten one side of the wheel to 150 foot-pounds and the other to 80, you are literally pulling the rotor out of shape. Always use a torque wrench and follow a star pattern to ensure even pressure. While the wheels are off, take a second to look at your fluid. If it looks like maple syrup, you should check the brake fluid color that means you need a flush immediately. Dirty fluid carries moisture that can lead to sticking calipers, which is often the root cause of the heat that warps rotors in the first place. Once you have everything clean and tight, make sure you know the trick for a perfect brake bleed every single time to ensure your pedal feels just as firm as your steering wheel feels steady.
Stop Blaming Heat for Every Warped Rotor
Most shops will tell you that your rotors are ‘warped’ because they got too hot. While heat is the catalyst, the idea of metal physically bending like a potato chip is a common misconception. In reality, what we often call warping is actually the formation of cementite. According to technical bulletins from Raybestos, when brake pads are overheated and pressed against a stationary rotor, they transfer a layer of friction material unevenly. This creates high spots that are harder than the rest of the rotor. As you drive, the pads hit these hard spots, creating more heat, and eventually changing the molecular structure of the cast iron into cementite. You can’t just ‘turn’ or resurface this away; if those hard spots have formed, the rotor is compromised. This is why brake service myths busted articles are so important—they stop you from paying for a resurfacing job that will only last two weeks.
Why does the shaking disappear when the brakes are cold?
This is the ultimate ‘pro’ question I get all the time. You start your commute and everything feels smooth, but by the time you reach the office, the shudder is back. This happens because as the rotor expands with heat, those microscopic uneven deposits—the ‘high spots’ I mentioned—become more pronounced. If you’re relying on decoding vehicle diagnostics to find the answer, don’t just look for a code. A computer won’t always tell you about mechanical runout. Have you ever fallen into this trap? Let me know in the comments. I’ve seen drivers spend thousands on suspension parts because they only tested the car while the brakes were cold and assumed the rotors were fine.
The Dangerous Trap of the ‘Pad Slap’
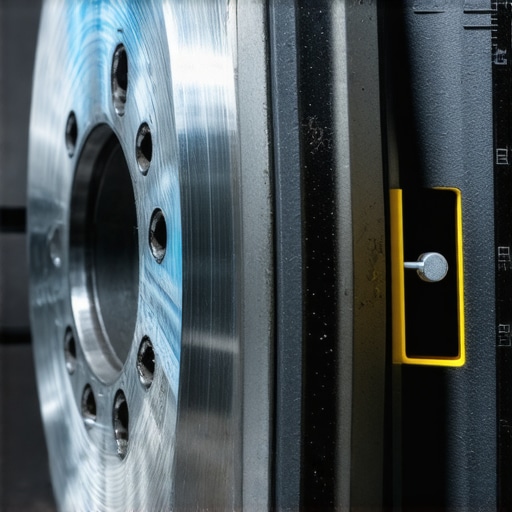
We’ve all been there—trying to save a few bucks by just throwing a new set of pads on old rotors. This is the ‘Oops’ factor that leads to more vibration than you started with. New pads need a perfectly fresh, clean surface to bed into. If you skip the rotor replacement or a proper resurfacing, the new pads will immediately pick up the uneven wear patterns of the old ones. It’s like putting a new soul into a shoe with a hole in the bottom. For a truly smooth ride, you need to follow the ultimate guide to brake service for safety and performance, which always emphasizes a matched set. Even the best pads can’t compensate for a rotor that has a few thousandths of an inch of runout.
Don’t Let Over-Maintenance Drain Your Wallet
While we are talking about doing things right, we also have to talk about doing too much. Just like people assume they need new rotors every time, they often assume they need the most expensive fluids and oils for every job. I see this a lot with ‘premium’ packages at local shops. For instance, the synthetic oil myth that costs you fifty dollars every visit is a prime example of how lack of knowledge leads to overspending. The same applies to brakes. You don’t always need ‘track-ready’ ceramic pads for a grocery getter; in fact, they might squeal more because they never reach their optimal operating temperature. Using how advanced vehicle diagnostics prevent costly breakdowns is about precision, not just throwing the most expensive parts at a problem. Stick to the specs, keep your mating surfaces clean, and use a torque wrench. Your hands—and your bank account—will thank you.
I have spent years collecting tools, and if there is one thing I have learned, it is that a cheap tool is the most expensive thing you will ever buy because you will have to buy it twice—and usually repair the damage it caused. For this specific brake job, I never touch a lug nut without my CDI Torque Products Micro-Adjustable Torque Wrench. I use this specific one because it is calibrated to 4% accuracy, which is vital when you are trying to prevent that rotor distortion we talked about earlier. Most guys just ‘uugga-dugga’ with an impact gun, but that is how you end up with a shaky wheel three weeks later. If you want a steering wheel that stays steady, precision is the only way forward.
Why My Torque Wrench Is My Most Trusted Tool
Beyond the hardware, I do not just wait for a light to pop up on my dash anymore. I use a mid-range scanner to look at ‘Live Data’ streams every few months. If you want to get serious about how advanced vehicle diagnostics prevent costly breakdowns, you need to look at fuel trims and sensor voltages before the computer even triggers a code. It is like having a crystal ball for your engine. According to technical reports from the Automotive Service Association (ASA), a proactive maintenance schedule can reduce the total cost of ownership by up to 46% over the life of a vehicle. This isn’t just marketing fluff; it is the reality of preventing catastrophic failures before they start. Using top auto repair tips to extend your vehicles lifespan ensures that you are the one in control, not your mechanic’s schedule.
How do I keep my car feeling brand new over time?
Consistency is more important than intensity. You do not need to spend a whole weekend in the garage every month; you just need to keep your eyes open. If you are a high-mileage commuter, you need essential auto repair strategies for frequent drivers to stay ahead of the game. This means checking your own fluids and knowing things like how to identify which wheel bearing is actually failing before it starts to growl. I always perform vehicle diagnostics explained easy checks before your road trip because nothing ruins a vacation faster than a preventable cooling or braking issue. Even small details matter, like being wary of the oil filter brand that causes low oil pressure lights. A little bit of research goes a long way in keeping that ‘new car feel’ for 200,000 miles or more.
Diagnostics Are Moving Into the Cloud
I see a future where brake services are less about replacing pads every 30k miles and more about maintaining the mechanical integrity of the calipers on EVs. With regenerative braking doing the heavy lifting, we are seeing a trend where traditional components seize from lack of use rather than wearing out. The future of auto repair is shifting toward software-based wrenching. Your car will likely tell your phone exactly which component is vibrating before you even feel it in the steering wheel. But until then, my challenge to you is this: Go grab a can of brake cleaner and a wire brush tonight. Even if you are not replacing your pads, cleaning the slide pins and hub surface can buy you another year of smooth, vibration-free braking. Take that one small step today and see how much better your car treats you tomorrow.
The 3 Brake Secrets I Had to Learn the Hard Way
Over the years, I’ve realized that most brake vibration issues aren’t caused by cheap parts, but by tiny errors in technique. First, never assume a new rotor is perfectly true right out of the box; checking for runout is non-negotiable. Second, I’ve learned that brake service myths busted are often the key to saving money—don’t let someone tell you that heat is the only enemy. Finally, I stopped skipping the ‘break-in’ or bedding process. If you don’t transfer that initial layer of pad material correctly, you’re setting yourself up for a shimmy in less than a month. I once rushed this on my daily driver and had to redo the entire job because the vibration returned in just 500 miles. Precision beats speed every single time when it comes to stopping power.
Gear That Keeps My Garage Running Smoothly
I don’t believe in having a thousand tools, just the right ones. I always keep a high-quality dial indicator nearby to measure rotor flatness because my eyes simply aren’t good enough to see 0.002 inches of wobble. I also rely on my mid-range diagnostic scanner to ensure I am how advanced vehicle diagnostics prevent costly breakdowns by checking sensor health before they fail. For the physical work, a simple cordless drill with a wire wheel attachment is my secret weapon for getting those hubs perfectly clean, which is one of the best auto repair hacks save money without sacrificing quality I can offer you. These tools transform a stressful repair into a predictable, successful afternoon project that saves me hundreds in labor costs.
Taking the Wheel Back from the Shudders
Driving shouldn’t be a test of your nerves or a physical workout for your forearms. When you take the time to follow the ultimate guide to brake service for safety and performance, you aren’t just fixing a car; you’re reclaiming your peace of mind and ensuring the safety of your family. Whether it is a simple pad swap or a full rotor replacement, doing it with precision ensures you can enjoy the road again. Remember that top auto repair tips to extend your vehicles lifespan always start with paying attention to the small vibrations before they become big bills. You have the knowledge now, so go out there, grab your torque wrench, and get that steering wheel steady again. Have you ever had a vibration that felt like a steering rack issue but turned out to be something as simple as a dirty hub? Let me know in the comments below!