
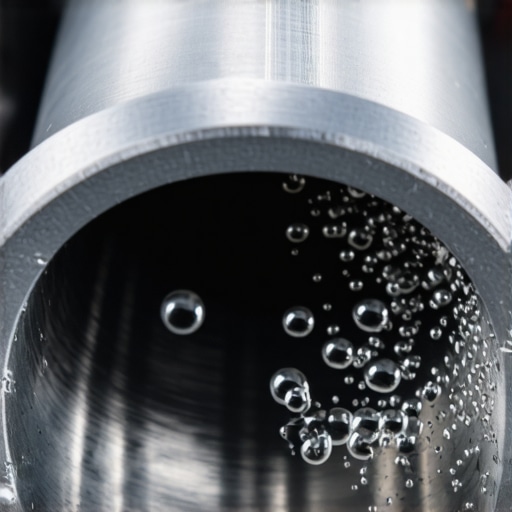
I will never forget the smell of sweet, burnt syrup filling the cabin of my favorite old truck as I pulled into my driveway three years ago. I ignored it at first, thinking it was just ‘old car character’ until the temperature needle suddenly spiked into the danger zone. I had already made the mistake of ignoring blue smoke from your exhaust in a previous vehicle, and I wasn’t about to let another engine melt down on my watch. My first instinct was to panic and start googling the price of new engines, but a mechanic friend of mine stopped me. He told me to put down the credit card and grab a glass of water. I thought he was joking, but that was my lightbulb moment regarding the bubble test. I had wasted so much time on generic vehicle diagnostics that I completely missed the simplest way to confirm a breach in the combustion chamber. Today, I am going to save you the heartache and the massive repair bill by showing you exactly how to spot the ‘bubbles of doom’ before you spend a dime at a shop.
Stop Guessing and Start Testing Your Engine Health
We have all been there—the heater stops blowing hot air, or you find a weird ‘mayonnaise’ substance under your oil cap. Your mind immediately jumps to the worst-case scenario. But before you commit to essential auto repair strategies that might be overkill, you need a definitive answer. The bubble test is a beautiful, low-tech way to detect combustion gases leaking into your cooling system, which is the absolute smoking gun for a head gasket failure. It is about working smarter, not harder. I once spent an entire weekend trying to find a vacuum leak with a cigar when the problem was actually internal pressure. Don’t be like past-me; use the physics of your engine to your advantage.
Is a DIY Test Actually Reliable Enough?
I get it. You are skeptical. How can a few bubbles be as accurate as a five-hundred-dollar diagnostic at a dealership? Well, physics does not lie. When the seal between your engine block and cylinder head fails, the massive pressure from the combustion stroke—which can exceed 1,000 PSI—forces air into your cooling passages. According to data from RepairPal, a head gasket replacement can cost anywhere from $1,600 to over $2,000, making it one of the most feared repairs for any car owner. Using this test helps you catch it early or, better yet, proves that your engine overheating in traffic might just be a simple fan issue instead of a terminal engine disease. It gives you the confidence to talk to a mechanic without feeling like a target.
Why This Simple Check Beats a Trip to the Shop
Efficiency is everything when you are a DIYer. This method is the ultimate filter for your diagnostic process. If the bubbles are steady and consistent, you have a mechanical breach. If they are not, you can breathe a sigh of relief and start looking at other auto repair hacks to get back on the road. Have you ever felt that heart-in-your-throat moment when the temp needle hits the red and you just know something is wrong? Drop a comment below and tell me what happened; I have probably been in that exact same spot, staring at a steaming hood with a look of pure confusion. Setting the stage for a successful test starts with a cold engine and a bit of patience, which is what we will dive into next.
Let the Engine Sleep Before You Touch the Cap
I learned the hard way that impatience is the most expensive tool in your garage. Back when I was working on an old 2004 Civic, I was so desperate to find the leak that I didn’t wait for the block to cool down. I twisted that radiator cap just a fraction too far, and—whoosh—a geyser of boiling green fluid shot up, narrowly missing my face but soaking my favorite shirt. Always, and I mean always, start this test with a stone-cold engine. This isn’t just about safety; it’s about accuracy. If the engine is hot, the coolant is naturally expanding, which can mimic the very pressure we are trying to isolate. While you wait for it to cool, take a second to consider other oil change innovations that keep your internals clean, because clean fluid makes spotting the ‘bubbles of doom’ much easier.
The Basic Setup for Success
First, remove your radiator cap. If your coolant level is low, top it off with plain water until it is about an inch from the top of the neck. You need enough fluid to see the air rising, but enough ‘headroom’ so it doesn’t spill over the second you turn the key. This is essentially a low-budget version of vehicle diagnostics that professionals charge a hundred bucks for. Once topped off, you are ready to observe the physics of combustion in real-time.
Spotting the Difference Between a Burp and a Breach
Once you crank the engine, watch that radiator neck like a hawk. If you see a few big bubbles right away, don’t panic. That is often just ‘burping’—trapped air escaping the system as the water pump starts to circulate. Think of it like your car letting out a small sigh. However, if you see a steady, relentless stream of tiny bubbles—almost like the carbonation in a fresh soda—that is your smoking gun. That is exhaust gas being forced through a crack in the gasket. If you aren’t seeing bubbles but the fluid is still disappearing, you might want to learn how to tell if your radiator is clogged without taking it apart, as flow issues can mimic gasket symptoms.
Confirming the Diagnosis with a Rev
To be absolutely sure, have a friend gently press the gas pedal while you watch the radiator. When the RPMs climb, the combustion pressure increases. In a healthy engine, the coolant level might rise slightly due to the pump’s speed, but it should stay clear. If a rev causes a literal volcano of bubbles or a sudden surge of fluid out of the neck, the seal is gone. It is a gut-wrenching sight, but catching it now prevents the catastrophic failure that happens when you’re 50 miles from home. Sometimes, these symptoms overlap with other cooling issues; for instance, you should also know how to spot a bad water pump before your engine overheats to ensure you aren’t misdiagnosing a simple mechanical failure for an internal one. If the bubbles are absent but you still have overheating issues, the simple test to see if your thermostat is stuck open or closed should be your next move. This methodical approach is the core of essential auto repair strategies: isolate, test, and confirm before you buy a single part.
Why Changing Just Your Pads Is a Recipe for Disaster
The common wisdom in most garages is that if you have plenty of friction material left on your pads, your stopping power is fine. I used to believe that too, until I experienced a terrifying pull to the left while braking on a highway off-ramp. What I learned is that ‘pad slapping’—simply throwing new pads on old rotors without service—is one of the biggest mistakes in essential auto repair strategies. Most people ignore the slide pins and the abutment clips, leading to uneven wear and that annoying chirp you hear at stoplights. If you have ever noticed the reason your brake pads are squealing even though they are new, it is almost certainly because the caliper isn’t moving freely. It is not just about the pads; it is about the entire mechanical symphony of the caliper assembly.
Does Fresh Brake Fluid Really Make a Difference?
Absolutely, and here is the nuance most ‘weekend warriors’ miss: brake fluid is hygroscopic, meaning it actively pulls moisture out of the air. According to the Car Care Council, brake fluid should be tested for moisture content every two years because water lowers the boiling point and causes internal corrosion. This is often the reason your brake fluid level is low but you see no leaks; as the pads wear, the fluid drops to fill the gap, but if that fluid is contaminated, it is eating your seals from the inside out. Don’t fall for brake service myths busted by the internet; if your fluid looks like coffee, you are already in the danger zone. 
The One Grease Mistake That Destroys Calipers
Here is the ‘oops’ factor I see constantly: using the wrong lubricant. I once saw a guy use standard chassis grease on his caliper slide pins. Within a month, the rubber boots had swollen to twice their size and the brakes were locked solid. Petroleum-based grease attacks the EPDM rubber used in braking systems. You must use a dedicated high-temp silicone or synthetic ceramic lubricant. If you skip this, you will find why your brakes feel soft after the car sits for three days or why they suddenly start dragging. Have you ever fallen into this trap and ended up with a smoking wheel? Let me know in the comments; we’ve all had those ‘learning moments.’ By following the ultimate guide to brake service for safety and performance, you ensure that your stopping power is as reliable as your diagnostic skills. Real expertise isn’t just about knowing what to fix; it is about knowing which shortcuts will actually cost you more in the long run.Owning the right tools is the difference between a productive Saturday afternoon and a Monday morning tow truck. I spent years using a cheap $20 code reader that gave me generic P-codes, but it never told me the whole story of what was happening under the hood. Real authority in your garage comes when you graduate to how advanced vehicle diagnostics prevent costly breakdowns by giving you access to live data streams. For instance, knowing your short-term fuel trim can reveal a vacuum leak before you even get a check engine light. It is like having an X-ray for your motor, allowing you to see problems before they become expensive failures. This level of insight is part of the top auto repair tips to extend your vehicles lifespan because it moves you from reactive fixing to proactive maintenance.
How do I keep my car systems healthy over the long haul?
Consistency is the secret sauce. Beyond the simple checks, you need to be religious about your fluid intervals and the quality of the parts you install. If you have been decoding vehicle diagnostics and finding that your car is constantly throwing small codes, it is usually a sign of ‘deferred maintenance’ catching up to you. I personally keep a detailed logbook for every vehicle I own, tracking everything from the brand of filter used to the exact date of the last brake flush. According to SAE International J1703 standards, brake fluid must maintain a minimum dry boiling point of 205°C (401°F) to ensure safety under load; once moisture creeps in, that safety margin evaporates. This is why I always use a vacuum gauge to double-check my work, especially if I suspect how to tell if your catalytic converter is clogged using a vacuum gauge.
Investing in Gear That Actually Saves You Money
If you are serious about skipping the shop, you need a few high-quality items that pay for themselves in one use. I am talking about a solid torque wrench, a reliable multimeter, and a set of flared nut wrenches for brake lines. Using the wrong tool is one of the most common brake service myths busted by experienced mechanics; you cannot ‘feel’ the right torque on a caliper bolt without a calibrated tool. I predict that as vehicle systems become more integrated with software, the ‘tool’ of the future will be a tablet with bi-directional control capabilities, allowing us to bleed ABS pumps or reset transmission adaptions from our own driveways. This shift is already happening, making essential auto repair strategies more about data management than just turning a wrench. My challenge for you this week is to pick up a simple vacuum gauge or a mid-range scan tool and look at your ‘live data’ while the car is idling. You will be amazed at what your car has been trying to tell you all along.
The Hardest Lesson I Learned About Cutting Corners
I used to think that speed was the mark of a good mechanic, but I quickly realized that rushing through a job is how you end up with the reason your car pulls to one side during hard braking. If I could go back and tell my younger self one thing, it would be to never ignore the details. Those tiny slide pins and the quality of your grease determine the success of your entire project. I’ve learned that a clean work area and a steady hand prevent the kind of ‘do-over’ jobs that eat up your entire Sunday. It is the difference between a repair that lasts a season and one that lasts a decade.
Gear That Paid for Itself in One Weekend
If you want to move beyond basic oil changes, there are three things I never go without. First, a dedicated vacuum gauge; it is the most underrated tool in the box and the simple way to tell if your exhaust is restricted without taking the whole pipe off. Second, a high-quality silicone lubricant for your brakes—this is non-negotiable for longevity. Finally, a mid-range OBD2 scanner that offers live data. These tools turn guesswork into science and stop you from throwing parts at a problem. I trust these specifically because they rely on the same physics that drive your engine, not marketing fluff. #IMAGE_PLACE_HOLDER_E#
Stop Being Afraid of the Check Engine Light
The biggest hurdle for most DIYers isn’t the mechanical work; it’s the fear of the unknown. But once you realize that your car is constantly sending you signals, that fear turns into empowerment. Whether you are performing a complex brake service or running basic vehicle diagnostics, remember that you are the one in control. You have the tools, the knowledge, and the patience to keep your machine running perfectly. Take it one bolt at a time, and don’t be afraid to get your hands dirty. Have you ever felt that surge of pride when you finally solved a mystery noise yourself? Let me know in the comments—I’d love to hear your garage victory stories!