
I remember the first time it happened to me. I was cruising down the highway at 70 mph, windows down and music up, feeling like the king of the road, until a truck ahead tapped its lights. I went to slow down, and my steering wheel started shaking so hard I thought my hands were going to go numb. It was terrifying, visceral, and honestly, a bit embarrassing. I thought my car was literally falling apart on the asphalt. That moment of panic is exactly why I want to help you figure this out today. We’re going to pinpoint the cause of that shimmy and get your ride back to being smooth as silk. Have you ever felt that sudden, scary vibration while trying to slow down on a bridge or off-ramp? It’s a heart-sinker for sure.
Your Brakes Should Not Feel Like a Jackhammer
When you press that pedal, you expect a smooth transition from speed to stop, not a frantic vibration that feels like you are driving over a corrugated tin roof. In my early days of tinkering under the hood, I made a massive mistake: I convinced myself the shaking was just a bad tire. I spent hundreds on a new set, only to realize that why your steering wheel vibrates only when you hit the brakes usually has nothing to do with the rubber and everything to do with the rotors. It was a tough lesson in properly decoding vehicle diagnostics before opening my wallet.
Today, we are stripping away the confusion. We are going to talk about warped rotors, “DTV” (Disc Thickness Variation), and why essential brake service is non-negotiable for your safety. Most of the time, that high-speed shudder is caused by uneven heat distribution on your brake discs. When they get too hot, they can actually distort or develop high spots. Every time the brake pads hit those spots, they bounce, and that bounce travels all the way up the steering column to your palms. It is a physical reaction to heat and friction gone wrong.
Can I just ignore the vibration for a while?
It is tempting to put it off, especially if the car still stops “well enough” in city traffic. However, ignoring a shaking brake system is like ignoring a small leak in a dam. According to data from the National Highway Traffic Safety Administration (NHTSA), brake system failures are a contributing factor in many vehicle-related crashes where a component failed. When your car shakes, it isn’t just annoying; it is actually increasing your stopping distance because the pads aren’t making consistent, flat contact with the rotor surface. Before you fall for common brake service myths, you need to understand that this vibration is a mechanical cry for help. We’re going to walk through the exact steps to diagnose this at home so you don’t get overcharged at the shop.
Get Your Hands Dirty with a Visual Inspection
The first thing I do when I pull a wheel off is look for the ‘hot spots.’ These are bluish-purple discolorations on the rotor face that scream friction abuse. It reminds me of a brake job I did on my old 4×4; the rotors looked okay from a distance, but under a bright shop light, I could see these mirror-like glazed patches. When your pads hit those slick spots, they lose grip for a fraction of a second, creating a rhythmic pulse. To avoid getting ripped off, you need to use some basic auto repair hacks to save money by measuring the rotor thickness yourself with a cheap micrometer. If the metal is too thin, it cannot dissipate heat, and it will warp again the minute you head down a steep hill.
The Hidden Culprit Hiding Under the Rust
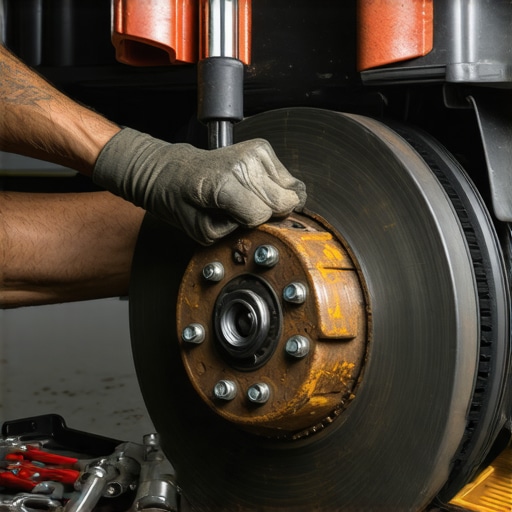
I once spent four hours replacing rotors and pads on a client’s sedan, only for them to call me two days later saying the shake was back. I was baffled. I pulled it all apart and realized I had committed a cardinal sin: I didn’t clean the wheel hub. Rust and scale build up on the hub surface where the rotor sits. Even a piece of rust the thickness of a business card can cause the rotor to sit slightly crooked. This is where advanced vehicle diagnostics come into play. You don’t always need a computer; you need a wire brush and some brake cleaner. Scrub that hub until it shines like a new dime. If the rotor doesn’t sit perfectly flush, it will wobble, and you will feel every bit of that wobble through the steering rack.
Rule Out Your Suspension Before Buying Parts
Before you blame the brakes entirely, you have to make sure your front end isn’t just loose. A worn-out bushing or a loose joint can amplify a tiny brake pulse into a massive vibration. I usually perform the simple way to check your ball joints with a pry bar while the car is already jacked up. If there is play in the suspension, no amount of new brake parts will fix that shimmy. Think of your suspension as a shock absorber for those vibrations; if the rubber is gone, the metal-on-metal contact sends the energy straight to your hands. While you are in there, check for any leaks, though you should know that the trick for a perfect brake bleed is essential if you end up opening the hydraulic system to replace a sticking caliper, which is another frequent cause of rotor overheating.
Why Even Tightening Matters More Than You Think
It sounds trivial, but how you put your wheels back on is the final piece of the puzzle. If you zip the lug nuts down in a circle with an impact wrench, you are practically begging for the rotors to warp. I learned this the hard way after snapping a stud on a Saturday night. Since then, I always use a star pattern and a torque wrench. If you run into trouble during the teardown, remember the secret to getting a stuck lug nut off involves steady pressure rather than erratic force. Consistent torque across all nuts ensures the rotor is squeezed evenly against the hub. This prevents the ‘hat’ of the rotor from distorting under the heat of your next drive, keeping your steering wheel calm and your nerves intact.
The Myth of the Warped Rotor
Most DIYers and even some shops are quick to blame a ‘warped’ rotor the second a steering wheel starts dancing. However, here is a contrarian take based on years in the garage: rotors rarely actually bend like a taco. In reality, what you are feeling is often cementite formation or uneven pad transfer. When you perform an essential brake service, if you don’t ‘bed’ the pads properly, you end up with microscopic hills and valleys of friction material on the disc. This creates a rhythmic grab-and-release sensation that mimics a warp. I have seen countless people waste money on new parts when a few aggressive, controlled stops could have leveled the surface. This is one of those brake service myths busted that can save you a fortune.
Can my driving habits actually cause permanent metal changes in the disc?
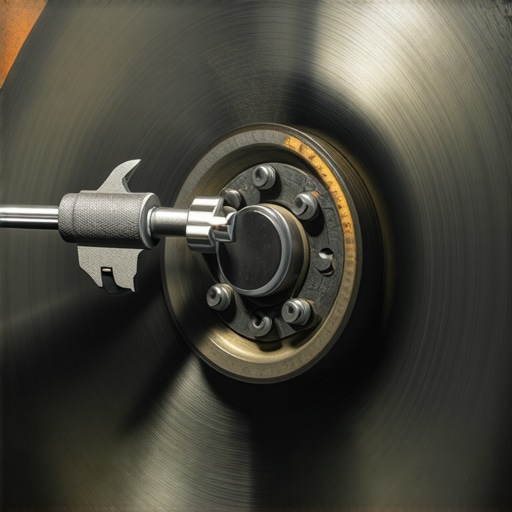
Yes, and this is where it gets technical. If you consistently overheat your brakes and then come to a dead stop with your foot jammed on the pedal, you create a thermal bottleneck. The area under the pad stays hot while the rest of the rotor cools. According to a study by SAE International, this localized heat can cause the cast iron to convert into cementite—an incredibly hard, brittle compound. This compound doesn’t wear down at the same rate as the rest of the rotor, leading to permanent vibration. This is why advanced vehicle diagnostics are so important; you need to know if you’re dealing with a surface deposit or a structural change in the metal. If it’s cementite, no amount of resurfacing will fix it; you’ll need a total replacement.
The Slide Pin Trap Most People Ignore
If you have ever wondered why your brand new brake pads are already squealing or vibrating, the ‘oops’ factor usually lies in the caliper slide pins. I’ve fallen into this trap myself. You focus so much on the shiny new rotors that you forget to grease the pins that allow the caliper to center itself. If those pins are seized or bone-dry, the caliper pushes the pads unevenly. This creates a diagonal wear pattern that will ruin a brand-new set of rotors in less than 3,000 miles. It’s a classic example of how auto repair hacks to save money—like skipping the high-temp silicone grease—actually cost you triple in the long run.
Nuance Beyond the Braking System
We also need to talk about the ‘overlap’ in symptoms. I’ve seen drivers spend $500 on brakes when the issue was actually a failing CV joint or an engine mount that only showed its face under the load of deceleration. This is similar to how people fall for the synthetic oil myth that says you must change it every 3,000 miles regardless of modern chemistry. We tend to over-fix the obvious and under-diagnose the subtle. Before you tear your hubs apart, double-check that your vibration isn’t just a symptom of a larger suspension geometry issue. Use the simple way to check your ball joints with a pry bar to ensure the ‘shake’ isn’t just a loose control arm reacting to the brake force. Have you ever fallen into the trap of replacing the same part twice because the root cause was hiding elsewhere? Let me know in the comments!
Stop the Guesswork with a Dial Indicator
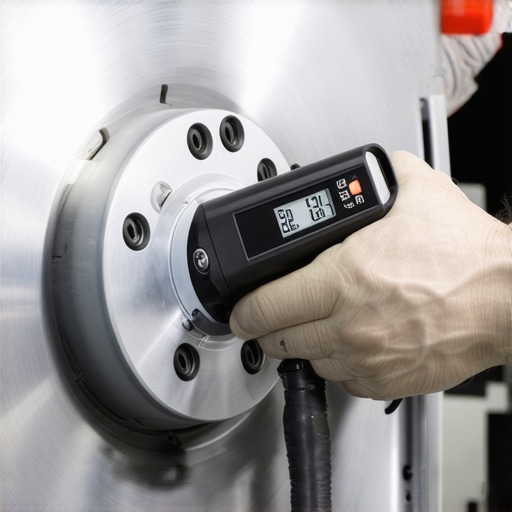
If you really want to move beyond being a ‘parts swapper’ and start being a diagnostic expert, you need to own a dial indicator. I remember when I used to just look at a rotor and guess if it was flat. That was a fool’s errand. Now, I use a digital dial indicator with a magnetic base to measure lateral runout. If that needle moves more than 0.002 inches while you rotate the hub, you’ve found your culprit. This is the gold standard of decoding vehicle diagnostics. It’s not just about the brakes; it’s about verifying the precision of the entire assembly. When I’m deep into a job, I also use this tool to check for hub runout, ensuring the mounting surface itself isn’t the root of the wobble. This level of detail is exactly how advanced vehicle diagnostics prevent costly breakdowns by catching a tiny alignment issue before it eats through your brand-new pads.
How do I keep my brakes smooth for the next 50,000 miles?
Maintenance isn’t a one-and-done event; it’s a rhythm. Every time you have the wheels off for a tire rotation or are looking into oil change innovations technologies that save your engine, take five minutes to spray down your calipers with dedicated cleaner. According to Brembo’s Technical Documentation, road grime and brake dust act as abrasives that can eventually seize those crucial slide pins we talked about earlier. I also recommend a full fluid flush every two years. Brake fluid is hygroscopic, meaning it absorbs water. That water can boil during heavy braking, creating steam pockets that lead to a spongy pedal and uneven pressure distribution. By following top auto repair tips to extend your vehicles lifespan, you turn a reactive repair into a proactive strategy. If you’re a high-mileage commuter, these essential auto repair strategies for frequent drivers are the difference between a car that lasts 100k miles and one that lasts 300k.
The Tech-Heavy Future of Stopping
We are currently standing on the edge of a massive shift in how cars stop. With the rise of electric vehicles and hybrids, ‘Brake-by-Wire’ systems are becoming the norm. In these systems, your pedal isn’t physically connected to the master cylinder; instead, it sends an electronic signal to a computer that decides how much clamping force to apply. This is fascinating because it allows for regenerative braking, where the electric motor slows the car down to recharge the battery, significantly reducing the wear on your physical pads and rotors. In the future, the traditional steering wheel shake might become a thing of the past as software compensates for minor mechanical variances. However, until we all have computers doing the stopping for us, you still need to know vehicle diagnostics explained easy checks before your road trip to ensure your hardware is up to the task. My advice? Grab a wire brush and a torque wrench this weekend and give your front end the attention it deserves. You’ll feel the difference the very next time you hit a red light.
What Three Decades Under the Lift Taught Me About Brake Pulsation
Over the years, I have learned that the loudest part doesn’t always indicate the source of the problem. Precision beats chemistry every single time in the garage. One of the biggest brake service myths I have seen is the idea that you can just ‘burn off’ pad deposits with a few hard stops; if the material has converted to cementite, it is there to stay. Another hard-earned lesson: cheap, white-box rotors are almost always a trap. They lack the internal vane structure needed for proper cooling, leading them to warp again before your next oil change. Lastly, never skip the bed-in process. Properly seating those pads is the most overlooked part of an essential brake service and is the only way to ensure a smooth, long-term friction surface.
The Tools That Saved My Hands and My Sanity
If you are serious about stopping the shimmy, you need more than just a socket set. I always keep a digital dial indicator in my top drawer to verify runout before I even put the wheel back on. I also swear by a high-quality, calibrated torque wrench to avoid the common tire rotation mistake of uneven lug pressure, which is a primary driver of rotor distortion. For deep technical dives, I trust the Brembo Academy technical documentation; their research into thermal dynamics changed how I view disc metallurgy. These specific tools turn guesswork into advanced vehicle diagnostics that actually solve the root cause rather than just masking the symptoms.
Take Back Your Confidence on the Road
Braking should be a whisper-quiet event, not a wrestling match with your steering column. When you finally track down that vibration and fix it using your own two hands, you aren’t just saving a few hundred dollars—you are mastering the machine you rely on every day. Don’t let a shaky pedal keep you on edge or make you dread your morning commute. By utilizing smart auto repair hacks to save money and focusing on the precision of the hub and rotor interface, you can restore that factory-smooth feeling. You deserve a car that responds exactly how you expect it to when you need to slow down. Have you ever spent a fortune on brand-new rotors only to have the shaking come back just a few weeks later? Let me know your story in the comments below!