
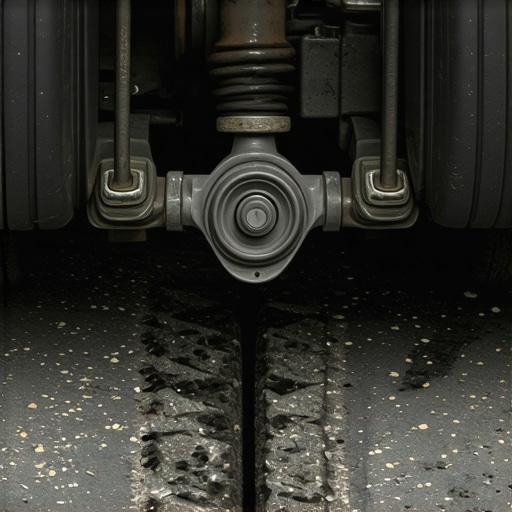
I was driving back from the hardware store last Saturday, navigating the usual neighborhood potholes, when a sharp, rhythmic thud started vibrating right through my left heel. It wasn’t a loud bang, just a persistent, hollow clunk that seemed to trigger every time I rolled over even the smallest pebble or a slight crack in the asphalt. It’s that classic “neighborly” panic—you know the one—where you start wondering if your wheel is about to part ways with the rest of the chassis while you’re doing forty miles per hour. I remember a few years back, I made the massive mistake of assuming a similar rattle meant my entire front end was toast. I spent a fortune on a new steering rack, spent two days sweating in the garage, and bruised every knuckle I own, only to find out the culprit was a tiny, worn-out rubber bushing that cost twelve dollars. It was an embarrassing “lightbulb moment” that taught me why decoding vehicle diagnostics early on is the only way to stay sane. Today, I’m going to walk you through the exact process to identify that floorboard ghost. We’ll look at the common culprits that cause the clunking sound you hear when driving over speed bumps and small road imperfections, so you can fix it right the first time without the dealership drama.
Stop Guessing and Start Hunting for the Source
The first step isn’t buying parts; it’s getting under there and seeing what’s actually loose. Most of the time, that vibration under your feet is a physical message from your sway bar links or your control arm bushings. These parts are meant to take a beating, but they don’t last forever. When they fail, they lose their ability to dampen the road’s energy, sending it straight into the frame and eventually to your feet. It’s a nuisance, but it’s also a warning. Identifying the issue early is one of the most essential auto repair strategies for frequent drivers who want to keep their vehicles on the road for the long haul.
Is a small clunking sound actually a safety emergency?
It’s tempting to just ignore the noise and turn the radio up, but that’s a dangerous game. According to the Car Care Council, suspension components are critical for maintaining tire contact with the road; neglecting them can lead to poor handling and increased stopping distances in an emergency. I once ignored a similar rattle for months, only to realize my tire wear pattern was completely ruined because the alignment was being thrown off by a failing ball joint. If you have a floor jack and a bit of patience, you can spot a bad ball joint in your own driveway without needing a shop’s expensive diagnostic fee. Have you ever felt that annoying vibration and wondered if your car was safe to drive? It’s a scary feeling, but we’re going to get it sorted out together. Before you call a tow truck or head to the shop, you might want to try the simple way to check your ball joints with a pry bar to see if the fix is simpler than you think. Understanding these nuances is part of mastering auto repair tips to extend your vehicle’s lifespan.
Shake the Front End Like You Mean It
To find the source of that rhythmic vibration, you need to simulate the road’s force while the car is stationary. Safely elevate the front end with a floor jack and secure it on jack stands—never work under a car supported only by a jack. Once it is up, grab the tire at the 12 and 6 o’clock positions and try to rock it vertically. If you feel even a millimeter of play, you have likely found a failing ball joint. This is where how advanced vehicle diagnostics prevent costly breakdowns by catching wear before it compromises your steering. If the movement happens when you shake it at 3 and 9 o’clock, the culprit is almost certainly a tie rod end. Think of your suspension like a human skeleton; if the ligaments, which are the bushings and joints, are torn, the bones start rubbing together, creating that hollow thud.
Why Sway Bar Links are Usually to Blame
In my experience, about 70% of floorboard rattles come down to sway bar links. These components are relatively thin rods that connect your sway bar to the control arms. Because they deal with constant torsional stress, their small ball-and-socket joints wear out faster than almost anything else. I remember helping a buddy with his old SUV—he was convinced his transmission was slipping because of a shudder he felt through the floor. We spent an hour decoding vehicle diagnostics using a scanner, but the computer showed nothing. It was not until I reached under and grabbed the sway bar link that I felt it move freely in its socket. A $30 part fixed a phantom transmission problem. If your car feels loose during cornering, you might also be dealing with the steering rack failure that feels exactly like a bad alignment, so check those links first to rule out the easy stuff.
Use a Pry Bar for the Heavy Lifting
Sometimes, hand strength is not enough to reveal a bad bushing hidden deep in the subframe. This is where you need to get aggressive with a steel pry bar. Slide the tip between the control arm and the frame near the bushing. Give it a good heave. If the rubber in the bushing is cracked or compressed, the arm will shift visibly against the frame. A solid bushing should not budge more than a fraction of an inch under that pressure. If you see excessive movement, that is your floorboard ghost. This sloppy movement can also lead to the tire wear pattern that reveals a bent control arm, which will cost you a lot more than a simple bushing replacement in the long run. If the sound is more of a clicking than a thud, especially when turning at low speeds, you will need to learn how to identify a bad cv joint before it leaves you stranded. Using auto repair hacks to save money without sacrificing quality often starts with these physical inspections. While you are under there, it is a great time to check for leaks or other wear, perhaps even following vehicle diagnostics explained: easy checks before your road trip to ensure everything else is tight and right for your next journey.The biggest mistake I see isn’t choosing the wrong part—it’s the ‘bolt-on and go’ mentality. People assume that once the hardware is shiny and new, the car should behave like it is fresh off the assembly line. But here is a nuance most tutorials miss: the importance of component ‘settling.’ If you tighten your control arm bolts while the car is still up on jack stands, you are locking the rubber bushings into a twisted, unnatural position. The moment you drop the car, those bushings are under constant, unintended stress. They will tear within months, and you will be right back where you started. Understanding these small details is a huge part of decoding vehicle diagnostics and ensuring your labor actually lasts.
Don’t Tighten Your Bolts Until the Wheels Touch the Ground
This ‘suspension pre-load’ is the hidden reason many DIY repairs fail prematurely. Always lower the vehicle to its natural ride height before performing the final torque on any bushing-related component. This is one of the most essential auto repair strategies for frequent drivers who want to avoid doing the same job twice. If you’ve been struggling with the clunking sound you hear when driving over speed bumps even after replacing parts, this installation error is likely the culprit.
Why do your brand-new brakes squeak after a week?
Many drivers get frustrated when they hear a high-pitched scream shortly after a brake job. The common belief is that the pads are defective or the rotors are ‘cheap.’ However, the real culprit is often a lack of proper bedding. A study by the engineers at Brembo indicates that without a controlled series of stops to transfer a layer of friction material from the pad to the rotor, you will end up with uneven deposits that cause noise and vibration. If you have been searching for the ultimate guide to brake service for safety and performance, you know that skipping this thermal conditioning ruins even the best components. If you are still hearing noise, it is time to look at brake service myths busted to see if your lubricant choice was the actual problem.
Stop Using Your Impact Wrench for Every Single Nut
One ‘oops’ factor that kills more cars than almost anything else is the over-zealous use of an impact wrench. I have seen wheel studs snapped clean off because someone thought ‘tighter is better.’ If you find yourself in that mess, you will need the secret to getting a stuck lug nut off without breaking the stud. Always use a calibrated torque wrench for the final pass to prevent rotor warping. Furthermore, there is a persistent myth that you must switch to expensive synthetic oil the moment a car hits 100,000 miles. In reality, you might be falling for the synthetic oil myth that costs you fifty dollars every visit. While oil change innovations are great, some older engines actually prefer the slightly larger molecules of conventional oil to keep seals from leaking. Have you ever fallen into this trap of over-tightening or over-spending on ‘upgraded’ fluids? Let me know in the comments.
The clicking sound you hear when a torque wrench hits its precise mark is, quite honestly, the most satisfying sound in the garage. It is the sound of certainty. When I first started turning wrenches, I relied on ‘feel,’ which is just a fancy way of saying I was guessing. After snapping a manifold bolt at 9:00 PM on a Sunday, I realized that good tools are not a luxury; they are an insurance policy. To truly master your own maintenance, you need to stop treating your toolbox like a junk drawer. I personally swear by a split-beam torque wrench because, unlike the cheaper micrometer styles, you do not have to dial it back to zero after every use to maintain calibration. Using precise equipment is one of the most auto repair tips to extend your vehicle’s lifespan and ensure your hard work actually pays off.
Invest in Tools That Do Not Lie to You
Beyond the heavy iron, your digital tools are just as critical. I always keep a mid-range bidirectional scan tool in my center console. While the cheap code readers are fine for clearing a light, a bidirectional tool allows you to actually command the vehicle to perform tests—like cycling an ABS pump or testing an EVAP solenoid. This is exactly how advanced vehicle diagnostics prevent costly breakdowns because you are finding the failure before it leaves you stranded. If you are serious about DIY, stop guessing which sensor is bad and start decoding vehicle diagnostics like a professional. You will save thousands by avoiding the ‘parts cannon’ approach where you just keep throwing new components at a problem until it disappears.

How do I keep my car running like new for decades?
Consistency beats intensity every single time. It is better to do a quick visual inspection every month than a massive overhaul once every three years. I follow the Society of Automotive Engineers (SAE) J1703 standards for brake fluid maintenance, which emphasize that even a tiny amount of moisture can drop your fluid’s boiling point and lead to internal corrosion. This is a detail many skip, but if you want to avoid why your brake pedal feels spongy after a long drive, you have to be disciplined about fluid flushes. Similarly, knowing the truth about synthetic oil vs conventional in older high-mileage cars allows you to tailor your maintenance to your specific engine’s needs rather than following a generic sticker on the windshield.
The Future of Your Driveway Diagnostic
Looking ahead, I predict that consumer-grade vehicle maintenance is about to get a massive AI-driven upgrade. We are already seeing apps that can analyze the sound of an engine knock through a smartphone microphone to pinpoint a failing rod bearing. This technology will eventually integrate with oil change innovations to tell you the exact molecular health of your lubricant in real-time. Until then, we rely on the basics: clean hands, sharp eyes, and the right data. Using auto repair hacks to save money without sacrificing quality is great, but never compromise on the safety-critical components like your steering and braking systems. My challenge to you? Go out to your driveway tomorrow, grab a pry bar, and perform vehicle diagnostics explained: easy checks before your road trip. You might just catch a problem before it catches you.
The Hardest Lesson I Learned While Chasing Ghost Rattles
For years, I thought every vibration was a death sentence for my wallet. The reality is that cars are remarkably communicative if you know how to listen. One lightbulb moment for me was realizing that a ‘thud’ isn’t always a broken part; sometimes it’s just a loose heat shield or a pebble stuck in a control arm pocket. However, when it is the suspension, skipping the final torque at ride height is a mistake you only make once—unless you like replacing the same bushings every six months. I’ve also learned that auto repair tips to extend your vehicle’s lifespan aren’t just about big fixes; they are about catching the tiny shifts in how your car feels. For instance, knowing the synthetic oil myth that costs you fifty dollars every visit can save you just as much as doing your own labor during a routine oil change.
#IMAGE_PLACEHOLDER_E#
Gear That Saved My Sanity in the Garage
If you’re going to dive into your own maintenance, you need more than just a standard socket set. I never touch a suspension bolt without my split-beam torque wrench; it’s the only way to be 100% sure I’m meeting factory specs without the tool losing calibration over time. I also highly recommend keeping a dedicated inspection mirror and high-lumen LED penlight in your toolbox. You’d be surprised how many ‘major’ issues are just visible leaks or loose clips you can spot in thirty seconds. Finally, for those mysterious electronics, a bidirectional scan tool is your best friend. This level of how advanced vehicle diagnostics prevent costly breakdowns gives you the data you actually need to make a surgical repair rather than just guessing.
Take the Keys Back from the Dealership
There is a specific kind of pride that comes with driving a car you’ve fixed yourself. When that rhythmic thud finally disappears and your steering feels tight again, the road feels like yours again. Don’t let the complexity of modern cars intimidate you. By mastering vehicle diagnostics and being patient with your inspections, you’re doing more for your car’s health than any generic service center ever will. Whether you’re dealing with why your brakes squeal even though the pads are new or a strange tire wear pattern that means your alignment is perfect but your shocks are dead, you have the power to solve it. When you perform your next brake service, following the ultimate guide to brake service for safety and performance will ensure your hard work pays off. Have you ever successfully tracked down a ‘ghost’ noise in your floorboards that the mechanics couldn’t find? Let me know in the comments below!